Getting the outdoor kitchen dimensions right before a single block is laid is what separates a space you love from one that feels cramped and awkward the day it is finished. Poorly planned outdoor kitchen dimensions lead to grills jammed against walls, no landing space for hot pans, and stools that will not tuck under the bar. This guide gives you the standard heights, depths, and clearances a builder uses, plus real sizes for L-shaped, U-shaped, and island layouts.
Part of our Kitchen Remodeling guide — explore the full guide →
Standard Outdoor Kitchen Dimensions to Know
Start with the numbers that govern every build. These are the baseline dimensions professionals design around:
- Counter height: 36 inches from the finished floor, matching indoor counters.
- Counter depth: 24 to 30 inches; 30 inches is generous and accommodates most drop-in appliances.
- Bar counter height: 42 inches for a raised seating bar.
- Base cabinet depth: 24 inches standard.
- Toe kick: 3 to 4 inches tall and deep so you can stand close to the counter.
- Overall structure height: 36 inches for work counters, up to 42 inches for raised bars.
Stick to 36-inch counters for the working surfaces. It is the height your body expects, and matching it keeps prep comfortable whether you are chopping, plating, or grilling.
Counter overhang for the finished edge is a small dimension people forget. A finished countertop typically overhangs the base cabinet or masonry by 1 to 1.5 inches on the working side, both for looks and to keep drips off the cabinet face. If you are running a raised bar, that overhang jumps to the 12 to 15 inches needed for knee room. Plan the base structure narrower than the finished counter accordingly, so your 30-inch-deep granite top sits on a roughly 28-inch-deep block base with a clean, consistent reveal all the way around.
Sizing Around the Grill
The grill drives the whole layout. A standard built-in gas grill needs a cutout roughly 30 to 42 inches wide, so build the surrounding masonry to fit your exact model, since cutout specs vary by brand. Beyond the grill itself:
- Provide at least 24 inches of counter on one side of the grill and 18 inches on the other for staging.
- Leave 12 inches or more of noncombustible clearance between the grill and any adjacent wall or structure, per the grill maker’s spec.
- Allow 6 to 8 inches of counter depth behind the grill if it vents at the rear.
A grill boxed in with no landing space forces you to run back and forth to a table. Those side counters are not luxury; they are what make the kitchen actually workable.
Walkway and Clearance Dimensions
People and traffic flow need room. Skimp here and the space feels claustrophobic no matter how nice the finishes are. Follow these clearances:
- Single-cook walkway: 36 inches minimum between the counter and any wall or opposing counter.
- Two-cook or traffic path: 42 to 48 inches so two people can pass.
- Behind seated diners: 44 inches of clear space to walk behind occupied stools.
- Grill door swing: confirm the hood or lid can open fully without hitting an overhead structure.
If your kitchen sits under a pergola or roof, verify the covered height gives at least 8 feet of headroom and enough space above the grill for heat to escape.
Seating and Bar Dimensions
An overhang bar is the social heart of an outdoor kitchen, and it has its own rules. For a 42-inch-high bar paired with 30-inch bar stools, provide a 12-inch counter overhang so knees fit underneath. At standard 36-inch counter height with 24-inch counter stools, a 15-inch overhang works better. Plan on 24 inches of linear bar width per person so guests are not elbow to elbow. A bar seating four therefore wants about 8 feet of usable counter frontage.
Storage and access dimensions round out a workable plan. Under-counter access doors are commonly 20 to 30 inches wide, and a double door for a propane and trash pullout runs 30 to 36 inches; leave at least the door’s full width of clear swing space in front of each. Drawer stacks want 15 to 30 inches of width and need the counter overhang above them kept modest so the top drawer clears. If you include a refrigerator, allow the manufacturer’s ventilation gap, typically 1 to 2 inches at the sides and rear plus a clear front on built-in front-venting models, since a unit starved for airflow will fail early in summer heat. Plan the trash and recycling location within a step of the prep counter, not tucked in a far corner, so cleanup flows naturally. As a final check, confirm every door and drawer can open fully without colliding with an adjacent appliance handle or a corner, a clash that is trivial on paper and infuriating once it is finished stone.
Appliance Cutout Dimensions
Every built-in appliance has a rough-opening spec. Common cutouts to design around:
- Built-in grill: 30 to 42 inches wide, 22 to 24 inches deep, 9 to 11 inches tall.
- Side burner: roughly 12 to 24 inches wide.
- Outdoor refrigerator: a 15 to 24 inch wide opening, allowing front ventilation clearance.
- Access doors and drawers: commonly 20 to 30 inches wide.
- Sink: 15 to 25 inches wide depending on bowl size.
Always pull the exact cutout dimensions from your chosen appliances before framing, and build the openings slightly to spec rather than guessing. A cutout even a half inch too small means grinding masonry after the fact.
Vent and combustion clearances around a built-in grill are dimensions that protect your structure and your safety. Most grill makers require a minimum air gap, often 1 inch, between the grill body and the surrounding masonry or cabinet, plus ventilation panels on the sides of any enclosure housing a propane tank so leaking gas, which is heavier than air, can escape rather than pool. Never seal a gas grill into an airtight box. Build the cutout to the manufacturer’s stated dimensions exactly, including the specified clearance to combustibles below and behind, and keep the printed spec sheet on hand for your inspector.
Layout Sizes: Straight, L, U, and Island
How much footprint each configuration needs:
- Straight-line kitchen: 8 to 12 feet of counter run along one wall; needs a footprint about 3 feet deep.
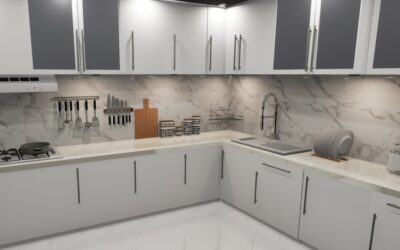
- L-shaped: two runs of roughly 8 to 10 feet each; a good all-around choice that separates cooking from prep. Plan a 10 by 10 foot minimum footprint.
- U-shaped: three connected runs; needs at least 12 by 12 feet and gives the most counter and storage.
- Island: a freestanding block, commonly 6 to 10 feet long by 3 to 4 feet wide, with 36-inch clearance all the way around.
Match the layout to your yard and your cooking style. A couple who entertain rarely thrive with a straight run; a family that hosts every weekend earns its keep with an L or U and a seating bar.
Planning for Utilities and Drainage
Dimensions extend below the counter too. Leave chase space for a gas line, a 120-volt circuit, and if you include a sink, both supply and drain lines. Slope any countertop 1/4 inch per foot toward drip edges so rain sheds off. In an island, plan an access panel large enough to reach the propane tank or gas valve. Nail down these hidden dimensions early, because retrofitting a utility run into finished masonry is expensive and messy.
Overhead dimensions matter as much as the footprint when the kitchen sits under cover. Give at least 8 feet of headroom under a pergola or roof, and confirm the space above the grill lets heat and smoke escape, either through an open pergola, a vented roof, or a vent hood sized to the grill’s total output, commonly 1,200 CFM or more for a big burner. A grill trapped under a solid low roof with no ventilation scorches the ceiling and fills the seating area with smoke, undoing all your careful counter planning.
Putting the Dimensions Together
Sketch your kitchen at 1/4-inch scale on graph paper using these numbers, then tape the footprint out on your patio with painter’s tape before you commit. Stand at the imaginary grill, reach for the imaginary counter, and walk the imaginary path behind the stools. That five-minute mockup catches sizing mistakes no drawing will, and it is the cheapest insurance you can buy on a project that will run many thousands of dollars.