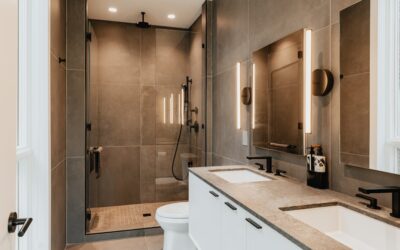
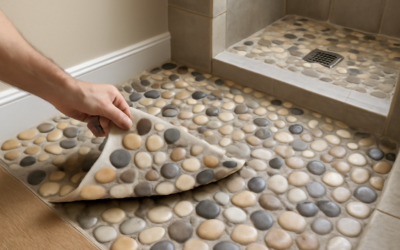
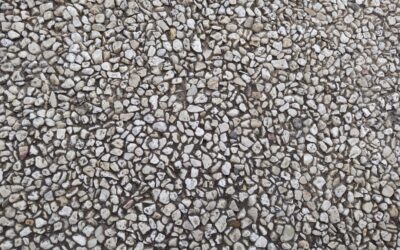
Step onto a shower floor lined with smooth river stones and you understand the appeal instantly. Pebble mosaic tile turns a flat, ordinary surface into something that looks pulled from a spa or a creek bed. The catch is that it takes more grout, more sealing, and more attention to detail than standard tile, and a sloppy install shows immediately. After laying plenty of these, I can tell you the difference between a stunning pebble floor and a grout-clogged mess comes down to technique. Here is everything you should know before you buy.
Part of our Tile & Grout guide — explore the full guide →
What Pebble Mosaic Tile Is
Pebble mosaic tile is a sheet of natural or manufactured stones bonded to a mesh backing, usually in 12-by-12-inch squares. The mesh lets you install dozens of small stones at once instead of placing each one by hand. The stones range from rounded river rock to flat sliced pebbles, and they come loose-packed for a chunky look or interlocking for a tighter, flatter finish.
You will find it most often on shower floors, where the texture provides grip and the small stones conform to the slope toward the drain. It also works as a bathroom floor, an accent strip, a backsplash, or even an outdoor patio band.
Types of Pebble Mosaic Tile
Knowing the styles helps you match the tile to the job.
- Standard river rock: Rounded, varied heights, the classic natural look. Most texture, most grout.
- Sliced or flat pebble: Stones cut flat on top, giving a smoother, more comfortable walking surface with less grout to fill.
- Standing pebble: Tall, narrow stones set on end for a dramatic, dense vertical texture. Common in feature walls.
- Polished pebble: Tumbled and glossed stones with rich color. Stunning but slicker underfoot.
- Porcelain pebble look: Manufactured tile that mimics pebbles without the sealing or porosity of natural stone.
Pebble Mosaic Tile Cost
Material runs roughly $8 to $20 per square foot for most natural pebble sheets, with premium polished or marble pebbles climbing higher. Porcelain pebble-look mosaics fall in a similar range. The real cost driver is labor. Because of the irregular surface and heavy grouting, installers often charge a premium over flat tile, frequently $12 to $25 per square foot for setting and grouting. A small shower floor is an affordable upgrade; a whole bathroom floor in pebbles adds up fast.
Installation: Where Most People Go Wrong
Pebble mosaic demands a few extra steps that flat tile forgives.
- Build a flat, well-sloped base. On a shower floor, the slope to the drain has to be right before the tile goes down, because pebbles will not hide a bad pan.
- Back-butter and use a flat-troweled bed. The stones need full contact. Set the sheet, then tap it level with a grout float and a beating block so no pebble stands proud.
- Stagger the sheets. Pull a few edge stones loose and weave the seams so the 12-inch grid does not telegraph through the finished floor.
- Let it cure fully before grouting, usually 24 to 48 hours.
The single biggest mistake is uneven stones. Run your hand across the surface before the thinset sets. Any pebble that sits high becomes a stub-your-toe point and a grout problem later.
Grouting Pebble Tile
Pebble mosaic eats grout. The deep gaps between stones mean you are filling far more volume than a flat tile job, so buy extra. Use a sanded grout for the wide joints. Work it in thoroughly with a float, pressing into every void, then sponge carefully so you reveal the tops of the stones without digging grout back out of the gaps.
Many pros recommend sealing natural pebbles before grouting so the grout wipes off the stone faces cleanly. Skip that step and you will spend an afternoon scrubbing haze off rough rock. Epoxy grout is an upgrade worth considering in showers because it resists staining and never needs resealing.
Sealing and Maintenance
Natural stone is porous, so sealing is non-negotiable on a pebble floor. Apply a penetrating stone sealer after the grout cures, and reseal once a year in wet areas. A sealed surface beads water and resists soap scum and mildew far better than bare stone.
For routine cleaning, use a soft brush and a pH-neutral stone cleaner. Avoid vinegar and acidic cleaners on marble or limestone pebbles, which etch on contact. The textured surface traps grime in the grout lines, so a stiff nylon brush and a little elbow grease beat a flat mop here.
Natural Stone vs. Porcelain Pebble Look
If the upkeep of natural stone gives you pause, weigh the porcelain alternative. Manufacturers now make pebble-look porcelain mosaics that capture the rounded shape and varied color of real stone in a fully waterproof, non-porous tile. The advantage is enormous: no sealing, no etching, far easier cleaning, and consistent sizing that installs flatter and faster.
The trade-off is authenticity. Up close, real river rock has a depth and irregularity that printed porcelain cannot perfectly match, and natural stone feels cooler and more organic underfoot. For a high-end spa look where you will run your hand over the texture, natural pebbles win. For a busy family bathroom where low maintenance matters most, porcelain pebble-look tile is the practical choice. Many homeowners split the difference and use natural pebbles on a small shower floor while running porcelain elsewhere.
Pros, Cons, and Best Uses
Pebble mosaic tile gives you natural texture, excellent slip resistance, and a spa-like look no flat tile matches. It is forgiving of curves and slopes, which is exactly why shower floors love it. The downsides are real, though. It is harder to clean, requires diligent sealing, and a thick grout install is more labor.
My honest recommendation: use it where its strengths pay off and its weaknesses are contained. A shower floor, a curbless wet-room base, an outdoor accent, or a small powder-room feature are ideal. For a large floor you walk barefoot on for hours, consider a flat-cut or sliced pebble for comfort. Done right, a pebble mosaic tile installation looks like a custom, high-end feature, and it holds up for decades when sealed and maintained.
Prefer to explore on your own?
See how new flooring looks in your actual room in seconds — free, no signup.
Try the free Floor Studio →