Few surfaces feel as spa-like underfoot as smooth river rocks set into a shower floor. Pebble stone tile delivers that organic, textural look by mounting real or engineered stones onto mesh sheets, giving you a natural, grippy surface without placing every pebble by hand. It has become a go-to for shower pans, accent bands, garden paths, and even feature walls.
This guide explains the types available, where pebble tile works and where it struggles, honest pricing, the all-important sealing and grouting steps, and how to install it so it looks intentional rather than lumpy.
What Is Pebble Stone Tile?
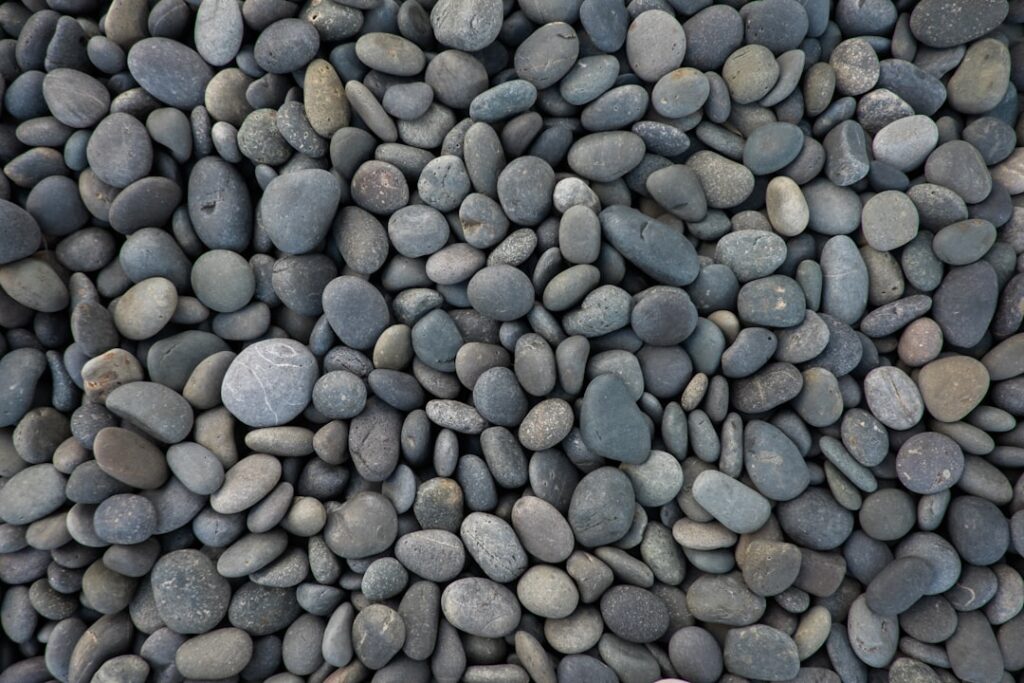
Pebble stone tile is a mosaic sheet, usually about 12×12 inches, with natural river pebbles, sliced stones, or pebble-look porcelain bonded to a flexible mesh backing. Instead of setting hundreds of loose stones, you install one sheet at a time and the pebbles interlock along the edges so seams disappear. Each sheet covers roughly one square foot.
You will encounter several formats. Standard rounded pebbles keep the full three-dimensional river-rock shape. Sliced or “flat” pebbles are cut to expose a level top, giving a smoother, more comfortable walking surface with the same natural pattern. Standing or “pebble mosaic on edge” versions set stones vertically for a dramatic pebbled texture, best reserved for walls.
Types of Pebble Tile
Choosing the right variety depends on how much texture and maintenance you want. Here are the main options homeowners weigh.
- Natural river rock: Genuine polished stones in earthy grays, tans, whites, and blacks. Beautiful and authentic, but requires sealing.
- Sliced or flat pebble: Stones cut flat on top for a level, foot-friendly surface. Ideal for shower floors.
- Marble or quartzite pebbles: Premium stone with richer color and veining, at a higher price.
- Pebble-look porcelain: Manmade tile printed and textured to mimic pebbles. Nearly zero maintenance and no sealing, but slightly less authentic up close.
For a shower floor you will actually stand on daily, sliced flat pebbles or pebble-look porcelain usually win on comfort. For an accent strip or garden feature, full rounded river rock delivers maximum texture.
Where Pebble Stone Tile Works Best
The classic application is a shower floor. The many rounded surfaces and abundant grout lines create excellent slip resistance and let the sheet conform to the slope toward the drain, something large tiles cannot do. Pebble also makes a striking accent band in a tiled shower wall, a natural transition strip between rooms, or a bath-mat-style inset just outside a tub.
Outdoors, pebble tile suits covered patios, pool surrounds (with a freeze-rated stone), and garden stepping paths. It is generally not ideal for high-traffic interior floors like kitchens or hallways, where the uneven surface is tiring to walk on and hard to clean.
The Comfort and Cleaning Trade-Off
Pebble tile’s biggest strength, its texture, is also its main drawback. Rounded river rock feels wonderful as a foot massage but can be uncomfortable for extended standing and tricky to clean because dirt and soap scum settle into the deep valleys between stones. Sliced flat pebbles solve most of this by offering a level top while keeping the natural look.
The generous grout in a pebble floor also means more grout to seal and maintain. If low maintenance is a priority, lean toward flat pebbles or porcelain and use a stain-resistant epoxy grout. Go in knowing the honest trade-off, and you will be happy with the result.
Pebble Stone Tile Cost
Pricing depends heavily on whether you choose natural stone or porcelain and the stone grade. Use these ranges for planning.
- Standard natural river pebble sheets: $8 to $15 per square foot.
- Sliced or flat pebble: $12 to $22 per square foot.
- Marble or premium stone pebble: $18 to $35 per square foot.
- Pebble-look porcelain: $6 to $14 per square foot.
Installation labor for pebble is higher than flat tile, typically $12 to $25 per square foot, because the surface needs extra thin-set to bed the stones and careful grouting around every pebble. Add $3 to $6 per square foot for thin-set, grout, and multiple coats of sealer. A standard 12- to 15-square-foot shower floor in natural pebble usually lands between $350 and $700 installed.
Sealing Pebble Stone Tile Correctly
Natural pebble is porous and absolutely must be sealed, and the sequence matters. Unlike flat tile, you seal pebble twice.
- Pre-seal before grouting: Apply a penetrating sealer to the set, cured pebbles before you grout. This keeps grout haze from staining the stone surfaces and makes cleanup far easier.
- Grout the sheets: Work sanded grout fully into the deep joints between pebbles, packing it up to about two-thirds of the stone height for the classic look.
- Seal again after curing: Once the grout cures 48 to 72 hours, apply a second coat of penetrating sealer over both stone and grout for full water protection.
Use a quality penetrating sealer such as Miracle Sealants 511 Impregnator or a comparable stone sealer. In a wet shower, plan to reseal every one to two years to keep water beading and prevent staining.
How to Install Pebble Stone Tile
Installation is DIY-friendly for a small area if you are patient. Follow these steps for professional results.
- Waterproof the substrate: For a shower, install a properly sloped mortar bed or a foam pan (Schluter-KERDI or similar) and confirm the slope runs to the drain.
- Dry-fit the sheets: Lay sheets out first, trim excess mesh, and blend edge pebbles by hand so seams vanish. Remove a few stones from a spare sheet to fill any gaps.
- Spread thin-set: Use a white polymer-modified mortar and a 1/4-inch notched trowel. Pebble needs a thicker bed than flat tile so each stone seats fully.
- Set and press: Push each sheet firmly into the mortar with a flat block so the pebbles sit level. Wipe away any mortar that squeezes above the stone tops.
- Pre-seal, then grout: After 24 hours, pre-seal, then pack sanded grout around every pebble and tool the joints smooth.
- Final clean and seal: Remove haze, let it cure, and apply the final sealer coat.
Grouting Pebble Tile the Right Way
Grout is where most pebble installations succeed or fail, because the deep, irregular joints between rounded stones behave nothing like the tidy lines of flat tile. Always use a sanded grout, since the joints are far too wide for unsanded, and pick a color that flatters the stone. A tone that matches the darker pebbles reads natural, while a stark contrast highlights every stone and can look busy.
How far you pack the grout up the sides of each pebble determines the entire look. Fill to roughly two-thirds of the stone height for the traditional exposed-pebble effect, where the rounded tops rise proudly above the grout. Pack higher, near the tops, for a flatter, easier-to-clean surface that sacrifices some texture. Work the grout in thoroughly with a gloved hand to eliminate voids and air pockets, because any gap left below a stone becomes a spot where water sits and grout eventually crumbles.
Maintenance and Longevity
Kept sealed, a pebble stone tile floor lasts for decades. Rinse it regularly, wipe with a pH-neutral stone cleaner, and avoid acidic products like vinegar that etch natural stone. A soft brush helps lift soap scum from the valleys between stones. Watch for grout that darkens or water that stops beading, both signs it is time to reseal. Address a cracked or loose pebble promptly by scraping it out and re-bedding a replacement stone from your leftover sheet.
Final Thoughts
Pebble stone tile brings unmatched natural texture, slip resistance, and spa-like character to showers, accents, and outdoor spaces. Choose sliced flat pebbles or porcelain if comfort and easy cleaning matter most, budget for the extra labor and double-sealing that natural stone demands, and follow the pre-seal-grout-seal sequence carefully. Do that, and your pebble surface will feel like a luxury retreat while standing up to years of daily use.
Prefer to explore on your own?
See how new flooring looks in your actual room in seconds — free, no signup.
Try the free Floor Studio →