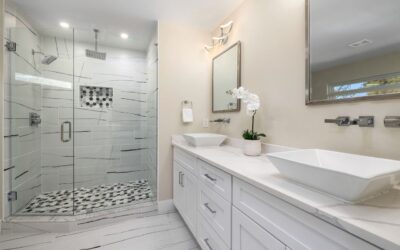
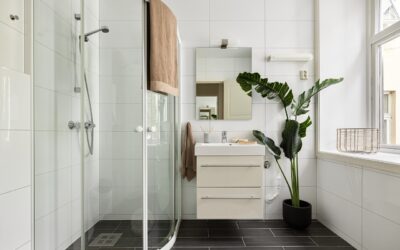
A pebble stone shower floor is one of those features that sells a bathroom on sight. Those smooth river rocks underfoot promise a spa-at-home feeling, a little natural texture, and a massage for tired feet after a long day. Many also end up needing repairs. Here is the honest version: what a pebble floor does well, where it frustrates homeowners, what it costs, and how to install one that lasts instead of one you regret.
Part of our Bathroom Remodeling & Flooring guide — explore the full guide →
- The Appeal: Why People Want Pebble Floors
- The Drawbacks You Need to Know
- Slip Resistance and Drainage
- Cost Per Square Foot
- Mesh-Backed Sheets Versus Loose Pebbles
- Sealing and Cleaning Maintenance
- Is a Pebble Stone Shower Floor Right for You?
- Waterproofing Underneath the Pebbles
- Choosing the Right Pebbles
The Appeal: Why People Want Pebble Floors
The number one reason clients ask for pebbles is the way they feel. Walking on rounded river stones is genuinely pleasant, almost like a reflexology mat, and the contours conform to your feet in a way flat tile never does. There is also the visual warmth. Natural stone in tans, grays, blacks, and creams brings an organic, earthy texture that pairs beautifully with wood vanities, greenery, and the spa aesthetic people are chasing.
There is a practical upside too. Because a pebble surface is bumpy rather than flat, it naturally offers more grip than a large polished tile, at least when it is clean and dry. The rounded stones also work well on a shower floor that slopes toward a center drain, since the small individual pieces conform to a curved pan more easily than big rigid tiles that would have to be cut.
The Drawbacks You Need to Know
Now the honest part. The biggest complaint about a pebble stone shower floor is grout. A pebble floor has an enormous amount of grout surface compared to standard tile, because every little stone is surrounded by grout lines snaking around it. All that grout is porous, it holds soap scum and body oils, and it needs regular cleaning and periodic sealing. If you hate scrubbing, this is not your surface.
The stones themselves can also feel harsh under bare feet for some people, especially if the pebbles are on the larger or more angular side. What feels like a massage to one person feels like standing on marbles to another. And because the surface is so irregular, water does not sheet off cleanly the way it does on smooth tile, so a poorly sloped pebble floor will pool and stay damp, which invites mildew.
Slip Resistance and Drainage
Slip resistance is a mixed bag and worth understanding. The texture gives you grip, but a slick film of soap scum or a coating of hard-water minerals can make even a bumpy floor slippery. Keeping the floor clean is what actually keeps it safe. Sealing helps too, because a sealed surface releases soap residue more easily.
Drainage is where installs live or die. A shower floor needs a slope of about a quarter inch of fall per foot toward the drain. On a pebble floor that slope has to be built into the mortar bed under the stones and maintained through the pebble layer, or water sits in the low spots between stones. Standing water breeds mildew and leaves mineral rings. A good installer floats the pan to the correct slope first, then sets the pebbles to follow it, rather than hoping the stones sort themselves out.
Cost Per Square Foot
Materials for a pebble stone shower floor are surprisingly affordable. Mesh-backed pebble sheets typically run $5 to $15 per square foot, with premium sliced or standing-pebble styles reaching $20 or more. Since a standard shower floor is only about 9 to 15 square feet, the stone itself is rarely the expensive part.
Labor is where the number climbs. Setting pebbles is fussy, detailed work, and grouting all those irregular joints takes far longer than grouting flat tile. Expect professional installation of just the pebble floor to run $15 to $30 per square foot in labor, sometimes more if the installer is meticulous about slope and grout. All in, a pebble shower floor often lands between $300 and $800 for materials and labor on a typical footprint, not counting the walls.
Mesh-Backed Sheets Versus Loose Pebbles
You have two main formats to choose from. Mesh-backed sheets are the common choice: pebbles are pre-arranged and glued to a fiberglass or plastic mesh backing in roughly 12×12-inch sheets, so you set them like mosaic tile. They install far faster, they keep the spacing consistent, and they are the better choice for most homeowners and DIYers. The tradeoff is that the seams between sheets can be visible if you do not blend the edges, so you pick loose stones and fill the seams by hand to hide the grid.
Loose or hand-set pebbles give the most natural, random look because you place every stone yourself, but the labor is intense and it is easy to end up with uneven heights that feel bad underfoot. Standing-pebble sheets, where the stones are set on end for a flatter, more uniform top surface, are a middle option that many people find more comfortable to walk on than traditional rounded river rock.
Sealing and Cleaning Maintenance
Plan on sealing, because this is the maintenance reality of a pebble floor. Both the natural stone and the grout should be sealed with a quality penetrating sealer. Seal a new pebble floor before grouting to keep grout haze off the stones, then again after grouting, and then reseal every 6 to 12 months depending on use. A busy family bathroom needs it more often than a guest shower.
For cleaning, use a pH-neutral stone cleaner and a soft brush, and avoid acidic products like vinegar that can etch natural stone and degrade sealer. Squeegee or towel the floor after showers when you can, because keeping it dry does more to prevent mildew and soap buildup than any cleaner. A quick weekly scrub of the grout lines keeps the floor from reaching the point where it needs an all-day deep clean.
Is a Pebble Stone Shower Floor Right for You?
Here is how I frame it for clients. A pebble stone shower floor is a great fit if you love the natural spa look, you do not mind a few extra minutes of maintenance, and you are pairing it with a properly sloped, professionally waterproofed pan. It is the wrong choice if you want a zero-effort surface, you have mobility concerns that make an uneven floor risky, or you tend to let cleaning slide for weeks.
My middle-ground advice for people who love the look but fear the upkeep is to use standing-pebble sheets on the shower floor for comfort and grip, seal everything diligently from day one, and keep the shower walls in smooth tile that wipes clean easily. Done that way, a pebble floor delivers the spa experience people want without becoming a scrubbing chore that overshadows the payoff.
Waterproofing Underneath the Pebbles
Everything above about slope and comfort is wasted if the pan below the stones is not waterproofed correctly, and this is where most pebble-floor failures actually begin. Water works its way through grout no matter how well you seal it, so the real barrier against leaks is the waterproofing layer under the mortar bed. That means either a sheet membrane like the orange dimpled system installers know well, or a liquid membrane painted over the sloped pan and up the curb.
Skip that layer and you get water migrating into the subfloor, rotting framing, and eventually a ceiling stain in the room below. A pebble floor punishes shortcuts here more than flat tile does, because the irregular surface holds water longer and gives it more time to find a weakness. If you are hiring the work out, ask the installer directly how they are waterproofing the pan, and if the answer is vague, keep interviewing.
Choosing the Right Pebbles
Not all pebble sheets are created equal, and the stones you pick change both the look and the feel. Larger river rocks read bold and dramatic but can feel harsh underfoot and leave wider grout gaps that trap more grime. Smaller pebbles feel gentler and pack more tightly, so there is proportionally a bit less grout to clean, though the mosaic effect is busier. Sliced or flat-cut pebbles give you the natural look with a flatter walking surface, which is a smart compromise for a primary shower.
Color matters for maintenance as much as for style. Lighter cream and tan stones show soap scum and hard-water spotting more readily, while mixed grays and blacks hide daily grime between deep cleans. Whatever you choose, buy from a single lot when you can, because natural stone varies batch to batch, and dry-lay a few sheets before setting them so you can hide the seams and cull any oddly shaped or discolored stones before they end up underfoot.
Prefer to explore on your own?
See how new flooring looks in your actual room in seconds — free, no signup.
Try the free Floor Studio →