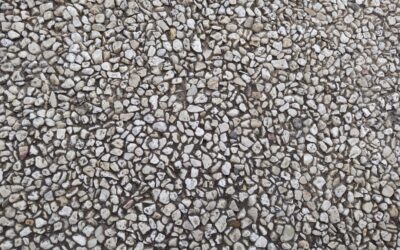
Walk into a spa-style bathroom and there is a good chance you are standing on stone. Pebble shower tile has become one of the most requested floor finishes for walk-in showers because it turns an ordinary pan into a natural, foot-massaging surface that photographs beautifully. But the same texture that looks so inviting also creates more grout lines than any other tile, which means installation, sealing, and cleaning all demand a bit more attention. Get those details right and pebble flooring lasts for decades; get them wrong and you end up with mold, cracked stones, and a floor that never quite feels clean.
Part of our Bathroom Remodeling & Flooring guide — explore the full guide →
This guide walks through the types of pebble tile, where it works best, the sealing and grout choices that make or break the result, and honest maintenance expectations so you can decide whether this material belongs in your shower.
- What Pebble Shower Tile Actually Is
- Rounded vs. Flat (Sliced) Pebbles
- Where Pebble Tile Works Best
- Slip Resistance and Safety
- Grout and Sealing: The Make-or-Break Step
- Installation Basics
- Cleaning and Maintenance
- Cost Expectations
- Color and Pattern Choices
- Common Mistakes to Avoid
- Is Pebble Shower Tile Right for You?
What Pebble Shower Tile Actually Is
Pebble tile comes as small natural or manufactured stones bonded to a mesh backing, usually in 12-inch square sheets. You set the sheets like any mosaic, and the mesh disappears under the thinset. The stones themselves are typically river rock, marble, or sliced pebbles, and they range from smooth polished domes to matte, tumbled textures.
Because the sheets flex, pebble tile conforms to the gentle slope of a shower pan far better than large-format tile, which is a major reason installers favor it for curbless and custom showers. The tradeoff is grout: a single square foot can contain dozens of stones and hundreds of tiny joints, so grouting is slower and sealing is non-negotiable.
Rounded vs. Flat (Sliced) Pebbles
The single biggest decision is stone profile, and it changes both comfort and cleaning.
Rounded Pebbles
Traditional dome-shaped river rock delivers that classic reflexology feel underfoot. It is the most textured, most natural-looking option, and the domes shed water quickly. The downside is that deep valleys between stones trap soap scum and require diligent scrubbing, and some people find the uneven surface uncomfortable for extended standing.
Flat or Sliced Pebbles
Sliced pebbles are cut flat on top, giving you the organic pattern of natural stone with a level, comfortable walking surface. They drain a touch slower but are dramatically easier to clean because there are no deep pockets. For most homeowners, sliced pebble tile is the smarter everyday choice, especially in a primary shower used daily.
Where Pebble Tile Works Best
Pebble tile shines on shower floors, where its texture doubles as slip resistance, and as an accent on a shower bench or a single feature strip. It is less ideal as a full wall finish because the deep texture collects grime at eye level and reads as busy across a large expanse. A common, well-balanced design pairs a pebble floor with large-format porcelain walls, which keeps cleaning manageable while still delivering the natural focal point.
One caution: on a truly zero-entry or wet-room floor outside the shower, pebbles can be harder to keep dry and clean. Reserve them for the contained shower pan where water and drainage are controlled.
Slip Resistance and Safety
The natural texture of pebble shower tile is one of its biggest practical advantages. The rounded or tumbled surface breaks up standing water and gives bare feet plenty of grip, which makes it a strong choice for aging-in-place bathrooms and family showers alike. Matte and tumbled finishes offer more traction than glossy polished stones, so if safety is a priority, skip the high-shine river rock in favor of a honed or natural finish.
Keep in mind that grip depends on clean stone. A soap-scum film can turn even textured pebbles slick, which is one more reason regular cleaning matters here more than with smooth tile.
Grout and Sealing: The Make-or-Break Step
Because pebble tile has so much grout, this is where installations succeed or fail. Use a sanded grout for the wide, irregular joints, and choose a color that hides dirt; medium gray and warm taupe age far better than bright white on a shower floor.
Sealing happens twice. First, if you use natural stone, seal the stones before grouting so grout haze does not stain the porous surface. Then seal both stone and grout again after installation cures. Plan to reseal a natural-stone pebble floor every 12 to 18 months, or as soon as water stops beading on the surface. Epoxy grout is worth considering here; it is harder to install but is naturally stain- and water-resistant, which reduces long-term maintenance considerably.
- Grout type: Sanded grout, or epoxy grout for maximum durability
- Sealer: Penetrating natural-stone sealer, applied twice
- Reseal interval: Every 12 to 18 months for natural stone
- Slope check: Confirm at least a quarter-inch-per-foot fall to the drain
Installation Basics
While a handy DIYer can tackle pebble tile, the shower pan is the hardest place to learn because waterproofing and slope must be perfect. If you do it yourself, install a proper waterproof membrane, confirm the slope drains fully with no ponding, and back-butter thin spots so every stone bonds. Blend sheets from several boxes as you go to avoid obvious color patches, and hand-place loose pebbles into any gaps at the seams so the mesh grid never shows.
Expect grouting to take two to three times longer than standard tile because you are working grout into every crevice. Wipe carefully and buff off haze promptly, since dried haze clings stubbornly to textured stone.
Cleaning and Maintenance
Day-to-day care is simple but consistent. Rinse the floor after showers and squeegee or wipe standing water when you can. Once a week, scrub with a soft brush and a pH-neutral stone cleaner; avoid vinegar, bleach, and acidic tub cleaners, which etch natural stone and degrade sealer.
If soap scum builds up, a paste of baking soda and water worked in with a nylon brush lifts it without harming the finish. Switching to a liquid body wash instead of bar soap dramatically cuts scum, which is the number-one complaint people have about pebble floors. Address any mold in the grout early with a stone-safe cleaner rather than harsh chemicals.
Cost Expectations
Pebble tile sheets typically run $8 to $20 per square foot for the material, with premium marble or exotic stones higher. Because installation is labor-intensive, professional setting adds $10 to $25 per square foot, more than standard tile. For a typical shower floor of 12 to 15 square feet, budget a few hundred dollars in materials plus labor, which keeps the total reasonable for the visual payoff.
Color and Pattern Choices
Pebble tile comes in a surprising range of palettes, and the color you choose sets the entire mood of the shower. Natural earth tones, blends of tan, brown, cream, and gray, feel warm, organic, and spa-like, and they hide everyday grime well. Cooler blends of slate gray, charcoal, and black-and-white read modern and dramatic, pairing nicely with white subway or large-format walls. Pure white marble pebbles look luxurious but show soap scum and require the most diligent cleaning, so weigh that before choosing them for a daily-use shower.
Consider how the floor relates to the rest of the bathroom. A busy, multicolor pebble floor wants quiet, solid-colored walls so the space does not feel chaotic. If your walls are already patterned or heavily veined, a more uniform, single-tone pebble keeps the design balanced. Sampling a full sheet at home under your actual bathroom lighting, rather than judging from a small online swatch, saves you from a color surprise once it is set in thinset.
Common Mistakes to Avoid
Most pebble-tile disappointments trace back to a handful of avoidable errors. Learn them before you start.
- Skipping the pre-grout seal on natural stone: Grout haze permanently stains porous pebbles.
- Choosing white grout on a floor: It discolors fast; go medium gray or taupe.
- Inadequate slope: Water ponds in the valleys and breeds mildew.
- Using acidic cleaners: Vinegar and tub scrubs etch stone and strip sealer.
- Neglecting resealing: An unsealed floor absorbs water and stains within a season.
Getting these details right is the difference between a floor that looks incredible for fifteen years and one that turns dingy within twelve months. The material rewards care and punishes shortcuts, so plan the sealing and grout steps as carefully as the layout itself.
Is Pebble Shower Tile Right for You?
Choose pebble shower tile if you want natural texture, built-in slip resistance, and a spa-like floor, and you are willing to seal and scrub a little more than average. Opt for sliced pebbles and epoxy grout to minimize upkeep. If you dislike cleaning grout or want a low-maintenance surface above all, a large-format textured porcelain may suit you better. For most homeowners, though, the warmth and character of a well-sealed pebble floor is well worth the modest extra care it asks in return.
Prefer to explore on your own?
See how new flooring looks in your actual room in seconds — free, no signup.
Try the free Floor Studio →