Step into a high-end spa and there is a good chance you are standing on pebble floor tile, the rounded river-stone surface that turns an ordinary shower into a sensory experience. Beyond the natural good looks, the contoured stones massage your feet, provide excellent grip when wet, and conform to sloped surfaces that flat tile struggles with. That combination has made pebble tile a favorite for shower floors, bathrooms, and even garden paths.
Part of our Tile & Grout guide — explore the full guide →
This guide covers what pebble tile is, where it works best, how it is installed and sealed, the grout and slip-resistance details that make or break the result, and how to keep it looking pristine for years.
What Pebble Floor Tile Is
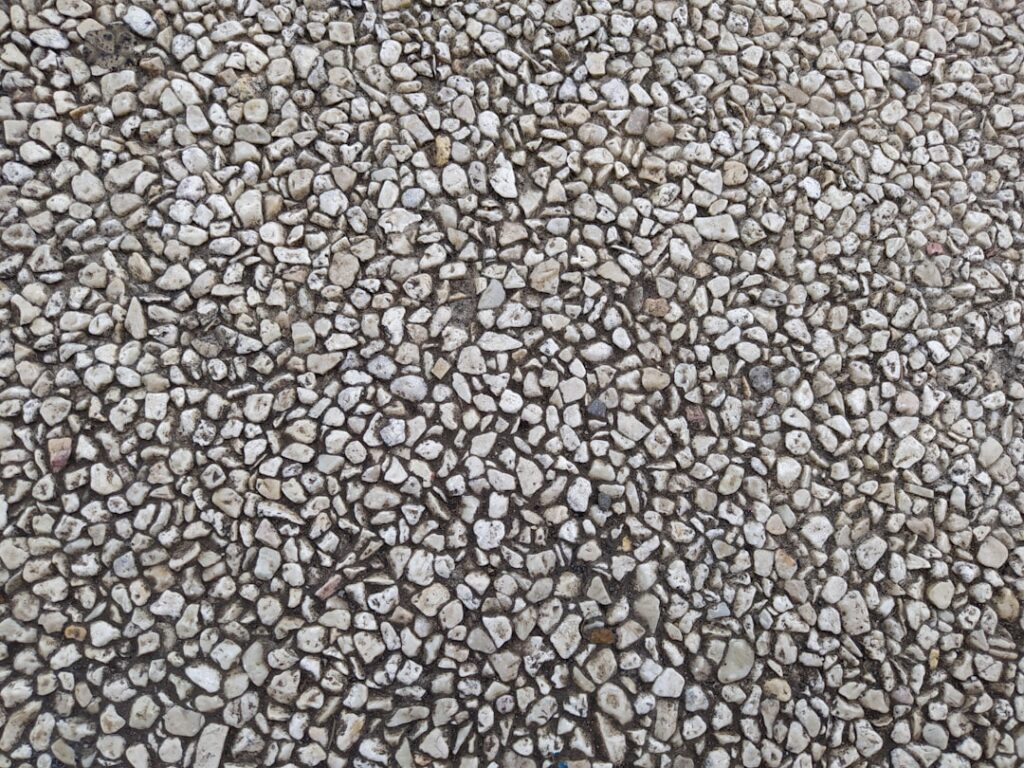
Most pebble tile comes as smooth river stones, sorted by size and color, adhered to a flexible mesh backing in roughly 12-by-12-inch sheets. The mesh lets you lay many stones at once and bend the sheet to follow curves and slopes. You will find several styles: standard rounded pebbles, sliced or flat-cut pebbles that offer a more level walking surface, and standing or pebble-mosaic versions arranged for visual texture. Colors range from soft creams and grays to dramatic black and multicolor blends.
Because the stones are natural, every sheet varies, which is part of the charm and a reason to dry-lay before setting.
Where It Works Best
Pebble tile shines in wet, contoured, and naturally themed spaces. Common uses include:
- Shower floors, where the texture grips wet feet and the mesh conforms to the slope toward the drain.
- Bathroom floors and accent borders, for an organic, spa-like feel.
- Outdoor patios, paths, and pool surrounds, where natural stone fits the landscape.
- Feature strips and niches, adding texture against smooth wall tile.
The uneven surface makes it less ideal for main living-area floors where you want a flat, easy-to-clean plane, but for showers it is hard to beat.
The Slip-Resistance Advantage
One of the strongest practical reasons to choose pebble tile in a shower is grip. The rounded, textured stones and the many grout lines between them give your feet far more traction than a large, smooth tile, which matters a great deal on a wet, soapy surface. The numerous joints also break up the floor into small facets that follow the drainage slope cleanly. For aging-in-place bathrooms and family showers, that built-in slip resistance is a meaningful safety feature, though no surface is entirely slip-proof and a grab bar is still wise.
Installation Basics
Pebble tile rewards patience, especially when blending sheets so the seams disappear. The general process looks like this:
- Prepare a clean, waterproofed, properly sloped substrate; in showers this means a sound pan and membrane.
- Dry-lay several sheets and mix stones between them to avoid obvious repeating patterns and grid lines.
- Trim mesh as needed and fit individual stones into gaps along the seams for a seamless look.
- Set the sheets in a polymer-modified thinset, pressing firmly so mortar grips the back of each stone.
- Check that no mortar squeezes up between stones where grout will go, and let it cure fully.
Blending the seams is the step amateurs skip and pros never do; it is the difference between a natural riverbed and an obvious grid of squares.
Sealing and Grouting
Natural stone is porous, so sealing is essential. Most installers apply a penetrating sealer before grouting to keep grout from staining the stones, then grout, then seal again after the grout cures. Pebble tile uses a lot of grout because of all those gaps, so plan for extra material and time. Use a quality grout rated for the joint width and the wet environment, and pack it carefully around each stone, leaving the tops exposed. After everything cures, a final coat of penetrating sealer protects both the stone and the grout. Reseal periodically, especially in showers, to maintain water resistance.
Cleaning and Maintenance
The textured surface and abundant grout lines trap a bit more soap scum and grime than flat tile, so regular cleaning keeps it looking its best. Practical tips:
- Rinse and squeegee or wipe the shower floor after use to limit soap and mineral buildup.
- Clean with a pH-neutral stone cleaner; avoid acidic or harsh chemicals that can etch natural stone.
- Use a soft brush to work cleaner into the crevices, then rinse thoroughly.
- Reapply sealer on the manufacturer’s recommended schedule.
Skip vinegar and acidic bathroom sprays, which dull and damage natural stone over time.
Standard Versus Sliced Pebble Tile
One choice that shapes both comfort and cleaning is whether to use rounded or sliced pebbles. Each has clear strengths:
- Standard rounded pebbles give the most natural riverbed look and the strongest foot massage, with deeper crevices between stones.
- Sliced or flat-cut pebbles are sawn to present a flatter top surface, creating a more level walking plane that is easier underfoot and simpler to clean.
- Pebble mosaics and standing pebbles arrange stones for distinct visual texture, often used as accents.
If you want the spa-like massage feel and dramatic texture, rounded stones deliver. If you or family members find an uneven surface uncomfortable, or you want less grout-line cleaning, sliced pebbles are the practical compromise that keeps the natural look with a friendlier surface.
Common Mistakes to Avoid
Pebble tile is forgiving in looks but unforgiving of installation shortcuts. The errors that cause the most regret are predictable. Failing to blend the mesh sheets leaves an obvious grid where seams line up, breaking the natural illusion. Skipping the pre-grout sealer lets grout haze and stain the porous stones permanently. Using too little thinset, or not pressing firmly, leaves stones loose that pop free later underfoot.
In showers, the biggest mistake of all is neglecting waterproofing and proper slope beneath the tile. Pebbles conform to a slope beautifully, but they cannot fix a pan that does not drain or a membrane that leaks. Get the substrate right, blend your seams, and seal at the correct stages, and the finished floor will look and perform like the spa surface you envisioned rather than a maintenance headache.
Is Pebble Floor Tile Right for You?
If you want a spa-like, natural shower floor with great underfoot grip and a soothing texture, pebble floor tile is an outstanding choice that adds character no flat tile can match. Be realistic about the trade-offs: it needs diligent sealing, the many grout lines take more cleaning, and the uneven surface is not ideal everywhere. For a polished result, especially with shower waterproofing involved, consider hiring an experienced tile setter, since proper slope, membrane, and seam blending are where this material succeeds or fails. Get those fundamentals right and you will enjoy a beautiful, slip-resistant floor for many years.
Prefer to explore on your own?
See how new flooring looks in your actual room in seconds — free, no signup.
Try the free Floor Studio →