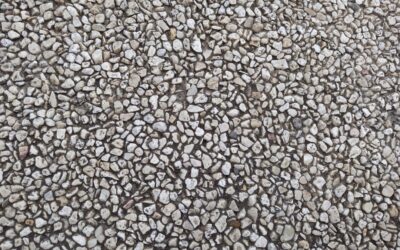
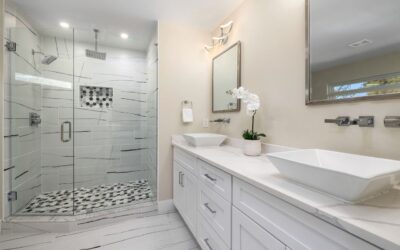
Step onto a pebble shower floor and the difference is immediate; the rounded stones massage your feet and add a spa-like, natural texture no flat tile can match. Pebble tile is made of small, smooth river stones attached to a mesh backing in sheets, making a rustic mosaic surface that has become a go-to for showers, accent walls, and garden paths. The natural look comes with real maintenance considerations, especially around grout and sealing, so it pays to understand the material before you commit. Here is everything that matters.
Part of our Tile & Grout guide — explore the full guide →
What Pebble Tile Is
Pebble tile consists of natural river stones, or sometimes sliced flat pebbles, bonded to a flexible mesh sheet, typically around 12 by 12 inches. The mesh lets you install a complex mosaic of stones quickly, then grout fills the spaces between them. Variations include standard rounded pebbles, sliced pebbles with flatter tops for a smoother walking surface, and standing-pebble styles set on edge for a denser look.
Because the stones are natural, every sheet varies in color and size, giving installed floors an organic, no-two-alike character.
Best Uses Around the Home
- Shower floors: The most popular use; the textured surface improves grip and conforms gently to a sloped drain.
- Bathroom accent walls: A pebble strip or niche adds natural texture without covering an entire room.
- Outdoor patios and paths: Frost-tolerant stones create rustic walkways and pool surrounds.
- Spa and powder rooms: Small-area accents that bring a natural, calming feel.
On shower floors specifically, the texture provides slip resistance, but those same crevices and abundant grout lines need diligent cleaning, which is the main trade-off.
The Sealing Question
Sealing is the single most important step with pebble tile, especially in wet areas. Natural stone is porous, and a shower floor sees constant water, soap, and minerals. You should seal pebble tile in two stages: apply a penetrating sealer to the stones before grouting to keep grout from staining them, then seal both stones and grout again after grouting and curing.
Plan to reseal a pebble shower floor roughly once a year, or whenever water stops beading on the surface. Skipping resealing invites staining, mineral buildup, and a dingy look that is hard to reverse.
Installation Basics
Pebble tile is more forgiving to lay than precise square tile because the irregular edges hide minor misalignment, but it demands attention to a few details.
- Ensure a properly waterproofed and sloped substrate in showers, with the drain set correctly.
- Use a high-quality thinset and press each sheet firmly so individual stones bed evenly; check that none sit proud of the surface.
- Trim mesh sheets and fill gaps with loose pebbles for a seamless, natural transition between sheets.
- Pre-seal the stones, then grout with a sanded grout, working it fully into the deep joints.
- Clean off haze carefully and apply a final sealer once everything cures.
Cleaning and Maintenance
Routine cleaning keeps a pebble floor from looking grimy. Rinse and wipe shower floors regularly, and use a soft brush with a pH-neutral stone cleaner on the grout and crevices. Avoid acidic cleaners like vinegar, which etch natural stone, and skip harsh abrasives. A squeegee or quick wipe-down after showers reduces soap scum and water spots dramatically. Address any mildew in the grout promptly with a stone-safe cleaner.
Avoiding Common Problems
A few missteps cause most pebble tile complaints. Inadequate sealing leads to stained stones and discolored grout, so never skip the pre-grout and post-grout sealing steps. Poor slope or waterproofing under a shower floor causes pooling and leaks, which is why the substrate work matters more than the tile itself. Stones set unevenly create sharp high points and trip hazards, so press each sheet firmly and check the surface as you go. Finally, using acidic cleaners over time etches the stone; stick to pH-neutral products. Handle these details and the floor performs beautifully for years.
Cost Expectations
Pebble tile sheets typically cost $8 to $20 per square foot for materials, with premium sliced and polished varieties higher. Because shower floors are small, the material outlay is modest, often $100 to $300 for a standard shower base. Professional installation adds labor, and the extra grouting and sealing work can push install costs above standard tile. Factor sealer into your ongoing budget.
Types of Pebble Tile
Not all pebble tile walks or cleans the same, and the variety you choose affects comfort and upkeep.
- Standard rounded pebbles: The classic look with the most pronounced texture, but uneven underfoot and more grout to clean.
- Sliced or flat pebbles: Stones cut to present a flat top, giving a smoother, more comfortable walking surface while keeping the natural shapes.
- Standing pebbles: Stones set on edge for a dense, vertical pattern, often used on accent walls for dramatic texture.
- Polished vs natural finish: Polished pebbles look glossy and rich but can be slicker; natural matte pebbles offer better grip on floors.
For a shower floor where comfort matters, sliced pebbles are often the easiest to live with, while rounded pebbles deliver the strongest spa-like massage effect.
Pros and Cons at a Glance
Pebble tile’s appeal is real, but so are its trade-offs. On the plus side, it offers natural beauty, slip resistance, and a comfortable, distinctive texture, and it conforms well to sloped shower floors. On the downside, the many grout lines require more cleaning, the natural stone needs regular sealing, and rounded pebbles can feel uneven to some people. Weigh how much you value the natural look against the extra maintenance before committing your whole shower to it.
Pairing Pebble Tile With Other Materials
A popular approach is to use pebble tile only on the shower floor, paired with larger, easier-to-clean porcelain or stone on the walls. This gives you the textured, slip-resistant floor and spa feel while keeping the high, splash-heavy walls low-maintenance. Choosing wall tile in a complementary tone to the pebbles ties the design together. This combination delivers the best of both worlds and is far easier to keep clean than a shower tiled entirely in pebbles.
Is Pebble Tile Right for You?
Pebble tile rewards homeowners who love natural texture and a spa aesthetic and are willing to keep up with sealing and grout cleaning. It is a beautiful, slip-resistant choice for shower floors and accents, and a charming option for patios. If you want a low-maintenance, easy-wipe surface, a flatter porcelain tile may suit you better. But for that distinctive, foot-massaging natural look, properly sealed pebble tile is hard to beat.
Prefer to explore on your own?
See how new flooring looks in your actual room in seconds — free, no signup.
Try the free Floor Studio →