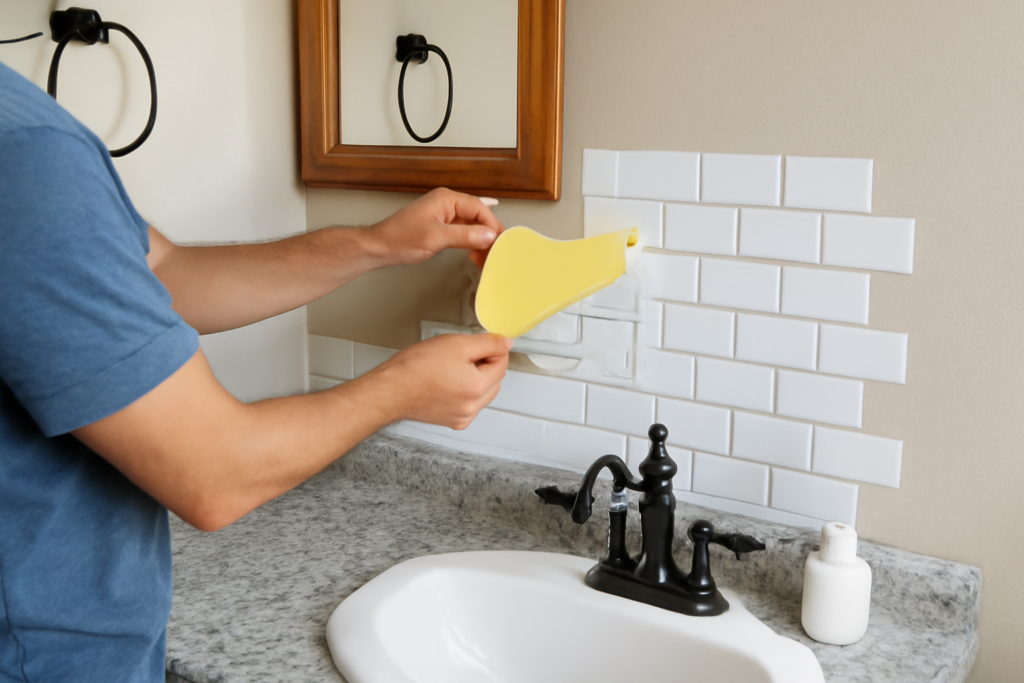
Renters and budget remodelers have made adhesive wall tile one of the fastest-growing corners of the home-improvement aisle, and bathrooms are exactly where most of it ends up — which is also exactly where most of it fails. Peel and stick bathroom wall tile can absolutely transform a dated vanity wall in an afternoon for a tenth of the cost of ceramic, but the product has honest physical limits in a room built around steam and splashing. The difference between a backsplash that still looks crisp in year four and vinyl squares curling off the wall by spring comes down to choosing the right zone, the right product, and surgical surface prep. Here is the truthful version of what this product can and cannot do.
Part of our Bathroom Remodeling & Flooring guide — explore the full guide →
What Peel and Stick Wall Tile Actually Is
Three distinct products share the shelf label. Thin vinyl sheets (1-2mm) are printed panels — often convincing subway or hex patterns — that cut with scissors and cost the least. Thicker gel or “3D epoxy” tiles have a cushioned domed surface that mimics grout lines and glazed depth surprisingly well; brands like Smart Tiles, Tic Tac Tiles, and Art3d dominate this category. And composite or real-material versions — actual thin stone, metal, or rigid PVC panels with adhesive backing — sit at the top of the price band. All of them rely on a pressure-sensitive adhesive layer rather than mortar, which is the whole appeal and the whole limitation: the bond is only as strong as the surface you press it onto, and heat and moisture are adhesive’s two natural enemies.
The Humidity Question, Answered Honestly
Can adhesive tile survive a bathroom? Yes — in the right zones. Quality gel tiles are themselves waterproof and handle the ambient humidity of a ventilated bathroom without trouble. The failures happen at the edges and in the splash zones: steam works into seams and corners, repeated direct water hits load the adhesive beyond its design, and temperature cycling from hot showers flexes the bond until corners lift. So the zone map matters more than the brand:
- Good bets: the vanity backsplash, walls behind the toilet, accent walls, powder rooms (low steam), laundry-room splash areas.
- Marginal: full walls in a heavily used family bathroom with weak ventilation; tub surrounds above the splash line.
- Do not: inside showers, tub surrounds within splash reach, steam-sauna setups, or any surface with standing or streaming water. Most manufacturers exclude these areas explicitly, and they are right to.
Run the exhaust fan during and after showers and even marginal zones improve meaningfully. No fan and a daily-shower household? Keep adhesive tile to the vanity wall.
Honest Costs vs Real Tile
Quality gel peel-and-stick runs $5 to $15 per square foot at retail — cheap vinyl sheets dip to $2 to $4, stone-veneer versions reach $15 to $20. That sounds close to ceramic’s $2 to $10 per square foot material price until you add tile’s installation reality: thinset, backer prep, grout, tools, and either a weekend of skilled DIY or $10 to $20 per square foot of setter labor. A 20-square-foot vanity backsplash tells the story: roughly $150 to $250 in premium peel-and-stick done in two hours with a utility knife, versus $400 to $700 for professionally set ceramic. The trade: real tile lasts 30-plus years and survives any moisture; adhesive tile realistically gives you 3 to 7 good years in appropriate zones before edges, sheen, or adhesive age out. For renters, flippers, and anyone bridging to a future full remodel, that math often favors adhesive. For a forever-home shower wall, it never does.
Surface Prep: Where the Lifespan Is Decided
Pressure-sensitive adhesive bonds instantly to clean, smooth, non-porous surfaces and poorly to everything else. The prep ritual:
- Degrease the wall with TSP substitute or isopropyl alcohol — hairspray film and hand-soap splatter are invisible bond-breakers in bathrooms.
- Smooth matters more than clean. Adhesive tile telegraphs and bridges texture badly. Light orange-peel is workable with thick gel tiles; knockdown or heavy texture needs skim-coating first, or the tiles hold on by their high points only.
- Prime fresh drywall and flat paint. Matte paint is porous; a satin or semi-gloss surface, or a coat of primer-sealer, grips far better. Never apply over peeling paint or wallpaper — the tile will faithfully pull it off later.
- Wait on new paint at least 2 to 4 weeks; outgassing paint releases adhesive.
- Warm room, warm tiles: apply at 65°F+, and press each tile hard for 30 seconds — a wallpaper roller beats palms.
Layout advice mirrors real tile: strike a level line (vanity backsplashes drift with the counter, not the level, so split the difference), start from the most visible corner, and dry-fit the row before peeling anything.
Living With It: Cleaning, Repairs, and Removal
Maintenance is genuinely easy — warm water, mild dish soap, soft cloth. Skip abrasive powders and magic erasers, which dull the glossy gel surface, and skip steam cleaners entirely for obvious reasons. A lifted corner gets a dab of clear silicone or double-sided mounting tape pressed under it; a damaged tile swaps out with a heat-gun-warmed peel and a spare from the box you wisely kept. Removal — the renter’s question — is usually clean off glossy paint and glass: warm each tile with a hair dryer, lift a corner, and pull low and slow. Expect adhesive residue (citrus remover handles it) and expect flat-paint and bare-drywall surfaces to lose some finish; “damage-free” is marketing optimism on porous walls, so renters should test one tile in a hidden spot first.
Buying Guide: What Separates Good From Junk
In this category, thickness is quality. Look for gel tiles 2mm-plus with beveled, slightly overlapping edges that shed water at seams; check that the pattern repeats are generous (cheap sheets repeat obviously across a wall); and read the manufacturer’s own wet-area language — honest brands publish exactly where the product is warranted. Buy 10 to 15 percent overage for cuts around outlets and mirrors, from a single batch. Reputable widely available options include Smart Tiles and Tic Tac Tiles in gel subway formats and Art3d in budget multipacks; expect roughly $8 to $12 per square foot for product that still looks good after a few hundred showers’ worth of ambient steam.
The Fair Verdict
Peel and stick bathroom wall tile is a legitimately good product wearing an oversold label. As a vanity backsplash, powder-room accent, or rental refresh, it delivers 80 percent of tile’s look for 20 percent of the cost and none of the mortar — a genuinely smart spend. As a shower surround or wet-wall solution it is the wrong tool, no matter what the marketplace listing photos imply. Respect the zone map, prep the wall like the bond depends on it (it does), ventilate the room, and this is one of the highest-satisfaction small projects in home improvement. Push it past its physics, and you will be reading removal tips by summer.
Prefer to explore on your own?
See how new flooring looks in your actual room in seconds — free, no signup.
Try the free Floor Studio →