Chunks of plaster falling off ceiling surfaces in an older home are a warning that the plaster has lost its grip on the wood lath above it. Traditional plaster ceilings stay up because wet plaster was pushed between the lath strips, where it curled over and hardened into “keys.” When enough keys break from age, water, vibration, or house settling, sections of plaster detach and hang by their own weight until they fall. A full plaster ceiling can weigh roughly 8 to 10 pounds per square foot, so a sagging section is a genuine safety hazard, not just a cosmetic flaw.
The fix depends on how much has let go. Small, loose areas can often be reattached to the lath with plaster washers and screws, then patched. Widespread sagging is usually better handled by covering the ceiling with new drywall screwed through the plaster into the joists, or by removing the plaster entirely. Before any drilling, scraping, or demolition, test for lead paint and asbestos, which are common in ceilings from these eras.
- Why Plaster Falling Off Ceiling Surfaces Happens
- How to Check a Sagging Plaster Ceiling
- Immediate Safety Steps
- Test for Lead and Asbestos First
- Tools and Materials
- Option 1: Reattach Loose Plaster With Washers
- Option 2: Cover the Ceiling With Drywall
- Troubleshooting
- Typical Costs
- When to Call a Pro
- Frequently Asked Questions
Here is how to judge the damage, what to do immediately, the tools you need, step-by-step repair methods, troubleshooting, costs, and when to bring in a professional.
Why Plaster Falling Off Ceiling Surfaces Happens
Knowing the cause keeps the repair from failing again.
- Broken keys: After many decades, keys crack from normal expansion and contraction, foot traffic above, and doors slamming.
- Water damage: Roof, plumbing, or bathroom leaks soften plaster and break the bond. Stains, bubbling paint, or crumbly patches point to moisture.
- Structural movement: Settling foundations, sagging joists, or removed walls can flex the ceiling and snap keys along a line.
- Vibration: Nearby renovation, heavy traffic, or hammering in the room above can loosen already-weak plaster.
- Overweight finishes: Many layers of paint or wallpaper add weight and stress.
How to Check a Sagging Plaster Ceiling
A sagging plaster ceiling often shows cracks that form a rough rectangle or web, a visible belly between joists, or edges that have dropped away from crown molding. Test it carefully.
- Shine a flashlight across the ceiling at a low angle to reveal bulges and hairline cracks.
- Wearing eye protection, press gently upward with a flat palm. Sound plaster feels solid. If it moves, flexes, or crunches, the keys behind it are broken.
- Tap lightly with a knuckle. A hollow sound over a wide area means detachment even if nothing has moved yet.
- Mark the loose area with painter’s tape so you can see its size.
- Check the attic or floor above, if accessible, for broken keys lying on top of the lath and for signs of water.
Immediate Safety Steps
If the plaster is visibly sagging, act now rather than waiting for a weekend.
- Keep people and pets out of the room and move furniture and valuables out from under the sag.
- Do not pull on hanging pieces. They can bring down a much larger section.
- Shore up a large sag temporarily: place a sheet of plywood against the ceiling and prop it with a 2×4 post or adjustable steel support column resting on another board on the floor. Tighten just enough to hold it, without pushing it upward.
- If water caused the problem, shut off the water supply to the leaking fixture and turn off the circuit to any ceiling light in the affected area at the breaker.
- Lay plastic sheeting on the floor to catch debris, and keep fallen material damp to limit dust until testing is done.
Test for Lead and Asbestos First
Homes built before 1978 may have lead paint on plaster ceilings, and plaster, textured coatings, and joint compound applied before the 1980s may contain asbestos. Drilling for plaster washers, sanding patches, and tearing out plaster can release these hazards. Have paint tested for lead with an EPA-recognized test kit or by a certified inspector, and send a plaster sample to an accredited lab for asbestos analysis, usually $30 to $60 per sample. If either test is positive, hire an EPA Lead-Safe Certified contractor or a licensed asbestos abatement contractor as required in your state. If tests are negative, still use a respirator rated N95 or better, eye protection, and wet cleanup methods.
Tools and Materials
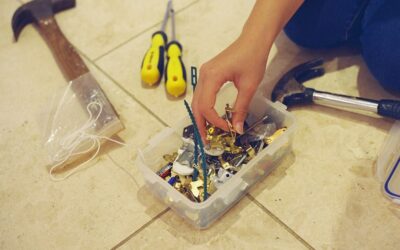
- Safety glasses, respirator, and gloves
- Drill/driver with masonry and wood bits
- Plaster washers (thin, perforated discs about 1 to 1.25 inches across)
- 1-5/8 inch coarse-thread drywall screws, and longer screws for drywall overlays
- Plaster adhesive and conditioner (optional, for bonding loose plaster back to lath)
- Setting-type joint compound, mesh tape, and 6-inch and 12-inch knives
- Stud finder or thin wire to locate joists
- For overlays: 1/4-inch or 3/8-inch drywall, drywall lift (rentable), and construction adhesive
- Primer and ceiling paint
Option 1: Reattach Loose Plaster With Washers
This method works best for areas a few square feet in size where the plaster is still mostly intact.
- Locate joists. Use a stud finder or drill a small test hole to find joists, usually 16 inches on center. Screws should hit lath at minimum and joists where possible.
- Support the section. Hold the loose plaster in place with a padded board and prop so it does not shift while you drill.
- Inject adhesive (optional). For a stronger bond, drill small holes through the plaster only (not the lath), vacuum the dust, spray a conditioner, and inject plaster adhesive into each hole.
- Install washers. Starting at the edge of the solid plaster and working inward, drive screws with plaster washers every 6 to 8 inches. Draw the plaster snug to the lath, but do not overtighten, which can crack it.
- Remove supports. After the adhesive cures (usually 24 hours), remove the props and check that the section is firm.
- Skim over. Scrape off any excess adhesive, then cover the washers and cracks with mesh tape and two or three thin coats of setting compound. Feather wide, prime, and paint.
Option 2: Cover the Ceiling With Drywall
When sagging is spread across the room, overlaying the whole ceiling is often faster and more durable than piecemeal fixes. Keeping the plaster in place also avoids a heavy, messy demolition.
- Reattach or remove any sections that hang more than about 1/4 inch so the new drywall sits reasonably flat.
- Mark joist locations on the walls just below the ceiling line so you can find them once the drywall covers the ceiling.
- Turn off the breaker and confirm power is off with a non-contact voltage tester before removing light fixtures or touching any wiring. Install box extenders so the electrical boxes end up flush with the new surface.
- Use a drywall lift to raise sheets of 1/4-inch or 3/8-inch drywall perpendicular to the joists. Apply construction adhesive if the manufacturer recommends it.
- Drive long screws through the drywall and plaster into the joists, long enough to penetrate at least about 1 inch into framing, spaced per the drywall maker’s instructions.
- Tape, mud, prime, and paint as with any new drywall ceiling. Reinstall trim or add crown molding to cover the edge where the ceiling meets the walls.
Troubleshooting
- Cracks reappear around washers. The plaster is still moving. Add more washers, use mesh tape, and use setting compound rather than premixed mud.
- Plaster crumbles when drilled. It is too deteriorated to save, often from water. Cut it out back to sound plaster and patch with drywall shimmed to the correct thickness.
- Screws miss framing. Pull them, patch the holes, and relocate joists more carefully with a test hole.
- Stains bleed through paint. Seal with a shellac-based stain blocker before painting.
- Ceiling still sags between joists. Joists may be undersized or damaged. Have a contractor inspect the framing.
Typical Costs
Reattaching a small area yourself usually costs $30 to $100 for washers, screws, adhesive, and compound. Professional plaster repair often starts with a minimum charge of a few hundred dollars and rises with the size of the area and the finish quality required. Covering a room with drywall is commonly priced per square foot and may run from several hundred to a few thousand dollars depending on ceiling size, fixture work, and local labor. Full plaster removal and replacement costs more because of demolition, disposal, and, if needed, lead or asbestos abatement.
When to Call a Pro
Call a plaster or drywall contractor if the loose area is larger than a few square feet, if the ceiling is high or over a stairwell, or if lead or asbestos tests are positive. Bring in a structural contractor or engineer if joists are sagging, cracked, or were cut for past remodeling, or if cracks line up with foundation movement elsewhere in the house. A licensed plumber or roofer should fix any leak before ceiling repair begins, and a licensed electrician should handle rewiring if old knob-and-tube wiring is found in the ceiling.
Frequently Asked Questions
Is plaster falling off ceiling surfaces dangerous?
Yes. Plaster is heavy, and a detached section can fall without warning. Clear the room, avoid pulling on loose pieces, and temporarily shore large sags until they are repaired.
Can a sagging plaster ceiling be saved?
Often. Small or moderate areas can be reattached with plaster washers and adhesive. Widespread sagging is usually better covered with drywall or removed and replaced.
Should I remove old plaster or cover it with drywall?
Covering is usually less messy and cheaper, provided the plaster can be secured reasonably flat. Removal makes sense if plaster is badly water damaged or you need access for wiring or insulation.
Do I need to test for asbestos before repairing a plaster ceiling?
If the plaster or any texture was applied before the 1980s, test it before drilling or demolition. Paint from before 1978 should also be tested for lead.
How far apart should plaster washers be installed?
Plan on roughly every 6 to 8 inches across the loose area, starting at the sound edge and working inward, with screws reaching lath or joists.