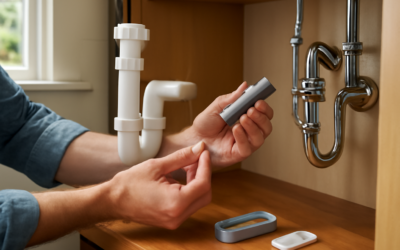
Plumber’s putty is one of the most essential and affordable products in any homeowner’s toolkit. This soft, pliable sealing compound has been used for over a century to create watertight seals around drains, faucets, and other plumbing fixtures. Despite its simplicity, many people misuse it or confuse it with other sealants. This comprehensive guide explains exactly when, where, and how to use plumber’s putty, along with situations where you should choose a different product entirely.
What Is Plumber’s Putty?
Plumber’s putty is a soft, clay-like sealing compound made from a blend of linseed oil, limestone powder (or fish oil and clay in some formulations). It stays soft and pliable for years after application, which is its key advantage over rigid sealants. This flexibility allows you to easily remove and reseat fixtures for maintenance without cutting or scraping hardened material.
Unlike silicone caulk or pipe thread tape, plumber’s putty is not an adhesive and does not create a permanent bond. It simply fills the gap between a fixture and a surface to prevent water from seeping through. Think of it as a gasket that you mold by hand.
A standard 14-ounce tub of plumber’s putty costs $3 to $7 and provides enough material for 15 to 20 typical applications. It has an indefinite shelf life when stored in a sealed container, making it an excellent product to keep on hand for plumbing repairs.
When to Use Plumber’s Putty
Plumber’s putty is designed for specific applications where a non-permanent, watertight seal is needed between a fixture and a surface.
Sink Drains
This is the most common use. Roll a rope of putty and press it around the underside of the drain flange before inserting it into the sink hole. When you tighten the drain, the excess putty squeezes out, creating a watertight seal.
Faucet Bases
Apply putty under the base plate of a faucet before mounting it to the sink or countertop. This prevents water from seeping between the faucet base and the surface.
Basket Strainers
Kitchen sink basket strainers require a ring of plumber’s putty between the strainer body and the sink surface. This is one of the most common DIY plumbing tasks.
Pop-Up Drain Assemblies
Bathroom pop-up drains use plumber’s putty under the drain ring that sits on the sink surface. The putty seals the gap while allowing easy removal if the drain needs servicing.
Toilet Base (Temporary)
Some plumbers use putty around the base of a toilet as a cosmetic seal when a wax ring provides the primary seal underneath. However, silicone caulk is generally preferred for this application in 2026.
| Application | Amount Needed | Difficulty | Time to Complete |
|---|---|---|---|
| Kitchen sink drain | 1/2 inch rope, 10 inches long | Easy | 5 – 10 minutes |
| Bathroom sink drain | 1/2 inch rope, 8 inches long | Easy | 5 – 10 minutes |
| Faucet base | 1/4 inch rope, 6 – 10 inches | Easy | 2 – 5 minutes |
| Basket strainer | 1/2 inch rope, 12 inches long | Easy | 10 – 15 minutes |
| Pop-up drain | 1/4 inch rope, 6 inches long | Easy | 5 minutes |
When NOT to Use Plumber’s Putty
Knowing when not to use plumber’s putty is just as important as knowing when to use it. Using it in the wrong situation can cause damage or fail to provide an adequate seal.
Threaded Pipe Connections
Plumber’s putty does not seal threaded connections. Use Teflon tape (PTFE tape) or pipe joint compound for threaded pipe joints. Putty will squeeze out under pressure and provide zero sealing.
Pressurized Water Lines
Putty cannot withstand water pressure. It’s designed only for non-pressurized drain connections and fixture mounting. For pressurized connections, use appropriate pipe fittings and sealants.
Plastic or Marble Surfaces
Traditional plumber’s putty contains oils that can stain porous surfaces like natural stone (marble, granite) and discolor some plastics. If you’re working with these materials, use a stain-free or non-petroleum putty, or switch to silicone caulk.
Rubber Gaskets
If your fixture comes with a rubber or foam gasket, do not add plumber’s putty. The gasket provides the seal, and adding putty can actually prevent the gasket from seating properly.
PVC Pipe Joints
PVC pipes require PVC cement (solvent welding) for permanent connections or compression fittings for removable connections. Plumber’s putty has no role in PVC pipe joining.
How to Apply Plumber’s Putty (Step-by-Step)
Applying plumber’s putty correctly takes just a few minutes and requires no special tools.
What You’ll Need
- Plumber’s putty
- Clean, dry cloth
- Your fixture (drain, faucet, etc.)
- Adjustable wrench or pliers (for tightening)
Step-by-Step Application
- Clean the surface: Wipe the sink or countertop surface where the fixture will sit. The area must be clean and dry for a proper seal.
- Knead the putty: Take a golf-ball-sized portion of putty and knead it in your hands for 30 to 60 seconds until it’s soft and pliable. If the putty feels dry or crumbly, it may be too old. Fresh putty should feel like soft modeling clay.
- Roll a rope: Roll the putty between your palms to create a uniform rope. For most drain applications, aim for a rope about 1/2 inch thick and long enough to wrap around the fixture.
- Apply to the fixture: Press the putty rope around the underside of the fixture flange (the part that will sit against the surface). Form a complete ring with no gaps.
- Press and seat: Place the fixture into position and press firmly. The putty should compress evenly around the entire circumference.
- Tighten: Secure the fixture with its retaining nut or mounting hardware. As you tighten, excess putty will squeeze out around the edges. This is normal and expected.
- Clean excess: Wipe away the squeezed-out putty with a clean cloth or your finger. The excess can be saved and reused.
Cleanup & Removal
Removing old plumber’s putty is straightforward because it never fully hardens.
For most surfaces, simply peel or scrape the putty away with a plastic putty knife or your fingernail. Avoid metal scrapers on porcelain or acrylic surfaces to prevent scratching. Any oily residue left behind can be cleaned with mineral spirits, rubbing alcohol, or a degreasing kitchen cleaner.
On natural stone countertops, old putty residue may leave an oil stain. Apply a poultice of baking soda and water, cover with plastic wrap, and let it sit for 24 hours to draw out the oil. This is why stain-free putty formulations are recommended for stone surfaces.
Plumber’s Putty Alternatives
| Product | Best For | Permanent? | Stain Risk | Cost |
|---|---|---|---|---|
| Plumber’s putty | Drain flanges, faucet bases | No (removable) | Yes (on stone) | $3 – $7 |
| Silicone caulk | Tub/shower joints, stone surfaces | Semi-permanent | No | $4 – $8 |
| Teflon tape | Threaded pipe connections | No (removable) | No | $1 – $3 |
| Pipe joint compound | Metal threaded connections | Semi-permanent | Yes | $4 – $10 |
| Rubber gaskets | Pre-fitted fixture seals | No (removable) | No | Included with fixture |
| Stain-free putty | Marble, granite, plastic | No (removable) | No | $5 – $10 |
Common Mistakes to Avoid
These errors account for the majority of plumber’s putty failures.
- Using too little putty: A thin, incomplete ring won’t seal properly. Use a generous rope and let the excess squeeze out. You can always remove extra, but you can’t add more after the fixture is tightened.
- Applying to wet surfaces: Putty doesn’t adhere to wet surfaces. Always dry the area completely before applying.
- Using on stone countertops: Standard putty will stain marble, granite, and other porous stones. Use stain-free putty or silicone caulk instead.
- Confusing putty with caulk: Putty is for fixture-to-surface seals that may need to be removed later. Caulk is for permanent or semi-permanent joints like tub-to-wall seams.
- Using old, dried-out putty: If the putty crumbles instead of rolling smoothly, it’s too old. Fresh putty should be soft, oily, and pliable. A sealed container lasts years, but once exposed to air, putty dries within 6 to 12 months.
Best Plumber’s Putty Brands
| Brand | Size | Price | Stain-Free | Best For |
|---|---|---|---|---|
| Oatey | 14 oz | $4 – $6 | No (stain-free version available) | General use |
| Hercules | 14 oz | $5 – $7 | Yes (Sta-Put version) | Stone surfaces |
| Harvey’s | 14 oz | $3 – $5 | No | Budget option |
| Danco | 9 oz | $3 – $5 | No | Small projects |
| Rectorseal | 14 oz | $5 – $8 | Yes | Professional use |
Plumber’s Putty & Bathroom Flooring
When installing or repairing plumbing fixtures in bathrooms, the type of flooring matters for your putty choices.
If you’re working near tile flooring, standard putty is fine since glazed ceramic and porcelain are non-porous. However, if your bathroom features natural stone tiles, use stain-free putty exclusively. Even small drips of oil from standard putty can leave permanent marks on marble or travertine tile.
During toilet installations on vinyl flooring, plumber’s putty is sometimes used around the toilet base for a cosmetic seal. However, many professionals now prefer a thin bead of silicone caulk, which provides a cleaner finish and is less likely to discolor the vinyl over time. Always ensure the wax ring underneath provides the primary seal, not the putty or caulk around the base.
For laminate flooring in bathrooms, be especially cautious about water leaks around plumbing fixtures. A properly applied putty seal prevents water from seeping under the sink, where it can damage the laminate substrate. Check under-sink putty seals annually for signs of deterioration.
Frequently Asked Questions
How long does plumber’s putty take to dry?
Plumber’s putty never fully dries or hardens. That’s by design. It remains soft and pliable indefinitely, which allows for easy removal and reseating of fixtures. You can use the fixture immediately after applying putty; there’s no curing or drying time required.
Can plumber’s putty fix a leaky drain?
Yes, if the leak is occurring between the drain flange and the sink surface. Remove the drain, clean off the old putty, apply fresh putty, and reseat the drain. However, if the leak is at a threaded connection below the sink, putty won’t help. You’ll need Teflon tape or a new gasket.
Is plumber’s putty safe for PVC sinks?
Standard plumber’s putty can stain or soften some types of plastic. For PVC, acrylic, and composite sinks, use a stain-free or non-petroleum-based putty. Check the product label for “safe for plastics” or “stain-free” designations.
How long does plumber’s putty last?
A properly applied putty seal can last 10 to 15 years or more. Over time, the oils in the putty may dry out, causing the seal to deteriorate. If you notice water seeping around a drain or faucet base, removing the old putty and applying fresh putty is a simple fix.
Can I use plumber’s putty on a shower drain?
Yes, plumber’s putty works for shower drain flanges that sit on a tiled or fiberglass base. However, many modern shower drains come with rubber gaskets that replace the need for putty. Follow the manufacturer’s instructions for your specific drain model.
What’s the difference between plumber’s putty and silicone?
Plumber’s putty is non-hardening, removable, and designed for fixture-to-surface seals. Silicone caulk cures to a flexible rubber, is semi-permanent, and is used for joints and seams where long-term adhesion is needed. Putty is easier to work with and remove, while silicone provides a stronger, more durable seal.
Last updated: March 2026