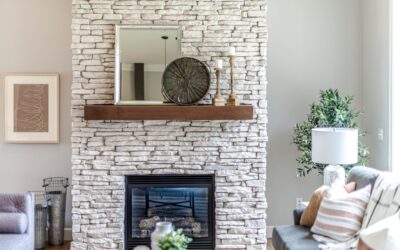
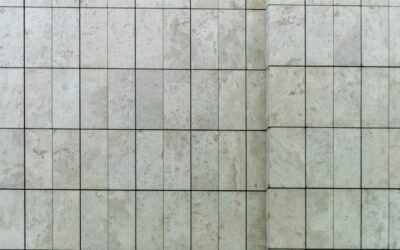
A porcelain fireplace surround has become one of the most popular ways to update a dated hearth, and for good reason. Large-format porcelain slabs and tiles resist heat, shrug off stains, and mimic marble, concrete, or wood at a fraction of the cost and maintenance. If you are planning to reface a fireplace, this guide covers what porcelain can and cannot do, along with real costs and installation details.
Part of our Tile & Grout guide — explore the full guide →
Homeowners love porcelain here because it delivers the luxury look of natural stone without the sealing, etching, and staining headaches. A porcelain fireplace can carry a seamless veined-marble appearance floor to ceiling, and it wipes clean with a damp cloth. Understanding the material and the code rules keeps your project both beautiful and safe.
Why Choose Porcelain for a Fireplace?
Porcelain is fired at temperatures above 2,200°F, which makes it extremely dense, hard, and dimensionally stable. That density gives it near-zero water absorption, under 0.5 percent, and outstanding resistance to scratching and heat. Around a fireplace, where soot, heat, and the occasional dropped log are facts of life, those traits matter.
Compared with natural marble, porcelain will not etch when something acidic touches it and never needs sealing. Compared with painted brick, it will not yellow or scorch. Large-format porcelain panels, some as big as 5 by 10 feet, also let you wrap a firebox with only a seam or two, giving that clean modern monolithic look that is so popular right now.
Is Porcelain Safe Around Heat?
Porcelain tile itself handles high heat well and is a common choice for fireplace facing. That said, tile is a facing material, not a firebox liner. The interior of a wood-burning firebox must be lined with rated firebrick and refractory mortar; porcelain goes on the surrounding face, mantel legs, and hearth extension.
Clearances still apply. Most codes require combustible mantels and trim to sit a minimum distance from the firebox opening, often 6 inches to the sides and 12 inches above for a standard opening, with more if the mantel projects outward. Porcelain and its cement backer board are noncombustible, but always confirm your fireplace manufacturer’s listed clearances and your local code before you build. For gas and electric units, follow the appliance manual to the letter.
Porcelain Tile Sizes and Formats
The format you pick drives both the look and the difficulty of the job. Larger pieces mean fewer grout lines but heavier, trickier handling.
- Standard field tile: 12 by 24 inches, easy to handle and widely available.
- Large-format tile: 24 by 48 inches, fewer seams, more dramatic.
- Gauged porcelain panels: up to 5 by 10 feet and only 6 to 12 mm thick, for a near-seamless slab look.
- Wood-look planks: 6 by 36 or 8 by 48 inches for a warmer stacked look.
Thin gauged panels give the highest-end result but demand special suction handling tools, a longer diamond blade, and real experience. For a first-time DIY reface, 12 by 24 inch tiles are far more forgiving.
What Does a Porcelain Fireplace Cost?
Material prices for quality porcelain tile run $4 to $15 per square foot, with premium marble-look and large-format panels reaching $20 to $30. A typical fireplace face and hearth covers 40 to 60 square feet, so figure $200 to $900 in tile for most projects.
Installed, expect to pay a tile setter $10 to $25 per square foot in labor, more for large panels that require two people and specialized tools. A complete professional reface of a standard fireplace commonly lands between $1,500 and $4,000. Going the DIY route on a small tiled surround can cut that to $400 to $900 in materials plus a weekend of your time.
How a Porcelain Fireplace Gets Installed
The process is methodical, and skipping steps around heat and clearances is asking for trouble. Here is the typical sequence a pro follows.
- Prep the substrate. Remove old facing and fasten cement backer board over the framing, taping and thin-setting the seams.
- Dry-lay the layout. Plan your tile so the most visible course is full and grout lines stay balanced around the firebox opening.
- Set the tile. Use a polymer-modified thin-set rated for large-format tile, combed with a 1/2-inch notch trowel, and back-butter big pieces for full coverage.
- Maintain clearances. Hold noncombustible facing tight but keep any wood mantel at code distance from the opening.
- Grout and seal joints. After 24 hours, grout with an unsanded or fine-sanded grout; porcelain itself needs no sealer, but grout benefits from one.
Full mortar coverage is critical on a fireplace face, since voids behind tile can trap heat and eventually crack a piece. Aim for 90 percent or better coverage on any heat-exposed area.
Design Ideas That Work
The floor-to-ceiling porcelain slab is the current favorite, wrapping the chimney breast in one uninterrupted stretch of marble-look veining. It reads as high-end stone but stays clean with zero maintenance. For a warmer feel, a stacked wood-look plank surround pairs well with a modern linear gas insert.
Keep the veining running vertically to emphasize height, or book-match two panels so the pattern mirrors across a seam for a dramatic centerpiece. Pair a bold porcelain face with a simple floating wood mantel and the fireplace becomes the anchor of the whole room without feeling busy.
Cleaning and Long-Term Care
Porcelain is about as low-maintenance as fireplace surrounds get. Wipe the face with a damp microfiber cloth and a mild pH-neutral cleaner; avoid abrasive pads on polished finishes. Soot near a wood-burning opening comes off with a little warm water and dish soap, and stubborn spots respond to a paste of baking soda and water.
Because porcelain does not absorb moisture or stain, you never have to seal the tile itself. Just keep the grout joints clean and reseal them every couple of years if they are near the firebox. Treated this way, a porcelain fireplace will look sharp for decades and outlast nearly any other surround material you could choose.
Porcelain Versus Other Fireplace Materials
It helps to weigh porcelain against the alternatives before you commit. Natural marble delivers unmatched depth and character but etches from anything acidic, needs sealing, and can cost two to three times as much installed. Painted brick is cheap and quick, yet it can scorch and yellow over time and reads as dated in many rooms. Cast concrete looks strikingly modern but is heavy, prone to hairline cracks, and porous unless sealed regularly.
Porcelain threads the needle. You get the marble, concrete, or wood look you want, none of the sealing chores, and excellent heat and stain resistance for a mid-range price. The one honest tradeoff is that very large gauged panels demand professional handling, so factor labor into the comparison if you want that seamless slab appearance rather than standard tile.
Common Mistakes to Avoid
A few errors trip up first-timers, and every one is preventable. Watch for these as you plan.
- Ignoring the appliance clearances and setting a wood mantel too close to the opening, which is both a code violation and a fire hazard.
- Skimping on mortar coverage behind heat-exposed tile, leaving voids that crack pieces once the firebox warms up.
- Using a standard thin-set instead of a large-format, polymer-modified mortar under big tiles or panels.
- Choosing a busy, high-variation tile that fights the rest of the room rather than anchoring it.
- Grouting the joint where the surround meets a hearth or mantel instead of using flexible caulk that allows for movement.
Take your time on layout and clearances, and the finished fireplace will look like it came straight from a design magazine while meeting every safety requirement.
Prefer to explore on your own?
See how new flooring looks in your actual room in seconds — free, no signup.
Try the free Floor Studio →