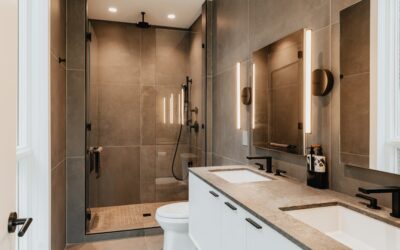
A prefab shower pan, also called a shower base, is a ready-made, factory-molded floor for your shower that arrives pre-sloped and waterproof, eliminating the hardest and most failure-prone part of a shower build: the mortar-bed pan and its hidden liner. For homeowners remodeling a bathroom, a prefab pan is often the smartest choice, offering a fraction of the labor, a lower risk of leaks, and a predictable result. Instead of trusting a tile setter to hand-slope a waterproof base, you drop in an engineered unit designed to drain perfectly the first time.
Part of our Bathroom Remodeling & Flooring guide — explore the full guide →
Prefab vs Custom Tile Pan
The alternative to a prefab pan is a site-built tile shower floor, where a professional builds up a sloped mortar bed over a rubber or hot-mopped liner, then tiles it with small mosaic tile that can follow the pitch. A custom tile pan looks seamless with the walls and allows any shape, but it is labor-intensive, expensive, and utterly dependent on the installer’s skill. A single flaw in the slope or liner leads to standing water or a hidden leak. A prefab pan trades the custom look for speed, lower cost, and engineered reliability, which is why it dominates the mid-market remodel.
Common Materials
Prefab pans come in several materials with distinct pros and cons.
- Acrylic: Lightweight, warm underfoot, easy to clean, and non-porous. Popular and affordable, though it can flex if not fully supported by a mortar bed underneath.
- Fiberglass (gelcoat): The cheapest option. Serviceable but prone to scratching, staining, and dulling over time.
- Solid surface / cultured marble: A dense, molded composite that feels solid, resists cracking, and offers a more upscale look. Heavier and pricier.
- Tileable foam pans (Schluter, Wedi, Tile Redi): A rigid, pre-sloped, pre-waterproofed foam base you tile over, blending the reliability of prefab slope with the custom look of tile. The best of both worlds for many remodels.
Standard Sizes and Drain Locations
Prefab pans come in a wide range of standard dimensions, from compact 32-by-32-inch corner units to generous 60-by-32 and 60-by-36 rectangles that replace a standard tub footprint. Larger 60-by-42 and neo-angle corner shapes are also common. Just as important as size is the drain location, which may be center, off-center, or at one end. You must match the pan’s drain position to your existing plumbing rough-in, or plan to relocate the drain. Always confirm the drain placement before ordering, because moving a drain in a slab or joist bay is a significant added job.
Cost Expectations
Prefab pans are budget-friendly. A basic fiberglass or acrylic pan runs $150 to $400. Solid-surface and cultured-marble pans cost $400 to $900. Tileable foam pans like Tile Redi or Schluter kits run $200 to $700 depending on size and whether the kit includes the drain and curb. Installation labor is modest compared with a custom tile pan, typically $300 to $600, since there is no mortar bed to build. All in, a prefab pan installation is often less than half the cost of an equivalent custom tile floor.
How a Prefab Pan Is Installed
The installation is straightforward but demands attention to a few critical details.
- Dry-fit the pan in the opening to confirm size, drain alignment, and level.
- Set the drain assembly according to the manufacturer’s instructions, connecting it to the waste pipe. Prefab pans use a specific drain type, so use the one specified.
- Bed the pan in mortar: Most acrylic and fiberglass pans require a full bed of thinset or deck-mud under the pan to support it and stop flexing. Skipping this is a top cause of cracked pans and squeaky floors.
- Set the pan into the mortar, pressing it level and checking that it drains toward the outlet.
- Fasten the flange to the studs where the pan has a nailing flange, then lap your wall waterproofing over it.
- Seal the drain connection and let everything cure before use.
Waterproofing the Transition
The most common leak point is where the pan meets the walls. The wall waterproofing, whether cement board with a liquid membrane, a sheet membrane, or the panel system, must overlap the pan’s upright flange so water running down the wall is directed into the pan, not behind it. The corner where the pan curb or flange meets the wall gets a bead of 100 percent silicone, never grout, because that joint flexes. Get this transition right and the pan will never leak; get it wrong and no pan quality will save you.
Common Mistakes
The biggest error is setting an acrylic or fiberglass pan without a supporting mortar bed, which leaves it to flex and eventually crack around the drain. Others include ordering the wrong drain location, failing to lap wall waterproofing over the pan flange, grouting the pan-to-wall joint instead of siliconing it, and not checking the pan for level in both directions. A pan that is level side to side but relies on its molded slope must still sit flat, or water pools in a corner.
When a Prefab Pan Is the Right Call
Choose a prefab pan when you want a reliable, cost-effective shower with a predictable timeline, when you are replacing a tub with a shower, or when you lack the skill or budget for a custom tile floor. Choose a custom tile pan only if you need an unusual shape, a fully seamless tiled look, or a curbless design, and you have a skilled installer. For the vast majority of bathroom remodels, a quality prefab or tileable foam pan delivers a leak-free shower with far less risk.
Curb vs Curbless Pans
Prefab pans come in curbed and curbless designs, and the choice affects both accessibility and installation. A curbed pan has a raised threshold at the entry that contains water, the traditional and easiest configuration to install and waterproof. A curbless or barrier-free pan sits flush with the bathroom floor for a seamless, walk-in look that is wheelchair accessible and increasingly popular for aging-in-place remodels. Curbless pans require the drain and slope to be recessed into the subfloor, which usually means dropping the joists or building up the surrounding floor, making them more involved and better suited to new construction or a full gut remodel. For a straightforward replacement, a curbed pan is simpler; for accessibility or a modern spa look, curbless is worth the extra work.
Matching the Pan to Your Walls
Coordinating the pan with your shower walls determines both looks and leak resistance. A tileable foam pan pairs naturally with a fully tiled shower for a custom, continuous appearance. An acrylic or solid-surface pan is often combined with matching acrylic wall panels for a fast, grout-free, easy-clean enclosure, or with tile walls if you carefully lap the waterproofing over the pan flange. When mixing an acrylic pan with tile walls, pay special attention to the transition, since the two materials expand differently and the joint must be siliconed, never grouted. Planning the wall and pan as a system, rather than buying them separately and hoping they meet cleanly, prevents the awkward gaps and leaks that plague mismatched combinations.
Lifespan and Maintenance
A quality prefab pan, properly bedded and sealed, lasts the life of the bathroom, but material choice affects durability and upkeep. Fiberglass pans scratch, stain, and dull the fastest and may need refinishing in 10 to 15 years. Acrylic resists staining better and cleans easily with non-abrasive cleaners, avoiding harsh scouring pads that scratch the surface. Solid-surface and cultured-marble pans are the most durable and can often be buffed to remove minor scratches. Across all types, keep the drain clear, re-caulk the pan-to-wall silicone joint every few years when it discolors, and avoid abrasive or bleach-heavy cleaners that degrade the finish. Simple routine care keeps a prefab pan looking new for decades.
A prefab shower pan removes the guesswork and the most common failure point from a shower remodel by giving you an engineered, pre-sloped, waterproof base ready to drop in. Match the size and drain location to your rough-in, bed the pan in mortar for full support, lap your wall waterproofing over the flange, and silicone the corners. Do that, and you will have a solid, leak-free shower floor at a fraction of the cost and effort of a custom tile pan.