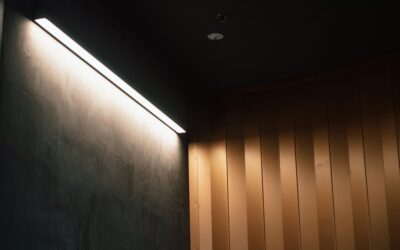
Falls on stairs send more people to the emergency room than almost any other spot in the house, and the riskiest moment is usually the trip down in the dark. Recessed stair lights fix that problem by putting low, glare-free light right where your feet go. Set into the wall beside the treads, they mark each step’s edge without blasting light into your eyes, and they double as a quiet night light for the whole hallway.
Part of our Stairs & Stair Flooring guide — explore the full guide →
Here is the short answer most homeowners want: for an indoor staircase, install one recessed step light every step or every other step, mounted on the side wall about 6 to 12 inches above the tread surface, wired to a switch, a three-way pair or a motion sensor. Use shallow boxes made for step lights, choose warm white LEDs around 2700K to 3000K, and keep brightness low enough that the light lands on the tread rather than on your eyes.
- Planning Recessed Stair Lights for an Indoor Staircase
- Every Step vs Every Other Step
- Mounting Height and Layout
- Fixture Types, Box Types and Light Output
- Switching and Sensor Options
- Step-by-Step Installation (Side Wall Retrofit)
- Trip Hazard and Safety Notes
- Troubleshooting
- Cost Ranges
- When to Call a Licensed Professional
- Recessed Stair Lights FAQ
Behind that summary sit a lot of practical decisions: spacing, fixture style, box type, switching and how to run wire into a finished wall. Each one is covered in turn, along with safety, troubleshooting and typical costs.
Planning Recessed Stair Lights for an Indoor Staircase
Before you buy anything, walk the stairs at night and notice where shadows fall. Most indoor staircases have one wall on at least one side, sometimes two. Recessed stair lights go on that wall, aimed down and across the tread. If both sides are open with balusters, wall-mounted step lights will not work and you would look instead at lights built into the risers or into the stringer.
The term “recessed stair lights indoor” covers two common placements:
- Side wall mounting: The fixture sits in the wall next to the stairs, a few inches above the tread line. This is the most common approach and the easiest to retrofit.
- Riser mounting: The fixture sits in the vertical face of each step. It looks sleek but requires cutting into the riser and running wire under the stairs, which is much easier during new construction or a full stair remodel.
Most retrofit projects choose side wall placement, so that is the focus here.
Every Step vs Every Other Step
The spacing choice shapes both the look and the budget.
One light per step
Placing a fixture at every step gives the most even light and the strongest visual rhythm. It is the right choice for steep stairs, households with older adults or small children, and stairs with dark treads that absorb light. The tradeoff is more fixtures, more holes and more wiring.
One light every other step
Spacing fixtures on alternating steps cuts the count roughly in half and still lights every tread because each light spills across two steps. It works well on standard-pitch stairs with light-colored treads. On a typical 13-step staircase, you might use six or seven fixtures this way.
Every third step or landings only
Wider spacing creates noticeable dark patches between lights. It can work on short runs or as purely decorative accent, but it does not provide the safety benefit most people want.
A good compromise for many homes: every other step on the straight run, plus an extra fixture at each landing and at the top and bottom steps, which are where most missteps happen.
Mounting Height and Layout
Mount recessed step lights so the bottom of the fixture sits roughly 6 to 12 inches above the tread nose line. Lower placement throws light flatter across the tread and reduces glare. Higher placement spreads light wider but becomes more visible as a bright spot when you walk down.
Keep every fixture at the same height relative to its tread. The easiest method is to measure up from each tread nose and mark the wall, then snap a line parallel to the stair pitch. Centering each light horizontally over its tread (or over the joint between two treads, if you go every other step) keeps the pattern tidy.
Watch for framing. A stud finder will show where studs sit behind the drywall, and the stair stringer often runs right behind the lower part of the wall. Shift fixtures an inch or two side to side if you need to clear a stud, but keep the height consistent.
Fixture Types, Box Types and Light Output
Recessed step lights come in a few shapes: square, rectangular horizontal, round and louvered. Louvered or hooded faceplates direct light downward and hide the light source, which cuts glare for people walking down. Open-face fixtures throw more light but are more visible.
For retrofit work, look for “recessed step lights” designed to fit a standard single-gang or shallow box. Common options include:
- Old-work boxes: Plastic boxes with swing-out tabs that clamp to drywall. These are the go-to choice for existing walls.
- New-work boxes: Nail or screw to a stud during new construction or when the wall is open.
- Fixture-specific housings: Some step lights ship with their own shallow housing that is thinner than a standard box. Follow the cutout template exactly.
- Remote-driver low-voltage units: Very small fixtures run on 12 or 24 volts from a single driver hidden in an accessible location. They need much smaller holes but require a driver sized to the total load.
Line-voltage fixtures run directly on household 120-volt power, each with its own built-in driver. Low-voltage systems step power down at a central driver, which makes wiring runs thinner but adds one more component to size and place. Either way, choose fixtures labeled for use in a wall cavity and, if your wall is insulated, rated for contact with insulation where relevant.
Brightness should be modest. Most indoor LED step lights produce roughly 20 to 100 lumens each, which is plenty. Choose warm white around 2700K to 3000K so the light feels calm at night. Dimmable fixtures add flexibility.
Switching and Sensor Options
How the lights turn on matters as much as where they go.
- Three-way switches: A switch at the top and bottom of the stairs is the traditional setup and works for every household.
- Motion or occupancy sensors: A sensor switch at each end turns the lights on as you approach and shuts them off after a set delay. This is popular for nighttime trips.
- Dusk-to-dawn or photocell control: Lights stay on at a low level after dark. Low-wattage LEDs make this inexpensive to run.
- Timer or smart dimmers: Program a dim level overnight and full brightness during the evening.
Check that any sensor or dimmer you pick is rated for LED loads and compatible with the fixtures’ drivers. Mismatched controls are the top cause of flicker and ghost glow.
Step-by-Step Installation (Side Wall Retrofit)
Tools and materials: stud finder, level, pencil, drywall saw or oscillating tool, old-work boxes, fish tape or glow rods, flexible drill bit, cable rated for in-wall use, wire connectors, wire strippers, a non-contact voltage tester and the fixtures themselves. If you plan this work yourself, first confirm a nearby circuit has capacity and that local rules allow homeowner wiring.
- Turn off the power. Turn off the breaker for the circuit you will tie into, then confirm power is off with a non-contact voltage tester at the box and wires before touching them.
- Mark fixture locations. Measure from each tread nose, mark the height and check for studs.
- Cut the openings. Trace the box template and cut carefully. Start with a small inspection hole to check for pipes, ducts or blocking.
- Run cable. Fish cable from the power source to the first fixture, then daisy-chain from fixture to fixture. A flexible bit helps drill through studs behind the drywall.
- Install the boxes. Feed cable into each old-work box and clamp the box into the drywall.
- Connect the fixtures. Match black to black, white to white and ground to ground, then fold the wires and fasten the fixture.
- Wire the switch or sensor. Follow the control’s diagram, especially for three-way setups.
- Restore power and test. Turn the breaker back on and check each fixture.
Low-voltage systems follow the same pattern, but the driver connects to line voltage and low-voltage cable runs to each fixture. Keep the driver accessible, never bury it in a closed wall.
Trip Hazard and Safety Notes
The whole point of stair lighting is fewer falls, so avoid creating new hazards. Keep the stairs clear during the project, and do not leave tools, scraps or cable on the treads. Use a step ladder with all four feet on a level surface (a stair-leveling ladder or platform is safer than balancing a standard ladder on steps). Once finished, check that no fixture creates glare that blinds people walking down; glare can be just as dangerous as darkness. If your stairs have runners or loose rugs at the top or bottom landing, make sure edges are flat and secured with non-slip backing so the new lighting is not hiding a trip point.
Troubleshooting
- Some lights work, others do not: With the breaker off and power confirmed off, check the connections at the last working fixture, since daisy-chained runs fail downstream of a loose splice.
- Flicker: Replace the dimmer or sensor with one rated for the fixture’s driver type, or check that a low-voltage driver is not overloaded.
- Glare: Swap to louvered faceplates, lower the brightness or lower the mounting height on future fixtures.
- Lights stay on with the sensor: Shorten the time delay or reposition the sensor so it does not see hallway traffic.
Cost Ranges
Basic LED step lights run roughly $20 to $60 each, with premium louvered or architectural fixtures from about $75 to $200 each. Boxes, cable and controls typically add a modest amount per fixture. Professional installation in an existing finished wall usually costs more per fixture than the light itself because of fishing wire and patching, with full staircase projects commonly reaching several hundred to a couple thousand dollars depending on fixture count and access.
When to Call a Licensed Professional
Hire a licensed electrician if you need a new circuit, if you are unsure which circuit to tap, if the wall contains plumbing or ductwork, or if your jurisdiction requires a permit for new wiring. New circuits and outlets are licensed-electrician work, and stairwells often need careful routing around framing and fire-blocking. A pro can also confirm that the circuit has capacity and that the switch and sensor wiring meets code.
Recessed Stair Lights FAQ
How far apart should recessed stair lights be?
Most staircases use one light per step for maximum safety or one every other step for a cleaner look. Keep the pattern consistent and add lights at the top step, bottom step and landings.
What height should step lights be mounted?
Mount them about 6 to 12 inches above the tread nose line. Lower placement throws light across the tread and reduces glare for people walking down.
Can I add recessed step lights to an existing wall?
Yes. Old-work boxes clamp into drywall, and wire can be fished through the wall cavity. Expect some patching where cable has to cross studs.
Are low-voltage step lights better?
They need smaller holes and thinner wiring, which helps in tight walls, but they require a properly sized driver in an accessible spot. Line-voltage fixtures are simpler to wire for most retrofits.
What color temperature is best for stair lights?
Warm white between 2700K and 3000K is the most comfortable at night and blends with most interior lighting.