Most homeowners assume the carpet itself makes or breaks a room, but residential carpet installation quality matters just as much as the fiber you choose. A $6 per square foot plush laid over cheap pad and stretched by hand will ripple and wear out years before a mid-grade carpet installed by a pro with a power stretcher. Getting the details right — subfloor prep, padding, seam placement, and stretch tension — is what separates carpet that looks new at year eight from carpet that buckles by year two. This guide walks you through the whole process so you know what to buy, what to expect, and where your money actually goes.
- What Residential Carpet Installation Actually Costs
- Choosing Carpet and Padding Together
- Preparing the Subfloor
- The Installation Process Step by Step
- Seams, Transitions, and Trouble Spots
- DIY Versus Hiring a Professional
- Preparing Your Home on Installation Day
- Making the Investment Last
- Common Mistakes to Avoid
What Residential Carpet Installation Actually Costs
Nationally, installed carpet runs roughly $3.50 to $11 per square foot including materials, pad, and labor. Labor alone typically lands between $0.50 and $1.50 per square foot on a straightforward job. For a standard 12-by-15-foot bedroom of about 180 square feet, budget $650 to $1,900 depending on the carpet grade you pick.
Several line items sneak onto quotes. Furniture moving adds $25 to $75 per room. Tearing out and hauling old carpet runs $1 to $1.50 per square yard. Stairs are billed per step, usually $5 to $12 each, because they demand precise cutting and tucking. If your installer has to reseal a subfloor or add plywood, expect an extra $1 to $3 per square foot. Always ask for an itemized bid so you can compare apples to apples between contractors.
Choosing Carpet and Padding Together
Fiber drives durability. Nylon is the workhorse — resilient, stain-resistant when treated, and ideal for stairs and hallways. Polyester (PET) feels soft and resists fading but crushes faster underfoot. Triexta blends softness with better resilience than standard polyester. Olefin (polypropylene) belongs in basements and low-traffic rooms where moisture resistance beats bounce-back.
Padding is not the place to cut corners. A 7/16-inch pad at 6- to 8-pound density suits most living areas; bedrooms can go slightly softer, but stairs and high-traffic zones need firmer 8-pound pad to prevent premature wear. Cheap 1/2-inch foam feels luxurious in the showroom yet flexes so much it fatigues the carpet backing. Match the pad to the carpet warranty requirements, because installing the wrong thickness can void coverage.
Preparing the Subfloor
Skipping prep is the fastest way to ruin a good carpet job. Every squeak, hump, and loose board telegraphs straight through the finished floor. Walk the room and screw down any subfloor panels that flex or creak, driving screws into the joists rather than just the sheathing.
Concrete slabs need a moisture check. Tape a two-foot square of plastic sheeting to the slab for 24 hours; condensation underneath means you have a vapor problem that will breed mold under carpet. Level low spots with patching compound and grind down high ridges. Finally, install fresh tack strips around the perimeter, keeping them about a gap-width — roughly the carpet’s thickness, or 1/4 to 3/8 inch — off the wall so edges tuck cleanly.
The Installation Process Step by Step
Professional crews follow a predictable sequence, and understanding it helps you spot corners being cut.
- Lay the pad. Staple or glue padding to the subfloor, seams butted tight and taped, trimmed flush to the inside edge of the tack strips.
- Rough-cut the carpet. Installers roll out the carpet, orienting the pile direction consistently and leaving a few inches of excess on each wall.
- Seam the sections. Where two pieces meet, they use hot-melt seam tape and a seam iron, then roll the joint to bond the backing.
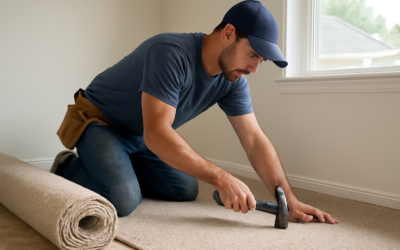
- Power-stretch. A power stretcher pulls the carpet drum-tight across the room and hooks it onto the tack strips — this is the single most important step.
- Trim and tuck. Excess is cut at the wall and tucked into the gap with a stair tool for a clean finished edge.
Watch for one shortcut in particular: installers who rely only on a knee kicker and skip the power stretcher. A knee kicker sets small areas, but it cannot deliver the tension a full room needs. Carpet stretched by hand almost always ripples within a year or two.
Seams, Transitions, and Trouble Spots
Seam placement is an art. A good installer runs seams away from high-traffic paths and perpendicular to the main window so daylight does not highlight the joint. In a bedroom, that usually means the seam falls under the bed rather than across the doorway.
Transitions to hard flooring get a metal or wood threshold strip sized to the height difference. Doorways, closets, and register cuts all take extra time, which is why a room full of angles costs more per square foot than a simple rectangle. If you have a staircase, confirm whether your installer does a waterfall wrap or an upholstered (French cap) finish, since the tailored look adds labor.
DIY Versus Hiring a Professional
Installing your own carpet can save $0.50 to $1.50 per square foot, but the tool list is real: a power stretcher, knee kicker, seam iron, carpet knife, and stair tool. Renting the stretcher and iron runs about $40 to $60 a day. For a single closet or a basic rectangular room, a patient DIYer can manage.
Full rooms with seams, stairs, or transitions are where amateurs struggle. A botched seam shows forever, and under-stretched carpet wastes the money you spent on the material. If your carpet carries a wear or texture-retention warranty, check the fine print — many manufacturers require professional installation for the coverage to hold. When in doubt, hiring out a residential carpet installation is cheap insurance against a floor you will stare at every day.
Preparing Your Home on Installation Day
Clear the rooms yourself if you can, since installer furniture moving is billed by the piece and does not include disconnecting electronics or emptying dressers. Pull items off closet floors and take down anything hanging at baseboard height.
Plan for ventilation. New carpet and pad off-gas a mild odor for the first 48 to 72 hours; open windows and run a fan to clear it faster. Keep kids and pets out of the work zone, because loose tack strips and utility knives make it hazardous. After the crew leaves, vacuum lightly to lift crushed pile and pick up stray fibers, and hold off on heavy furniture for a day so fresh seams fully cure.
Making the Investment Last
Once the job is done, a few habits protect it. Vacuum high-traffic lanes twice a week and the whole floor weekly to keep grit from grinding the fibers. Rotate area rugs and rearrange furniture occasionally so wear spreads evenly. Blot spills immediately instead of rubbing, and schedule a professional hot-water extraction every 12 to 18 months to keep any warranty valid.
Keep the leftover scraps, too. A remnant the size of a doormat lets you patch a burn or a pet-damaged spot years later with carpet that matches perfectly, since dye lots drift over time. Label the scrap with the room name and store it flat in a dry closet.
Common Mistakes to Avoid
A few recurring errors sink otherwise good jobs. Buying carpet on price alone leads homeowners to pair a decent carpet with bargain pad, which fails first. Skipping the moisture test on a slab invites mold. And accepting a bid that does not specify a power stretcher almost guarantees ripples down the road.
Ask every installer three questions before you sign: Do you power-stretch every room? Where will the seams fall? And what pad density do you include? Clear answers signal a pro who will do it right the first time.
Done well, a quality residential carpet installation delivers 8 to 15 years of comfort, and the difference between a floor that lasts and one that fails almost always comes down to the prep, the pad, and the stretch — not the price tag on the roll. Spend your attention there, and the carpet will reward you every time you walk across it.