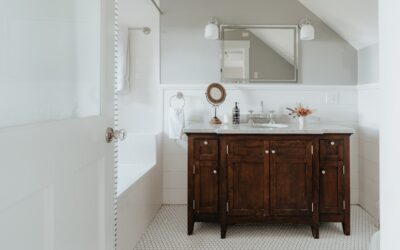
A worn, dated, or stained counter doesn’t automatically mean a demo and a new slab. Resurfacing bathroom vanity top surfaces is a legitimate weekend project that can take a chipped cultured-marble counter or a tired laminate top and make it look new for a fraction of replacement cost. I’ve refinished countless counters this way, and when the prep is done right, the results hold up for years. The catch is that resurfacing rewards patience, because every shortcut in the prep stage shows through in the finish. Here’s the full process, the products that actually work, and what it costs.
Part of our Bathroom Remodeling & Flooring guide — explore the full guide →
- When Resurfacing Makes Sense
- Products That Actually Hold Up
- Tools and Materials Checklist
- Step 1: Clean and Degrease
- Step 2: Sand for Adhesion
- Step 3: Prime, Base Coat, and Build
- Step 4: Clear Topcoat and Cure
- Handling the Sink and Backsplash
- Color and Finish Options
- Caring for a Refinished Top
- Cost, Durability, and Realistic Expectations
When Resurfacing Makes Sense
Resurfacing works best when the counter’s substrate is sound but the surface is ugly. If your cultured marble, laminate, or ceramic top is structurally solid but stained, dated in color, or lightly chipped, it’s a great candidate.
It’s the wrong call if the top is cracked through, if the substrate is water-damaged and soft, or if the sink area is spongy from a long-term leak. No coating fixes a rotten base. It’s also not a fit if you want a natural stone look with real depth, since a coating is a surface film, not a slab. But for a $30 to $150 kit versus $300 to $900 for a new top plus plumbing disconnection, resurfacing is a smart middle path when the bones are good.
Products That Actually Hold Up
Your finish is only as good as your product. Bathroom counters get water, toothpaste, and abrasion, so you want a coating rated for wet, high-contact surfaces.
- Two-part epoxy countertop kits: Products like Rust-Oleum’s countertop coatings or Stone Coat epoxy give a hard, water-resistant, stone-look finish. Best durability.
- Acrylic urethane refinishing kits: Spray or roll-on systems marketed for tubs and counters. Faster but thinner.
- Multi-step decorative kits: Base coat plus mineral flakes plus clear topcoat that mimic granite. More involved, more realistic.
For a bathroom vanity that sees daily water, I lean toward a two-part epoxy or a true countertop-rated system with a dedicated clear topcoat. Skip generic spray paint and general-purpose enamels; they will not survive standing water at the sink.
Tools and Materials Checklist
Gather everything before you start, because once the epoxy is mixed you’re on the clock. You’ll want 120 and 220 grit sandpaper, a sanding block or orbital sander, painter’s tape, plastic sheeting, a good degreaser like TSP substitute, tack cloths, foam rollers, chip brushes, nitrile gloves, and a respirator rated for organic vapors.
Don’t cheap out on the respirator or ventilation. Epoxy and urethane fumes are no joke in a small, enclosed bathroom. Open a window, run a fan, and wear the mask. Cover the floor and the cabinet with plastic, because drips will happen and cured epoxy is nearly impossible to remove cleanly.
Step 1: Clean and Degrease
Everything starts with a spotless surface. Years of soap scum, hairspray residue, and body oils sit invisibly on a bathroom counter, and any of it will keep the coating from bonding.
Scrub the entire top with a strong degreaser, rinse thoroughly, and let it dry. Then wipe it again with denatured alcohol to pull off any remaining film. This step feels tedious, but adhesion failure almost always traces back to a contaminated surface. If water beads on the counter, there’s still oil there, so keep cleaning until it sheets.
Step 2: Sand for Adhesion
Coatings need tooth to grip. Scuff the entire surface with 120 grit to knock off the factory sheen, then follow with 220 grit to even it out. You’re not trying to remove material, just dull the gloss so the primer or base coat can bite.
Pay special attention to any glossy cultured-marble or ceramic top, since those slick surfaces are the ones that most often reject a coating. After sanding, vacuum the dust and wipe the whole area with a tack cloth. A single overlooked glossy spot will show as a fisheye or a peel point later, so sand every square inch.
Step 3: Prime, Base Coat, and Build
Follow your kit’s sequence exactly, because cure windows matter. Most systems start with a bonding primer or a tinted base coat. Apply it thin and even with a foam roller, tipping off bubbles with a light pass of a brush.
If you’re doing a decorative stone-look finish, this is where you sponge or broadcast the accent colors and flakes to build depth. Work in thin layers rather than one heavy coat; thick coats sag and take forever to cure. Respect the recoat window listed on the can. Recoat too soon and you trap solvent; wait too long past the window and you may need to scuff between coats for the next layer to bond.
Step 4: Clear Topcoat and Cure
The clear topcoat is what makes the counter waterproof and washable, so don’t skimp. Flow the two-part clear epoxy on evenly and let it self-level, popping any bubbles with a quick pass of a heat gun or a small propane torch held well back from the surface.
Then leave it alone. Full cure is the step people rush and regret. Most epoxy topcoats are dry to the touch in a day but need 3 to 7 days to fully harden before heavy use. Keep water off it, don’t set anything on it, and resist reconnecting the faucet until the surface is rock hard. Rushing the cure is the single most common way these projects fail.
Handling the Sink and Backsplash
The sink area is where most refinishing jobs get tricky, and you have a decision to make before you start. If your vanity has an integrated cultured-marble bowl, you can coat right over the whole top and bowl, but the basin sees the most water and abrasion, so it’s the first place a coating wears.
For a drop-in sink, you can either remove it and coat the top cleanly, or mask around it carefully and coat up to the rim. Removing the sink gives a far better result, so disconnect the P-trap and supply lines, lift the sink, and coat the full top. Mask the faucet holes and any hardware you’re keeping. Don’t forget the backsplash if it’s part of the same molded top; coat it in the same passes so the color matches. Tape a crisp line where the counter meets the wall or the sink so you get a clean edge rather than a ragged, built-up ridge of epoxy. Reinstall the sink only after the topcoat has fully cured.
Color and Finish Options
Modern refinishing kits go well beyond flat white, and the look you choose changes both the effort and the result. Understanding your options helps you match the counter to the rest of the bathroom.
- Solid color: The simplest, a uniform white, gray, or beige. Fastest to apply and easiest to keep even.
- Faux stone with flakes: Base coat plus broadcast mineral flakes and a clear topcoat, mimicking granite or quartz. More realistic, more steps.
- Metallic epoxy: Swirled metallic pigments for a marble-like movement. Striking but requires practice to control.
Practice your technique on a scrap board or the underside of a drawer before committing to the visible top. Flake and metallic finishes reward a test run, because the timing of when you broadcast flakes or swirl pigment affects the final look. A solid color is the safest bet for a first-timer, and it still transforms a dated top.
Caring for a Refinished Top
A resurfaced counter lasts far longer when you treat it like the coated surface it is. The finish is durable, but it’s a film, so a few habits keep it looking new for years.
Skip abrasive cleaners and scouring pads, which scratch and dull the topcoat; use a soft cloth and a mild, non-abrasive cleaner instead. Blot spills promptly, especially anything acidic or staining, and don’t let water pool around the faucet base for long stretches. Avoid setting hot tools like a curling iron directly on the surface, since heat can soften some coatings. Use a tray under bottles and containers to prevent ring marks. If a spot ever chips or wears near the sink after several years, you can scuff and spot-recoat that area rather than redoing the whole top. Treat it gently and a refinished vanity top holds up beautifully for the better part of a decade.
Cost, Durability, and Realistic Expectations
A DIY refinish runs $30 to $150 in materials for a single vanity, versus $300 to $900 for a replacement top with a new sink and plumbing labor. Professional refinishing sits in between at $250 to $500. That’s a real savings if your substrate is sound.
Set expectations honestly. A resurfaced top is durable but not indestructible; it’s a coating, so it can chip if you drop a heavy bottle on an edge, and it won’t tolerate abrasive cleaners. Treat it like a painted finish: no scouring powder, blot spills, and it’ll look great for five to ten years. Done with careful prep, resurfacing bathroom vanity top surfaces gives you a like-new counter for the price of a nice dinner out, and it’s one of the highest-return weekend projects in the whole bathroom.