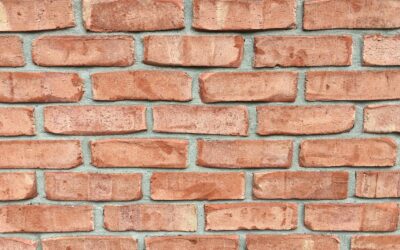
Most people who measure a Roman brick for the first time think the supplier shipped the wrong product. Roman brick dimensions are quoted as 4 x 2 x 12 inches, yet the unit in your hand measures about 3-5/8 inches deep, 1-5/8 inches tall and 11-5/8 inches long. Nothing is wrong. The quoted figure is the nominal size, which includes a standard 3/8 inch mortar joint, while the measured figure is the actual (or specified) size of the fired brick itself.
That long, thin profile is what makes Roman brick so distinctive. Each unit is roughly six times longer than it is tall, so a wall built from it reads as strong horizontal bands rather than the familiar stacked grid of a standard modular brick. Mid-century ranch houses, Prairie-style homes and a lot of current modern builds use it for exactly that reason.
- Roman Brick Dimensions at a Glance
- Nominal vs Actual Size: Why the Numbers Differ
- How Many Roman Bricks Per Square Foot?
- Where the Long, Thin Roman Look Works Best
- Tools and Materials for Laying Roman Brick
- Laying Out a Roman Brick Wall Step by Step
- Troubleshooting Common Roman Brick Problems
- Roman Brick Cost Considerations
- When to Call a Mason
- Frequently Asked Questions
If you are matching existing masonry, planning a fireplace surround or estimating material for a new veneer wall, you need both numbers. The nominal size tells you how the wall lays out on a grid. The actual size tells you what will fit, what to order and how to blend with old work.
Roman Brick Dimensions at a Glance
Here is how Roman brick compares with the other formats you will see in most brick yards. All actual sizes assume a 3/8 inch mortar joint, which is the industry standard for modular layouts. Individual manufacturers vary slightly, so treat these as typical values and confirm against the product sheet before you order.
| Format | Nominal size (D x H x L, in) | Typical actual size (D x H x L, in) | Vertical coursing | Bricks per sq ft (approx.) |
|---|---|---|---|---|
| Roman | 4 x 2 x 12 | 3-5/8 x 1-5/8 x 11-5/8 | 3 courses = 6 in (1 course = 2 in) | 6.0 |
| Modular | 4 x 2-2/3 x 8 | 3-5/8 x 2-1/4 x 7-5/8 | 3 courses = 8 in | 6.75 |
| Norman | 4 x 2-2/3 x 12 | 3-5/8 x 2-1/4 x 11-5/8 | 3 courses = 8 in | 4.5 |
| Engineer modular | 4 x 3-1/5 x 8 | 3-5/8 x 2-3/4 x 7-5/8 | 5 courses = 16 in | 5.6 |
| Queen (non-modular) | Not on the 4 in grid | about 2-3/4 to 3 x 2-3/4 x 7-5/8 to 8 | 5 courses = 16 in | about 5.5 |
| Utility | 4 x 4 x 12 | 3-5/8 x 3-5/8 x 11-5/8 | 1 course = 4 in | 3.0 |
The pattern is easy to spot. Roman and Norman share the same length, so they line up at corners and openings. Roman and modular share the same bed depth, so they sit on the same footing ledge or shelf angle. What sets the Roman format apart is the short 2 inch course, which gives you more horizontal lines per foot of wall than any other common size.
Nominal vs Actual Size: Why the Numbers Differ
Brick sizing is built around a 4 inch module. Designers lay out walls, openings and corners in multiples of 4 inches, and the nominal brick size is chosen so that brick plus one mortar joint lands on that grid. Subtract the 3/8 inch joint from each nominal dimension and you get the specified size the brick plant aims to produce.
For a Roman brick that works out cleanly:
- Depth: 4 in nominal minus 3/8 in joint = 3-5/8 in actual
- Height: 2 in nominal minus 3/8 in joint = 1-5/8 in actual
- Length: 12 in nominal minus 3/8 in joint = 11-5/8 in actual
Fired clay shrinks in the kiln, so every batch comes out with small size variations. Industry standards allow a tolerance on each dimension, which is why two pallets of the same product can differ by a sixteenth or so. When you are tying into an older wall, measure several bricks and average them rather than trusting one sample.
Some older and specialty Roman brick does not follow the modular math at all. You will occasionally find units around 1-1/2 inches tall or up to 15-5/8 inches long, especially in reclaimed brick or architectural lines. If the existing wall uses one of those, standard Roman brick dimensions will not help much, and you will need to source by measured size.
How Many Roman Bricks Per Square Foot?
Estimating starts with Roman brick dimensions on the face of the wall. With nominal dimensions of 2 x 12 inches on the face, each Roman brick covers 24 square inches of wall. A square foot is 144 square inches, so you need 6 bricks per square foot before waste. That is slightly fewer bricks than modular (6.75) but more than Norman (4.5), because Norman uses the same 12 inch length with a taller course.
A practical way to estimate:
- Measure the wall area in square feet (height times width).
- Subtract windows and doors larger than about 2 square feet.
- Multiply the net area by 6 for Roman brick.
- Add 5 to 10 percent for cuts, breakage and color blending. Go toward 10 percent on walls with many openings or corners.
For a 10 by 8 foot fireplace wall with no openings, that is 80 square feet times 6, or 480 bricks, plus roughly 25 to 50 extra. Mortar consumption is a little higher per square foot than modular because the thin units create more bed joint length per foot of height.
Where the Long, Thin Roman Look Works Best
The format earns its keep wherever you want a wall to feel low, long and calm. A few places it tends to show up:
- Fireplace surrounds and hearth walls. The fine horizontal lines make a chimney breast look wider and more architectural than the same area in modular.
- Mid-century and ranch exteriors. Many houses from the 1950s and 1960s used Roman or Roman-proportioned brick to emphasize long rooflines.
- Prairie-style and modern homes. Designers often pair it with raked (recessed) horizontal joints and flush or tinted head joints to push the horizontal effect further.
- Garden walls, planters and low site walls. The thin course gives fine control over wall height, which helps when you are stepping a wall down a slope.
- Interior accent walls using thin brick. Thin veneer versions cut to Roman proportions give you the same look at a fraction of the weight.
Because there are more joints per foot of height, mortar color has a bigger influence on the finished wall than it does with larger brick. A mortar close to the brick color makes the wall read as a solid band; a contrasting mortar makes the lines pop. Try a small sample panel before you commit.
Tools and Materials for Laying Roman Brick
The tool list is the same as for any brick veneer, but a couple of items matter more with this format.
- Brick trowel and pointing trowel
- Mason’s line, line blocks and line pins
- Story pole marked in 2 inch increments (or a modular rule set to the Roman course)
- 4 foot level and a straightedge
- Brick jointer tool sized for the joint profile you want (a slim jointer suits the narrow courses)
- Masonry saw or angle grinder with a diamond blade, used wet
- Type N or Type S mortar, as the project calls for
- Wall ties and flashing for veneer over framing
A sharp, narrow jointer is the one item worth upgrading. Roman joints are visible in large numbers, and inconsistent tooling shows far more than it would on a modular wall. Strike joints when the mortar is thumbprint hard and keep the same tool angle on every course.
Laying Out a Roman Brick Wall Step by Step
- Confirm the actual size. Measure several bricks from the delivery for height, length and depth. Note any batch differences.
- Mark the story pole. For true modular Roman, mark every 2 inches. Check that your target heights (window sills, lintels, top of wall) land on a course line, and adjust joint thickness slightly if needed.
- Dry lay the first course. Set bricks along the base with 3/8 inch spacers to check how the length works out at corners and openings. Plan cuts so they land in the middle of a run, not at a corner.
- Set the leads. Build corners several courses high first, checking plumb and level often. Long units can rock on an uneven bed, so keep the bed joint full and consistent.
- Run the line and fill in. Stretch the mason’s line between leads and lay the field brick to it, one course at a time. A running bond with half overlaps is typical and suits the long unit.
- Tool the joints. Use the jointer on bed joints first, then head joints, then brush off crumbs once the mortar has firmed up.
- Clean and cure. Remove smears with a stiff brush. Follow the brick maker’s guidance for any masonry cleaner, and keep fresh work protected from rain and freezing for the first few days.
Troubleshooting Common Roman Brick Problems
New brick does not line up with the old wall
Older Roman brick may be slightly taller, shorter or longer than current stock. Adjust the joint width a little to make up the difference over several courses, rather than all at once. If the mismatch is more than about 1/8 inch per brick, look for a reclaimed source or a custom size.
Wall looks wavy along the courses
Thin units show every high and low spot. Keep the line tight, check level every few courses and avoid overfilling the bed joint on one end of a brick.
Cracked or chipped units after cutting
Long, slim brick is more fragile under a dry blade. Wet cutting with a sharp diamond blade gives cleaner edges and keeps silica dust down. Wear eye protection and a dust mask rated for masonry dust.
Joints look uneven in color
Mix mortar in consistent batches and tool at the same stage of set. Joints tooled too early can smear; joints tooled too late turn lighter and rougher.
Roman Brick Cost Considerations
Roman brick usually costs more per unit than standard modular because fewer plants make it and it is often sold as a specialty or architectural product. Because you need about 6 bricks per square foot, material cost per square foot tends to land a little above a comparable modular brick. Labor is often higher as well, since there are more courses per foot of height and more joints to tool. Thin brick versions cost less in structure and labor but more per square foot than many full-depth common bricks. Get quotes from local suppliers and masons, as prices swing widely by region and product line.
When to Call a Mason
Small garden walls and interior thin brick accents are reasonable DIY projects. Call an experienced mason for full-height exterior veneer, anything that needs a new footing or shelf angle, structural walls, chimneys and fireplaces, and any job where you need to match an existing historic wall. A pro can also advise on wall ties, flashing and weep holes, which are what keep veneer from trapping water behind it.
Frequently Asked Questions
What size is a Roman brick?
A Roman brick is nominally 4 x 2 x 12 inches. Its typical actual size is about 3-5/8 inches deep, 1-5/8 inches tall and 11-5/8 inches long, with a 3/8 inch mortar joint making up the difference.
How tall is one course of Roman brick?
One course of modular Roman brick is 2 inches tall including the mortar joint, so three courses equal 6 inches and six courses equal 1 foot.
Is Roman brick the same as Norman brick?
No. Both are 12 inches long nominally, but Norman brick is taller at about 2-1/4 inches actual height, so three courses equal 8 inches. Roman brick is thinner and creates more horizontal lines.
How many Roman bricks do I need per square foot?
Plan on about 6 Roman bricks per square foot of wall, then add 5 to 10 percent for cuts and breakage.
Can I use Roman brick for a fireplace?
Yes, Roman brick is a popular fireplace surround choice. Any brick inside the firebox must be rated for that heat, and the fireplace work should follow local code, so have a qualified mason or chimney pro handle it.