Most roof leaks that show up as a stain on an upstairs ceiling never started in the middle of the shingles. They start where a sloped roof runs into a vertical wall, because that joint has to shed water from two directions at once. Good roof to wall flashing handles that joint with layered metal pieces that overlap like shingles, so water always flows down and out instead of in and behind.
Part of our Roofing guide — explore the full guide →
There are two basic conditions. A sidewall is where the roof slope runs alongside a wall, such as a dormer cheek or a garage roof tied into a two-story house; it gets individual step flashing pieces woven into every shingle course. A headwall (also called an endwall) is where the top edge of a roof slope dies into a wall, such as a porch roof meeting the house; it gets one continuous apron flashing. Both conditions need the wall’s water barrier lapped over the flashing and the siding held up off the roof surface.
If you understand those three ideas (step versus apron, lapping order, and siding clearance), you can inspect any roof to wall joint and spot the mistake that is letting water in.
How Roof to Wall Flashing Works at Sidewalls and Headwalls
Water moves by gravity and by capillary action, and wind can push it uphill a few inches. Flashing beats all three by creating overlaps that face downhill and by giving every vertical leg enough height that wind-driven rain cannot climb over it. On a typical asphalt shingle roof, the vertical leg of a flashing piece runs at least 4 inches up the wall, and the horizontal leg extends at least 4 inches onto the roof deck.
Sidewall step flashing
Step flashing is a series of small bent pieces, usually about 8 to 10 inches long with 4 by 4 or 5 by 5 inch legs. One piece goes with each shingle course. You set a shingle, lay a step flashing piece on top of it tight to the wall, nail it only through the top corner of the roof leg, then set the next shingle over it. Each piece overlaps the one below by at least 2 inches. Because every piece is tucked under the shingle above and over the shingle below, water that hits the wall drops onto a piece of metal that dumps it onto the shingle surface.
Continuous L-shaped metal run along a sidewall is a common shortcut and a common failure. Any water that gets under it travels straight down the channel and pours out at the bottom, usually right behind the siding or into the eave.
Headwall apron flashing
At a headwall, the last shingle course stops at the wall. A single continuous apron flashing (sometimes several long pieces lapped 4 to 6 inches) laps over that top course and turns up the wall. Since water runs straight down the roof away from the wall, there is no need to weave pieces. The apron simply covers the joint and directs water onto the shingles.
Counter flashing and the wall side
Counter flashing is the piece that covers the top of the vertical leg so water running down the wall cannot get behind it. On masonry, it is a separate metal strip set into a mortar joint or reglet. On framed walls with lap siding, stucco or panels, the housewrap and siding do the counter flashing job, which is why the lapping order matters so much. Many people searching for counter flashing roof to wall details are dealing with brick or stucco, where a separate cap is required.
Tools and Materials
- Pre-bent step flashing pieces (aluminum or galvanized steel are standard; copper for copper roofs)
- Apron or end wall flashing in 10-foot lengths, or a metal brake to bend your own from coil stock
- Kickout flashing (diverter) for the bottom of each sidewall that ends above an eave
- Self-adhered ice and water membrane for the wall-roof corner
- Housewrap tape compatible with your water-resistive barrier
- Roofing nails, tin snips, flat bar, utility knife, chalk line and a tape measure
- Exterior sealant rated for metal and roofing (for counter flashing reglets only, not as a substitute for laps)
For most asphalt shingle roofs, aluminum step flashing in a bundle of pre-bent pieces is the easiest choice: it cuts with snips, will not rust and is inexpensive. Avoid aluminum in contact with fresh pressure-treated lumber or wet masonry without a separator, and never mix copper with aluminum or galvanized steel, since dissimilar metals corrode each other.
Step-by-Step Installation
- Open the wall. Remove the lowest course or two of siding along the joint, or install flashing before siding on new construction. You need access to the housewrap and sheathing at least 6 to 8 inches above the roof.
- Underlayment and membrane. Run roofing underlayment up the wall a few inches. In the corner, add a strip of self-adhered membrane that covers about 4 inches of deck and 4 to 6 inches of wall. This is your backup layer.
- Kickout first. Where a sidewall ends above a lower roof edge or gutter, install a kickout flashing at the bottom so water running down the step flashing gets thrown into the gutter instead of down the wall. Missing kickouts are one of the most common causes of rotted sheathing below a roof to wall joint.
- Weave step flashing. Starting at the bottom, install a starter piece, then a shingle, then a step flashing piece, then the next shingle. Fasten each piece with one nail high on the roof leg, never into the wall leg. The roof and wall move separately, and nailing both sides tears the metal over time.
- Apron at the headwall. Cut the top shingle course, set the apron over it, and fasten through the top edge into the wall framing area above the roof plane, or through the roof leg where the next layer will cover it. Lap joints between apron pieces 4 inches minimum.
- Lap the housewrap over the flashing. The water barrier on the wall must come down over the vertical legs of the step and apron flashing. Cut the housewrap if needed, slip the flashing behind the upper layer, and tape the horizontal cut. Water running down the wall face must land on the outside of the metal, never behind it.
- Set siding with clearance. Reinstall siding so its bottom edge stays 1 to 2 inches above the roof surface. This gap keeps siding from wicking water, lets you replace shingles later and prevents debris dams. Fiber cement and wood need the gap the most.
- Counter flash masonry. On brick, cut a reglet into a mortar joint about 1 inch deep, insert the bent counter flashing, wedge it and seal the joint. Stepped counter flashing follows mortar lines along a sloped wall.
Common Mistakes and Troubleshooting
When a leak appears near a wall, trace the path before you buy materials. Water stains often show up several feet away from the actual entry point because water runs along rafters and the top of drywall before it drips.
- Stain below the bottom of a sidewall: look for a missing or undersized kickout. Rot at the sheathing corner is the giveaway.
- Stain at a headwall: check whether the housewrap sits behind the apron instead of over it, or whether the apron vertical leg is shorter than 4 inches.
- Caulk-only joints: a bead of sealant where shingles meet siding is not flashing. It fails within a few seasons of sun and movement.
- Siding touching shingles: trim siding back to proper clearance and seal cut ends with paint or primer.
- Rusted or split pieces: galvanized step flashing reused through two reroofs often rusts at the bend. Replace it during the next tear-off.
- Brick with face-sealed counter flashing: a strip of metal glued onto the brick face with sealant will leak. It needs to be let into a joint.
Repairs to existing step flashing usually mean lifting shingles along the wall and removing siding, which is why many roofers replace all wall flashing during a reroof rather than reusing it. Reusing old step flashing saves very little and leaves the most leak-prone joint as the weakest part of a new roof.
Cost Ranges
Materials are cheap compared with labor. Pre-bent aluminum step flashing usually runs well under a dollar a piece in bundles, and apron stock is a modest cost per 10-foot length. Professional repair of a single sidewall typically lands in the low to mid hundreds of dollars, rising when siding must be removed and reinstalled or when rotted sheathing has to be replaced. Masonry counter flashing with a cut reglet costs more because it takes masonry tools and time. Folding new roof to wall flashing into a full reroof adds relatively little per linear foot and is the most cost-effective time to fix it.
Safety on the Roof
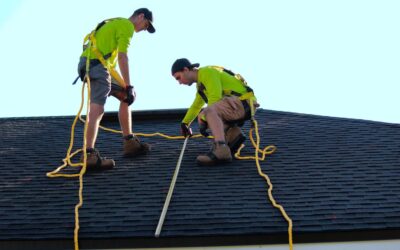
Wall joints are often at the high point of a lower roof, which means you are working near an edge with your attention on the wall. Use a ladder rated for your weight plus tools, set it at a 4-to-1 angle on firm, level ground, extend it 3 feet above the roof edge and tie it off. Wear soft-soled shoes with good grip, avoid working on wet, frosty or very hot shingles, and use a roof harness anchored to the framing on steep slopes. Keep three points of contact when climbing and carry materials up with a rope or hoist rather than in one hand. Any work on a roof two stories or higher, or on a slope steeper than about 6 in 12, is a job for a roofing contractor with fall protection equipment.
When to Call a Pro
Bring in a roofer if the leak has already caused soft decking or wall rot, if the wall is stucco or brick, if the joint sits above a second story or if you are not comfortable removing and reinstalling siding without damaging it. A qualified roofer or siding contractor can also confirm that flashing ties correctly into the wall’s water barrier, which is the step homeowners most often miss. Some areas require a permit for reroofing, so ask whether the work needs one.
Frequently Asked Questions
What is the difference between step flashing and apron flashing?
Step flashing is many small L-shaped pieces woven into each shingle course along a sloped sidewall. Apron flashing is one continuous piece laid over the top shingle course where a roof meets a headwall.
Can I use one long piece of flashing along a sidewall?
No. A continuous piece channels any water that gets under it straight down the wall joint. Individual step pieces, each lapped under the next shingle, are the correct method.
How high should the flashing go up the wall?
At least 4 inches up the wall and 4 inches onto the roof is standard. Areas with heavy snow or wind-driven rain often use 5 or 6 inch legs.
Do I need a kickout flashing?
Yes, wherever a sidewall ends above an eave or gutter. Without it, water exits the bottom of the step flashing and runs down the face of the wall and behind the siding.
Should siding touch the roof shingles?
No. Keep siding 1 to 2 inches above the roof surface so it cannot wick water and so shingles can be replaced later without removing siding.