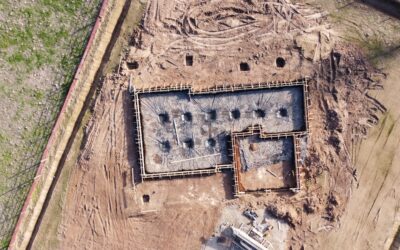
A shed door that suddenly drags, a floor that feels springy in one corner, or a gap opening between the siding and the ground are all early warnings. Most of the time the building itself is fine and the problem is underneath it. Shed foundation repair is one of the most approachable structural jobs a homeowner can take on, provided you understand what kind of foundation you have, why it moved, and how to lift the shed safely. Fix the cause, not just the symptom, and the repair should last as long as the shed.
- Signs You Need Shed Foundation Repair
- Identify Your Foundation Type
- Diagnose the Root Cause
- How to Safely Jack and Level a Shed
- Repairing Common Foundation Problems
- Fix Drainage So the Problem Does Not Return
- Shed Foundation Repair Costs
- When to Call a Licensed Professional
- Frequently Asked Questions
Signs You Need Shed Foundation Repair
Foundation trouble rarely shows up all at once. Walk around and inside your shed and look for these clues:
- Doors that stick or will not latch. Racking of even 1/2 inch across a doorway is enough to bind double doors.
- A sloped or bouncy floor. Set a 4-foot level on the floor in several directions; more than about 1/4 inch of drop over 4 feet is worth investigating.
- Soft or crumbling skids and joists. Poke with a screwdriver; if it sinks in easily, the wood is rotting.
- Cracked, tilted, or sunken blocks. Concrete deck blocks and cinder blocks can settle unevenly or break.
- Cracks in a concrete slab, especially ones with vertical displacement where one side sits higher.
- Standing water or erosion under or around the shed after rain.
Catching these early matters. A slightly out-of-level shed can usually be shimmed in an afternoon. One that has sat on rotting skids for years may need framing replaced before it can be lifted at all.
Identify Your Foundation Type
Repair methods depend entirely on what the shed sits on. Most backyard sheds use one of these systems:
Skids on Gravel
Pressure-treated 4×4 or 4×6 timbers run the length of the shed and rest on a compacted gravel pad. This is the most common setup for prefab sheds up to about 12×16 feet. Problems usually come from a thin or uncompacted gravel base, or from soil washing out at one end.
Concrete Blocks or Deck Blocks
Solid concrete blocks or precast pier blocks sit at the corners and along the skids. They are fast to install but prone to settling if placed on unprepared soil or turf.
Piers or Posts
Poured concrete piers, helical piers, or posts set below the frost line carry beams that support the floor. These resist frost heave but can suffer from rotted posts or undersized footings.
Concrete Slab
Larger sheds and workshops often sit on a 4-inch slab. Slab failures include settlement, frost heave, and cracks from poor compaction or missing reinforcement.
Diagnose the Root Cause
Before lifting anything, figure out why the foundation moved. Leveling a shed without fixing the cause just resets the clock.
Water is the most common culprit. Downspouts from the house or a neighbor’s yard, a shed roof with no gutter dripping along one side, or a low spot that collects runoff will soften soil and wash out gravel. Frost heave is next in cold climates: saturated soil freezes, expands, and lifts blocks or slab edges unevenly, then drops them in spring. Poor base preparation shows up as gradual settling when blocks were set on topsoil or sod rather than compacted gravel. Finally, rot attacks skids and floor joists that sit in direct contact with wet ground, especially older lumber or untreated wood.
Spend a rainy afternoon watching where water goes. The answer usually becomes obvious.
How to Safely Jack and Level a Shed
For skid, block, and pier foundations, the core of most shed foundation repair is lifting the low side, correcting the support, and lowering it back down. Empty the shed first; a loaded workbench and a riding mower add hundreds of pounds.
- Gather equipment. Two bottle jacks rated for at least 4 to 6 tons each, a long 4×6 or doubled 2×10 beam to spread the load, solid wood cribbing (short 4x4s or 6x6s stacked log-cabin style), composite or treated shims, and a 4-foot level.
- Set a stable jacking base. Place each jack on a solid board or paver on firm ground, never directly on soft soil.
- Lift under the frame, not the siding. Position jacks under a skid, beam, or rim joist. Lift in small increments of about 1/4 inch, alternating between jacks to avoid racking the walls.
- Crib as you go. Stack cribbing next to each jack and keep it snug against the frame after every lift. If a jack slips, the cribbing catches the load.
- Correct the support. Add or replace blocks, rebuild the gravel pad, or install shims under skids until the frame reads level.
- Lower gradually. Let the frame down onto the new supports, check level again, and open and close the doors to confirm they swing freely.
Never place any part of your body under a raised shed that is resting only on a jack. Jacks can tip or bleed down without warning; cribbing is the safety net.
Repairing Common Foundation Problems
Rebuilding a Gravel Pad
If the gravel under skids has washed out or sunk, lift the shed a few inches, rake out loose material, and add 3/4-inch crushed stone with fines in 2- to 3-inch layers, compacting each one with a hand tamper or plate compactor. Extend the pad about 12 inches beyond the shed footprint on all sides so drip-line water lands on gravel instead of soil. Crushed stone packs tighter than round pea gravel, which rolls under load.
Replacing Settled or Broken Blocks
Dig out under each failed block to firm subsoil, add 4 to 6 inches of compacted gravel, and set a new solid concrete block. Use solid cap blocks or treated shims to fine-tune height. Avoid stacking hollow cinder blocks more than two high without mortar, since they can crush or tip.
Replacing Rotten Skids or Joists
Rotten skids can often be replaced one at a time. Support the floor frame on cribbing, cut the fasteners holding the old skid, slide it out, and slide in a new ground-contact-rated treated timber. Sister damaged joists with new treated lumber fastened with structural screws or galvanized bolts. If rot has spread into the floor sheathing or wall bottom plates, you may be looking at a floor rebuild.
Fixing Slab Cracks
Hairline cracks under 1/8 inch are usually cosmetic and can be sealed with a flexible polyurethane crack filler. Wider cracks, cracks with one side higher than the other, or a slab that has tilted noticeably point to soil or frost problems. Options range from grinding and patching to slabjacking (lifting with injected grout or foam), which is a job for a concrete contractor.
Fix Drainage So the Problem Does Not Return
Once the shed is level, keep it that way by managing water:
- Add a gutter and downspout to the shed roof, discharging at least 4 to 6 feet away.
- Regrade soil so it slopes away from the shed at roughly 1/2 inch per foot for the first several feet.
- Redirect house downspouts that currently dump toward the shed.
- Install a shallow French drain on the uphill side if the shed sits in a runoff path.
- Keep at least 4 to 6 inches of clearance between siding and soil or mulch.
Good airflow under skid-mounted sheds also slows rot. Avoid packing soil, mulch, or firewood against the base where moisture gets trapped.
Shed Foundation Repair Costs
DIY repairs are inexpensive. Shims and a few replacement blocks cost $20 to $100. Rebuilding a gravel pad for a 10×12 shed typically needs 2 to 3 tons of crushed stone, roughly $100 to $300 delivered depending on your area, plus a rented plate compactor at about $75 to $100 per day. Two bottle jacks cost $50 to $120 if you do not already own them.
Professional repairs vary widely. Leveling a small shed on blocks may run $200 to $600. Replacing skids or rebuilding a floor frame can land between $500 and $2,000. Slab lifting or replacement for a large workshop can cost several thousand dollars. For a small, inexpensive prefab shed in poor condition, compare the repair quote with the cost of a new pad and a new shed before committing.
When to Call a Licensed Professional
Bring in a contractor or structural engineer when the shed is large (roughly 200 square feet or more), has a loft or heavy storage, sits on a slab that has heaved or split, or shows rot in the wall framing rather than just the skids. Call a licensed electrician before lifting any shed wired for power, since movement can strain conduit and connections. Always call 811 before digging for new footings or drains, and check whether your municipality requires a permit for foundation work on larger accessory buildings.
Frequently Asked Questions
Can I level a shed without emptying it?
You can lift a lightly loaded shed, but emptying it reduces the load on the jacks, prevents shelves from toppling, and makes the job safer. It is worth the extra hour.
How level does a shed need to be?
Aim for within about 1/8 inch over 4 feet. Doors and windows are the most sensitive to racking, so use them as a final check.
What is the best base for a shed foundation repair?
For most small to medium sheds, a compacted crushed-stone pad extending 12 inches past the footprint is the most forgiving base, because it drains well and is easy to re-level.
Why does my shed keep sinking in the same corner?
Repeated settling in one spot almost always points to water, such as a downspout or low area, or to a block set on soft soil. Fix the drainage and set the support on compacted gravel over firm subsoil.