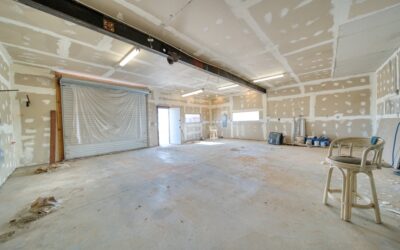
Walk into a Home Depot and ask for drywall, and the employee will probably walk you to a stack of USG-branded sheets labeled Sheetrock. The two words get used interchangeably so often that most homeowners do not realize Sheetrock is a brand, not a product category, the same way Kleenex is a brand of facial tissue. Understanding sheetrock drywall and how it compares to other gypsum board options helps you spec the right sheet for moisture areas, high-impact rooms, or fire-rated assemblies. The wrong choice can mean mold behind a tub surround or a garage wall that fails inspection.
Part of our Paint & Walls guide — explore the full guide →
Sheetrock Is a Brand Name
Sheetrock is the registered trademark of USG Corporation, founded in 1901 and credited with pioneering modern gypsum board manufacturing. The term dates to 1917 when USG patented the process of pressing gypsum between two paper sheets. Over a century later, the brand so dominates the category that contractors and homeowners call every brand of drywall by the Sheetrock name.
Competitors include National Gypsum (Gold Bond), Georgia-Pacific (ToughRock), and CertainTeed. All produce fundamentally similar products, though exact formulations and additives vary. Your framer likely does not care which brand ends up on the truck.
What Drywall Actually Is
Gypsum drywall is hydrated calcium sulfate pressed between two layers of paper. The gypsum core makes up 90 percent of the board, offering fire resistance and acoustic damping. Paper facings give nail holding strength and a paintable surface.
Compared to old-school plaster-over-lath construction, drywall cuts wall installation time by roughly 75 percent. A four-man crew can rock and tape a 2,400 square foot house in two days. Plaster on the same house would take a month.
Standard Sizes and Thicknesses
- 1/4 inch: Curved walls, skim coats over old plaster, around $12 per 4×8 sheet
- 3/8 inch: Repairs and overlay work, about $14 per sheet
- 1/2 inch: Standard residential walls and ceilings, $15 to $18 per sheet
- 5/8 inch: Fire-rated walls, garages, and ceilings over 24 inch spacing, $18 to $22
Sheet dimensions usually run 4 feet wide by 8, 10, or 12 feet long. Longer sheets reduce the number of butt joints on a wall, which is the hardest joint to finish invisibly. Pros often spec 12-footers to minimize taping time, even though they are harder to carry.
Specialty Sheetrock Types
Sheetrock Mold Tough, with its purple paper and enhanced mold-resistant core, goes in bathrooms, laundry rooms, and basements. It costs about 30 percent more than standard board but eliminates most moisture-related drywall failures.
Sheetrock Firecode C, marked with red paper, uses glass fiber and special additives to achieve a 1-hour or 2-hour fire rating when installed in a tested wall assembly. Every attached garage ceiling and shared townhouse wall in the US needs this or equivalent.
Sheetrock UltraLight is about 30 percent lighter than standard 1/2 inch board, making solo installation on ceilings far less brutal. Sheetrock Abuse Resistant handles impact in hallways, kid’s rooms, and rental properties better than standard board at a price bump of about 50 percent.
Tools You Need to Install It
Hanging drywall is a high-labor, low-skill job until you get to the taping. Essential tools include:
- Utility knife with spare blades
- T-square or 4-foot drywall square
- Rasp or Surform tool for trimming cut edges
- Drywall screws, 1 1/4 inch for 1/2 inch board
- Cordless drill or dedicated drywall screw gun
- Drywall lift for ceilings or hanging solo
- Taping knives in 6, 10, and 12 inch widths
- Mud pan or hawk
- Sanding pole with 120 or 150 grit screens
Budget $35 for a basic set of taping knives and another $45 for a sanding pole if you are tackling a DIY project.
Installation Basics
Hang ceiling sheets first, then walls, butting the top wall sheet tight against the ceiling. Gravity makes ceilings the harder job, which is why a $45 rental drywall lift pays for itself on any project over 500 square feet.
Screws should recess just below the paper surface without breaking it. Place them every 12 inches on ceilings and 16 inches on walls, keeping them at least 3/8 inch from the sheet edge. A screw that breaks the paper has almost no holding power and will pop through the finish later.
Cut sheets by scoring the paper face with a utility knife, snapping the gypsum core, then cutting the back paper. For cleaner cuts around outlets, measure twice and use a rotary cutter like the RotoZip DM10.
Taping and Finishing
Mudding is where amateur drywall jobs separate themselves from professional ones. Apply a thin first coat over each joint with a 6 inch knife, embed paper tape, and let it dry 24 hours. Skip the fiberglass mesh tape on butt joints, since paper holds better where movement is most likely.
Second coat gets a 10 inch knife and wider feathering out to 8 inches total. Third coat uses a 12 inch knife and extends 12 to 14 inches, which blends the patch invisibly. Sand lightly between coats and aggressively before priming.
Level 4 finish is standard for painted walls. Level 5, which adds a skim coat across the entire surface, is only needed for critical lighting conditions or high-gloss paint.
When to Use What Type
Standard white-paper Sheetrock handles 80 percent of residential walls and ceilings. Upgrade to Mold Tough in any wet area. Step up to Firecode wherever code requires, usually garages and party walls. Use Abuse Resistant in mudrooms, kids’ rooms, or rentals where doorknobs and toy strollers punish walls.
Most single-family homes need a mix of three types. Ordering sheetrock drywall in one big load at the start of framing inspection day lets the delivery truck place bundles inside the house before the roof goes on, which saves hours of lugging sheets through doorways later. A little planning up front makes the hanging job dramatically faster.