A sink garbage disposal turns kitchen cleanup from a chore into an afterthought — food scraps go down the drain instead of into a smelly trash can, and your kitchen stays cleaner for it. But not all disposals are equal, and the wrong choice (or wrong habits) leads to jams, clogs, and odors. Whether you’re buying your first one or replacing a unit that finally gave out, this guide covers how to pick, install, use, and maintain a disposal that lasts.
What a Disposal Does and Why It Helps
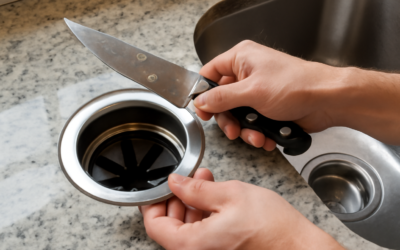
Mounted beneath your sink drain, a garbage disposal grinds food waste into fine particles small enough to flush safely through your plumbing. It’s not about blades chopping food — most disposals use blunt impellers (lugs) that spin and fling waste against a stationary grind ring, pulverizing it. The result is less household trash, fewer odors, fewer pests, and a genuinely cleaner kitchen. In homes on municipal sewer, it also keeps food waste out of the landfill.
Roughly half of American kitchens have one, and once you’ve lived with a good disposal, cooking without one feels like a step backward.
Continuous-Feed vs. Batch-Feed
There are two operating types, and it’s the first choice to make. A continuous-feed disposal — by far the most common — runs when you flip a wall switch, and you feed waste in while it’s running. It’s convenient and fast. A batch-feed disposal only runs when you insert a special stopper into the drain, which acts as the on switch. Batch-feed units are safer (nothing can fall in and run while your hand is near) and need no separate wall switch, but they’re pricier and slower since you grind one batch at a time.
For most households, continuous-feed is the practical pick. Choose batch-feed if safety is a priority — homes with young children, for instance — or if you can’t easily add a wall switch.
Sizing: Horsepower Matters
Horsepower determines grinding power and, indirectly, how quiet and jam-resistant the unit is. Match it to your cooking habits:
- 1/3 HP: the bare minimum, fine for a single person or light use. Jams easily on tough waste — I’d skip it.
- 1/2 HP: workable for one or two people, but still bogs down on fibrous scraps.
- 3/4 HP: the sweet spot for most families. Handles daily cooking waste, vegetable scraps, and small bones without jamming.
- 1 HP: best for large households and frequent cooks. Grinds fast, runs smooth, and rarely jams.
My standing advice: buy 3/4 HP or better. The price difference over a 1/2 HP unit is minor, and the reduction in jams and clogs is worth it. Higher-HP motors also tend to run quieter because they aren’t straining against tough waste.
Features to Look For
Beyond horsepower, a few things separate a good disposal from a frustrating one:
- Stainless steel grinding components resist corrosion and stay effective longer than galvanized parts.
- Sound insulation — units with acoustic jackets run dramatically quieter, which matters in open-plan kitchens. InSinkErator’s Evolution line and Moen’s insulated models lead here.
- Multi-stage grinding on premium units pulverizes waste finer, reducing clogs.
- Anti-jam or auto-reverse features that reduce the chance of a stuck flywheel.
- A solid warranty — quality units carry 4 to 10 years, or even lifetime.
Trusted brands include InSinkErator (the market leader), Moen, and Waste King. Any of the three makes reliable units across the price range.
Installing a Sink Garbage Disposal
Replacing an existing disposal is a straightforward weekend job; a first-time install adds electrical and possibly plumbing work. The basic sequence:
- Kill the power at the breaker and verify it’s off. Unplug if it’s cord-connected.
- Remove the old unit (if replacing) — disconnect the discharge tube, dishwasher hose, and wiring, then twist it off its mount. Support the weight as it releases.
- Install the mounting assembly at the sink drain with plumber’s putty under the flange, or reuse a compatible existing mount.
- Wire the disposal — line, neutral, ground — either hardwired or via a cord kit into a switched receptacle. Knock out the dishwasher inlet plug first if a dishwasher drains into it.
- Mount the unit, connect the discharge to the P-trap and the dishwasher hose, then run water and check every joint for leaks.
The electrical must connect to a properly grounded, switched circuit, and outlets near sinks often require GFCI protection under NEC 210.8. If you need a new circuit or outlet, or you’re unsure about the wiring, hire a licensed electrician and check whether a permit is required in your area.
What You Should Never Put Down It
Most disposal failures come from what people feed them, not the unit itself. Keep these out:
- Grease, oil, and fat — they congeal and clog your pipes downstream.
- Fibrous vegetables like celery, corn husks, artichokes, and onion skins that wrap the impellers.
- Starchy foods like potato peels and pasta that turn to paste and gum up the drain.
- Coffee grounds and eggshells that accumulate as sludge.
- Bones, fruit pits, and hard shells that can jam or damage the grinder.
Always run cold water while grinding and for 15-20 seconds after, and feed waste gradually rather than stuffing the chamber full.
Will It Fit Your Sink and Plumbing?
Before you buy, a few compatibility checks save you a return trip. Measure the cabinet space under your sink — higher-horsepower and premium insulated units are physically bigger and can crowd the P-trap, a garbage disposal air gap, or a nearby water filter. Check your sink’s drain opening: standard American sinks use a 3.5- to 4-inch drain that fits virtually all disposals, but confirm it, especially with a deep or specialty sink.
Consider your sink material, too. Stainless and composite sinks handle disposals well; some thin or older sinks may need a mounting adapter. If you have a septic system rather than municipal sewer, look at disposals designed for septic use — some include an enzyme injection to help break down waste, and you’ll want to be more conservative about what you grind. Finally, check whether your dishwasher drains into the disposal (most do), because you’ll need to knock out the dishwasher inlet plug on the new unit before connecting the hose — forgetting this is the classic first-timer mistake that leaves a dishwasher unable to drain.
Reducing Noise in an Open Kitchen
Disposal noise matters more than people expect, especially in today’s open-plan kitchens where the sink is feet from the living room. If quiet operation is a priority, it’s worth understanding what drives the racket and how to cut it. The biggest factor is the unit itself: models with acoustic insulation jackets and multi-stage grinding — InSinkErator’s Evolution series and Moen’s insulated lines — run dramatically quieter than bare budget disposals, and it’s the single best investment in a peaceful kitchen.
Beyond the unit, a few things help. A heavier stainless or composite sink transmits less vibration than a thin one; adding a sink baffle or an anti-vibration mount dampens the buzz. Making sure the disposal is mounted snugly and the discharge plumbing isn’t rattling against the cabinet also cuts noise. Higher-horsepower motors, counterintuitively, often run quieter under load because they aren’t straining against tough waste the way an underpowered unit does. If your kitchen opens onto living space and noise bothers you, spend up for an insulated 3/4 or 1 HP model — you’ll notice the difference every single time you run it.
Maintenance and Troubleshooting
Keep it fresh by grinding ice cubes and a little rock salt periodically to scour the chamber, and citrus peels to fight odors. If it hums but won’t turn, it’s jammed — cut the power, insert the hex wrench (included, or a 1/4-inch Allen key) into the slot on the bottom center, and rotate the flywheel to free the obstruction. If it’s completely dead, press the red reset button on the underside; disposals trip an internal overload. Leaks usually trace to the sink flange, the discharge gasket, or a loose dishwasher hose clamp.
Chosen well and treated right, a sink garbage disposal is a low-maintenance workhorse that keeps your kitchen cleaner for a decade. Go with at least 3/4 horsepower from a reputable brand, install it to a proper GFCI-protected circuit, run cold water, and keep the grease and fibrous scraps out — do that, and you’ll rarely think about it at all.