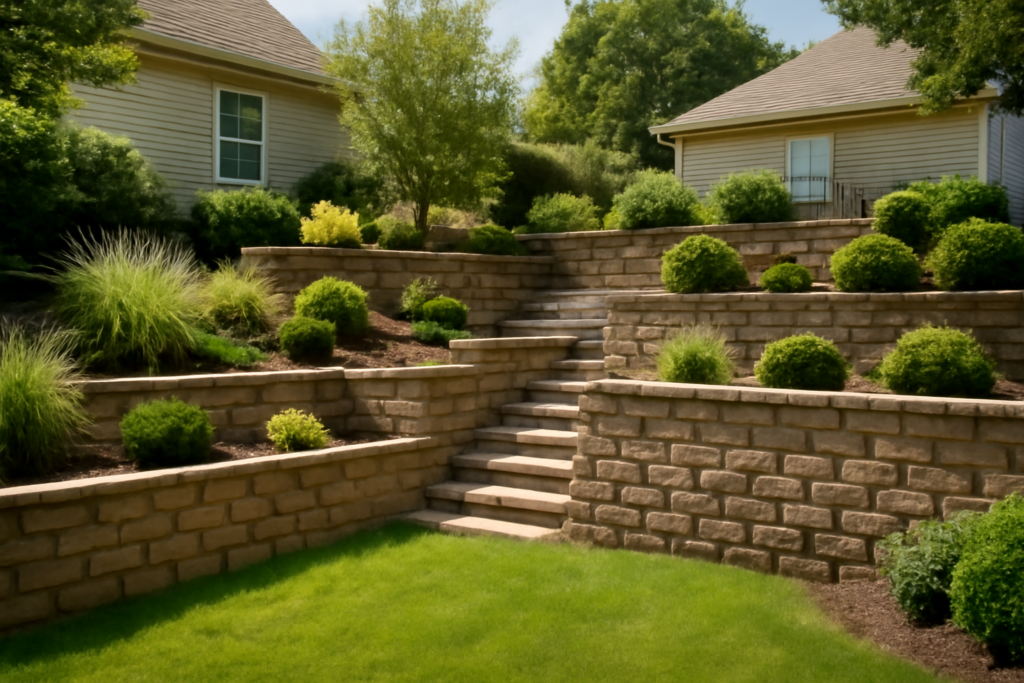
Stacking two short walls on a slope instead of building one tall one is not just a design choice; it can be the difference between a legal weekend project and an engineered wall that needs a permit and a stamp. A terraced retaining wall breaks a steep grade into a series of manageable steps, each holding a smaller volume of soil, which spreads the load, improves drainage, and creates usable planting space. But terracing only works if the spacing and drainage follow the rules; get them wrong and the upper wall pushes the lower one right out of the ground. This guide covers when to terrace, how far apart the tiers must sit, and how to build one that lasts.
- Why Terrace Instead of Building One Tall Wall
- The Spacing Rule That Makes or Breaks It
- Choosing Your Materials
- Drainage: The Real Cause of Wall Failure
- Building It Step by Step
- Permits, Height Limits, and When to Call an Engineer
- Landscaping the Terraces
- Common Mistakes That Cause Failure
- Hiring a Pro vs. DIY
- The Bottom Line
Why Terrace Instead of Building One Tall Wall
Soil is heavy, and the taller a wall, the more lateral pressure pushes against it. A single 6-foot wall may require engineering, deadman anchors or geogrid reinforcement, and a permit in most jurisdictions. Split that same slope into two 3-foot walls with a bench between them, and each wall handles far less pressure and often falls under the height threshold that triggers permits.
Beyond the engineering, terracing looks better and works harder. The flat benches between tiers become planting beds, seating areas, or a path, turning a useless bank into landscape you can actually use. Water gets a chance to slow down and soak in at each level instead of sheeting down a single face. For most homeowners with a sloped backyard, two or three modest terraces beat one intimidating wall on cost, safety, and looks.
The Spacing Rule That Makes or Breaks It
This is the detail that DIYers get wrong most often. Two terraced walls are only independent if they are far enough apart. Stack them too close and the upper wall’s soil load bears directly on the lower wall, effectively turning them into one tall wall with a weak seam, exactly the failure terracing is meant to avoid.
The common engineering guideline is that the horizontal distance between the walls should be at least twice the height of the lower wall. So if your lower wall is 3 feet tall, the base of the upper wall should sit at least 6 feet back. When walls must be closer than that, they can no longer be treated as separate and typically require geogrid reinforcement tying them into the slope, plus engineering. When in doubt, give the terraces more room, not less; a generous bench is safer, more useful, and easier to plant.
Choosing Your Materials
The block or stone you pick sets the look, the cost, and how tall you can safely go without special reinforcement.
- Segmental concrete blocks (SRW): The most popular DIY choice. Interlocking, uniform, and available with a built-in setback that leans the wall into the slope. Around $15 to $30 per square foot installed.
- Natural stone: Beautiful and timeless, but heavy and slower to build. Dry-stacked fieldstone or quarried block runs $25 to $50 per square foot and up.
- Poured concrete: The strongest for tall or heavily loaded walls, but it needs forms and usually a contractor. $30 to $60 per square foot.
- Pressure-treated timber: Lowest upfront cost at roughly $15 to $25 per square foot, but timber walls have a shorter lifespan, often 20 years or less before rot sets in.
For a homeowner tackling a terraced retaining wall themselves, interlocking SRW block hits the best balance of strength, appearance, and buildability.
Drainage: The Real Cause of Wall Failure
Nearly every retaining wall that fails does so because water pressure built up behind it, not because the blocks were weak. Saturated soil weighs far more than dry soil and pushes with hydrostatic force that no small wall can resist. Terracing helps, but each tier still needs its own drainage system.
- Gravel backfill: Fill at least 12 inches behind each wall with clean crushed stone so water drains down instead of loading the wall.
- Perforated drain pipe: Lay a 4-inch perforated pipe at the base of the gravel, sloped to daylight or a drain, to carry water away from each tier.
- Filter fabric: Separate the gravel from the native soil with landscape fabric so silt does not clog the drainage over time.
- Weep gaps or a base that daylights: Give the water a clear exit at the lowest point of each wall.
Building It Step by Step
The lowest wall goes in first, and everything else references off a solid, level base.
- Excavate and compact the base trench. Dig down 6 to 8 inches plus the buried first course, and compact the bottom with a plate tamper.
- Lay a compacted gravel base. Spread and tamp 4 to 6 inches of crushed stone, then level it carefully; this base sets the accuracy of the entire wall.
- Bury the first course. The bottom row should sit about one block-height below grade, and getting it dead level is the most important step of the build.
- Stack, backfill, and compact in lifts. Build up a course or two, add gravel backfill and drain pipe, then compact before continuing so the soil behind is dense, not loose.
- Set the bench and build the upper wall. Once the lower wall is complete and backfilled, grade the bench, then repeat the process for the next terrace at least twice the lower wall’s height back.
- Cap the walls and finish. Add cap blocks with construction adhesive, then plant the benches to stabilize the soil with roots.
Permits, Height Limits, and When to Call an Engineer
Rules vary by locality, but a common trigger for a permit and engineered design is any single wall over 3 to 4 feet tall, measured from the bottom of the buried base to the top. Terracing can keep each wall under that line, but only if the spacing rule is honored. Surcharge loads change the math too: if a driveway, pool, or structure sits above the wall, the extra weight often requires engineering regardless of height.
Call a licensed engineer when walls exceed local height limits, when tiers must sit closer than twice the lower wall’s height, or when anything heavy loads the top of the slope. The stamp costs a few hundred dollars and is far cheaper than rebuilding a collapsed wall or facing a liability claim.
Landscaping the Terraces
The benches between tiers are the real reward of terracing, turning a useless bank into planting space that also stabilizes the slope. Plant roots knit the soil together and slow surface runoff, so densely planted terraces are more stable than bare ones. Choose deep-rooted perennials, ornamental grasses, and low shrubs for the flat benches, and let trailing plants spill over the wall faces to soften the hard block edges.
Think about scale and access as you plant. Keep taller shrubs and small trees back from the wall face so their roots and weight do not surcharge the structure, and reserve the wall edge for shallow-rooted trailers and groundcovers. A gravel or stepping-stone path along one bench gives you a way to weed and maintain the upper tiers without trampling plantings. Drip irrigation tucked into the beds waters efficiently without eroding the soil the way overhead spray can. Mulch each bench to hold moisture and suppress weeds, but keep mulch a few inches back from the wall so it does not trap water against the block.
Common Mistakes That Cause Failure
Most terraced-wall failures trace back to a handful of avoidable errors. Spacing the tiers too close together is the classic one, effectively stacking the load of both walls into a single tall wall the lower course was never built to hold. Skimping on drainage is the next, since a wall without gravel backfill and a drain pipe becomes a dam that water pressure eventually pushes over. Setting the first course on loose or unlevel soil instead of a compacted gravel base guarantees settling and a wavy, leaning wall.
- Backfilling with the excavated clay soil instead of free-draining gravel, which traps water against the wall.
- Not compacting the backfill in lifts, leading to settling and slumping months later.
- Ignoring surcharge loads from a driveway, pool, or structure above the top terrace, which dramatically increase the pressure.
- Building too tall without a permit or engineering, risking both collapse and code violations.
Avoid these and the wall will do its job quietly for decades.
Hiring a Pro vs. DIY
A short terraced wall of interlocking block, with each tier under about 3 feet and generous spacing, is a realistic DIY for a fit homeowner with a plate compactor rental and a free weekend or two. The work is heavy, blocks often weigh 30 to 75 pounds each, and the base preparation is tedious, but the techniques are learnable. Where you should call a pro or an engineer is any wall over local height limits, tiers that must sit closer than twice the lower wall’s height, poor or wet soil, or a surcharge load above the wall. The few hundred dollars for an engineered design and the labor of an experienced crew are cheap next to the cost of rebuilding a collapsed wall or repairing what it damages downhill.
The Bottom Line
A well-built terraced retaining wall tames a steep slope, adds usable planting space, and often keeps you under permit thresholds by breaking the grade into smaller, safer steps. The keys are simple but unforgiving: space each tier at least twice the lower wall’s height apart, build every wall on a compacted gravel base, and give each level real drainage with gravel, pipe, and filter fabric. Choose interlocking block for a manageable DIY, respect your local height limits, and bring in an engineer for tall or loaded slopes. Follow those rules and your terraces will hold for decades.