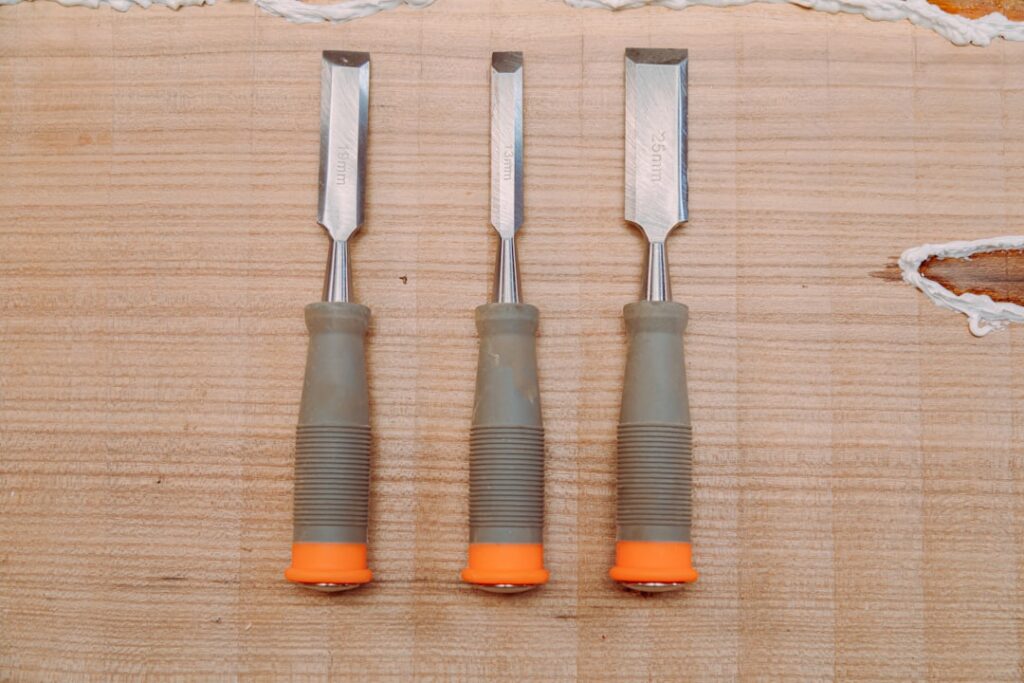
When it is time to rip out an old backsplash, pry up a dated floor, or clean thinset off a subfloor, a tile chisel is the tool that does the heavy lifting. This wide, flat-bladed chisel is purpose-built to get under tile and pop it loose, scrape away stubborn mortar, and break through grout without chewing up everything around it.
Part of our Tile & Grout guide — explore the full guide →
Whether you swing it with a hammer for a small job or chuck it into a rotary hammer for a whole floor, knowing how to choose and use a tile chisel makes demolition faster, cleaner, and safer. This guide covers the types available, the techniques that work, and the safety steps you should never skip.
What a Tile Chisel Is
A tile chisel is a specialized masonry chisel with a wide, flat blade designed to slide beneath tile and lift it from the substrate. The broad cutting edge spreads force across a larger area than a standard cold chisel, which helps separate tile cleanly rather than just shattering it in place. Many also work well for scraping off the layer of dried thinset mortar left behind after the tile is gone.
The blade is hardened steel built to take repeated hammer blows, and the better designs include a hand guard to protect your knuckles. The tool is a staple of any tile demolition, and choosing the right type for the scale of your project makes a real difference in speed and effort.
Types of Tile Chisels
There are a few variations, each suited to different jobs:
- Hand tile chisel (with guard): Struck with a hammer, ideal for small areas, detail work, and removing individual tiles.
- Flat masonry chisel: A wide flat blade for scraping thinset and lifting tile across larger surfaces.
- SDS rotary hammer tile chisel: A wide scaling or tile bit that fits a rotary hammer or demolition hammer for fast, powered removal of large floors and walls.
- Grout removal chisel: A narrower blade for digging out grout lines before replacing individual tiles.
For a single backsplash or a few cracked tiles, a hand chisel and hammer are plenty. For an entire floor, renting or buying a rotary hammer with a tile-removal bit will save hours of grueling manual work.
Essential Safety Gear
Tile demolition sends sharp chips flying and creates fine dust, so personal protection is not optional. Before you start, gear up with:
- Eye protection: Safety glasses or goggles are essential, since chiseled tile shatters into flying shards.
- Gloves: Heavy work gloves protect your hands from sharp edges and hammer mishaps.
- Dust mask or respirator: Tile and thinset dust can contain silica, which is hazardous to breathe, so use proper respiratory protection and control dust.
- Knee pads and sturdy footwear: For floor work and protection from dropped debris.
- Hearing protection: Especially when using a powered rotary hammer.
Keep the work area clear of others, since flying chips travel, and wet the surface lightly or use a vacuum to control silica dust whenever possible.
How to Use a Tile Chisel
Technique matters as much as muscle. Work through the job methodically:
- Start at an edge or a broken tile: Begin where you can get the blade underneath, such as an existing gap, a removed tile, or a corner.
- Set a low angle: Hold the chisel at a shallow angle to the surface so the blade slides under the tile rather than into it.
- Strike firmly: Drive the chisel with solid hammer blows to pop the tile loose, advancing under each piece.
- Work systematically: Move across the area tile by tile, clearing debris as you go so you can see your progress.
- Scrape the thinset: Once tiles are up, hold the chisel flatter and shave off the remaining mortar to leave a smooth substrate.
Let the tool and gravity do the work; a controlled, repeated strike is more effective and safer than wild, heavy swings.
Removing Thinset and Cleaning Up
After the tile is gone, a layer of dried thinset usually remains, and getting the surface flat is critical if you plan to retile, since new tile needs a clean, even base. Hold the chisel at a low angle and work it under the mortar in sections, knocking off ridges and lumps. For large areas, a powered rotary hammer with a wide scaling bit makes quick work of stubborn thinset.
Be careful not to gouge the subfloor or backer board underneath, especially on wood substrates that can splinter. Sweep and vacuum frequently to manage dust and to check your progress, and bag the sharp debris carefully for disposal.
How aggressively you remove thinset depends on what comes next. If you plan to lay new tile, the surface only needs to be flat and free of high spots, since a self-leveling underlayment or a thick mortar bed can absorb minor unevenness. If you are switching to vinyl plank, laminate, or another thin floor, the substrate must be much smoother, because every ridge of leftover mortar can telegraph through the new flooring. Matching your effort to the finished floor saves time and prevents callbacks on your own work.
Cost and Where to Get One
Tile chisels are inexpensive tools. A quality hand tile chisel typically runs from about $10 to $25, while flat masonry chisels are similarly priced. SDS rotary hammer tile bits generally cost $15 to $40, and the rotary hammer itself can be rented from a tool rental counter for a daily fee if you do not own one. Treat these as estimates that vary by brand and retailer.
For a one-time demolition, renting the powered equipment and buying a few inexpensive chisels is the economical route. For homeowners who tackle projects regularly, owning a good hand chisel and a rotary hammer pays off over time.
Tips for Better Results
A few final pointers make the work go smoother. Keep the chisel’s edge in reasonable shape, since a sharper blade slides under tile more easily, and replace a badly mushroomed or chipped chisel rather than risk a dangerous failure. Take breaks during big jobs to avoid fatigue, which leads to sloppy, hazardous swings. Protect nearby fixtures, tubs, and cabinets you intend to keep, because a stray strike can crack them.
Above all, respect the dust and flying debris, and wear your protective gear the entire time. With the right tile chisel, sound technique, and proper safety precautions, you can demolish old tile efficiently and leave a clean surface ready for whatever comes next.
Prefer to explore on your own?
See how new flooring looks in your actual room in seconds — free, no signup.
Try the free Floor Studio →