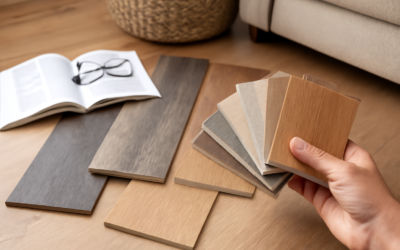
The tile that looks perfect under showroom lights can look completely wrong in your kitchen at 7 a.m. That gap is exactly why a tile sample is the cheapest insurance you can buy before committing to a project that might cost thousands. A single loose piece or a small swatch board lets you test color, finish, texture, and slip resistance against your actual cabinets, countertops, and daylight, days before a truck backs up with 40 boxes. I’ve watched homeowners save themselves from a five-figure mistake with a $2 sample and an afternoon of observation.
Part of our Tile & Grout guide — explore the full guide →
Samples are also where you catch the details spec sheets never mention: how a glaze catches glare, whether a “gray” reads blue in your room, and how a textured surface feels underfoot. Used well, a sample turns guesswork into a confident decision.
Why a Sample Is Non-Negotiable
Tile is a major, semi-permanent purchase, and returns on opened boxes are often impossible or costly. Once tile is set in thinset, changing your mind means demolition. A sample removes that risk for a few dollars. It also protects you from the number-one complaint I hear after installation: “It looked different in the store.” That difference is almost always lighting, and a sample viewed in your own space closes the gap.
Beyond color, a physical piece lets you judge thickness, edge quality, and how the finish handles fingerprints and water spots, none of which come through on a screen or a printed catalog.
Where and How to Get Samples
Sourcing samples is easier than most people realize. Your options generally break down like this:
- Local tile showrooms: Often lend or sell loose pieces for $1 to $5, sometimes refundable against a purchase.
- Big-box home centers: Sell individual tiles off the shelf so you can buy one to take home.
- Online tile retailers: Most ship 4-by-4-inch or full-size samples for $2 to $10, occasionally free with shipping.
- Manufacturer sample programs: Many brands mail swatch sets directly, useful for comparing a whole collection.
Order a full-size piece when you can, not just a chip. A 4-inch chip can’t show the variation in a mottled or veined tile, and variation is precisely what you need to evaluate.
Testing Color in Your Own Light
This is the step that saves projects. Bring the sample home and look at it in every lighting condition the room actually sees: bright morning sun, overcast afternoon, and warm evening bulbs. Tape it to the wall or lay it on the floor next to your cabinets and countertop, then live with it for two or three days. Colors shift dramatically between the cool 5000K LEDs in a store and the warm 2700K bulbs in most homes.
Pay special attention to undertones. A tile that reads as neutral greige in the store may pull distinctly pink or green against your existing finishes. Only your own light reveals that.
Checking Finish, Texture, and Slip Resistance
Run your hand and, for floors, your bare foot across the sample. A high-gloss polished tile looks luxurious but turns slick when wet, which is a real hazard on a bathroom or kitchen floor. Matte and textured finishes offer more grip. Look for the tile’s COF, or coefficient of friction, rating; for wet floor areas you want a DCOF of 0.42 or higher.
Wet the sample and step on it to feel the difference for yourself. Splash a little water, tilt it, and see whether your foot grips or glides. That thirty-second test prevents a decade of slippery mornings.
Judging Variation and Shade
Manufacturers rate shade variation on a V1 to V4 scale, from uniform to highly varied. A single sample can’t fully show a V3 or V4 tile, so ask to see several pieces or a full box display. If you love variation, that randomness is a feature; if you expected a uniform look, a high-variation tile can be a shock when the whole floor goes down.
Always confirm the dye lot when you order the real thing. Tiles from different production runs can vary noticeably, so buy all your tile from a single lot and add 10 to 15 percent overage from that same batch.
Testing Durability and Stains
A sample is your chance to abuse the tile before it’s on your floor. For a kitchen, drip coffee, red wine, and cooking oil on the sample, let them sit an hour, then wipe up to see if the surface stains. For floors, scratch an inconspicuous spot with a key to gauge how the glaze holds up. Porcelain rated for its PEI wear class handles this far better than soft, decorative wall tile pressed into floor duty.
These small tests reveal whether the tile suits how you actually live, especially in high-traffic and high-mess rooms. Pay attention to how easily each stain wiped away, too, since a tile that needs a scrub brush to release dried coffee will frustrate you every morning. For floors, drag a sample across a bit of grit on the ground to gauge whether the finish scratches, because a soft glaze that marks from tracked-in sand will look dull within a year in an entryway or kitchen.
Using Samples to Plan the Layout
Beyond judging color and finish, a physical sample helps you visualize the actual installation, which catalogs and renderings can’t do. Lay several samples together on the floor or wall to see how the grout joints will look at your chosen spacing. A tile that seems fine alone can create an odd rhythm once you see three or four in a row, especially with rectified edges that allow very thin grout lines. Seeing that spacing in person often changes people’s mind about joint width or grout color.
Samples also reveal how a tile handles the transitions in your room. Hold one up to your existing flooring to check whether the heights will meet cleanly or need a transition strip. For a backsplash, prop the sample against your countertop and cabinets to confirm the thickness looks right where it meets the counter and the underside of the uppers. These small dry-fit checks catch clearances and transitions that become expensive surprises on install day.
If you’re weighing a patterned layout like herringbone or a mixed-size design, order enough samples to lay out a small section of the actual pattern. A single tile tells you nothing about how a herringbone will read, and photographing your test layout under your room’s lighting gives you something concrete to compare against alternatives. I’ve had clients change their entire pattern choice after seeing just eight tiles arranged on the floor, and every one of them was glad they tested it before committing to hundreds of square feet.
Turning Samples Into a Confident Choice
Once you’ve narrowed it down, lay your finalist samples together with your paint chips, cabinet doors, and countertop remnant, and view the whole palette in your room’s light. A tile that’s beautiful in isolation can clash with the fixed finishes you can’t change. The point of a tile sample is to make every mistake on a two-dollar piece instead of a two-thousand-dollar installation. Spend the extra week testing, and you’ll walk into your finished room already knowing you got it right.
Prefer to explore on your own?
See how new flooring looks in your actual room in seconds — free, no signup.
Try the free Floor Studio →