The tnp valve on your water heater is one of the most important safety devices in your entire home, even though most homeowners never think about it. Also written as the T&P valve or TPR valve, it stands for temperature and pressure relief, and its single job is to open and release water if the tank ever gets too hot or too pressurized. Without it, a water heater that overheats could build enough internal pressure to rupture violently. Understanding how this small brass fitting works, and the absolute rules around never blocking it, can genuinely protect your family and your house.
What the Valve Is and Why It Exists
A water heater is a sealed tank that heats water, and heating water expands it and raises pressure. Normally the thermostat keeps things in check, but thermostats and other controls can fail. When they do, water can keep heating well past safe limits. Superheated water in a sealed tank stores enormous energy, and if the tank gives way, it can fail explosively.
The temperature and pressure relief valve is the fail-safe that prevents that outcome. It is designed to open automatically when the water temperature climbs to roughly 210°F or when internal pressure reaches about 150 psi, whichever comes first. By dumping hot water and pressure when those thresholds are hit, it stops the tank from ever reaching a catastrophic point.
Where It Is Located
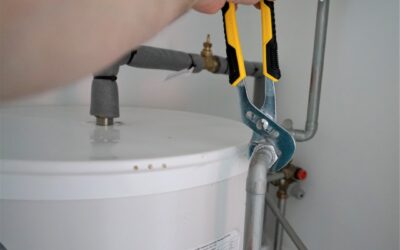
You will find the valve threaded into the top of the tank or into the upper portion of the side, near the top. It looks like a brass fitting with a small spring-loaded lever or test handle on it. Attached to its outlet is a discharge tube, also called the discharge pipe, that runs downward.
The Discharge Tube Rules
That discharge pipe is part of the safety system, not an optional accessory, and codes are specific about how it must be installed:
- It must run downward and terminate within about 6 inches of the floor, so scalding water discharges low and safely rather than spraying outward at face level.
- The end must be left unthreaded and uncapped, so nothing can ever be screwed onto it to seal it.
- It should be made of an approved material rated for the temperature and run without traps or upward loops that could hold water.
The idea is simple: if the valve ever opens, the water needs a clear, downward, visible path to the floor where it cannot hurt anyone and where you will notice it.
How It Works
Inside the valve is a spring-loaded mechanism with a temperature-sensing probe that extends into the tank. Under normal conditions the spring keeps the valve shut. If temperature or pressure crosses the rated threshold, the force overcomes the spring and the valve opens, venting hot water through the discharge pipe until conditions return to safe levels, at which point it reseats and closes. It is an automatic, mechanical response that needs no power.
Never Cap, Plug, or Block It
This is the most important warning in this guide. Never cap, plug, install a threaded plug into, or otherwise block the valve or its discharge pipe. People sometimes do this to stop a nuisance drip, but doing so disables the only thing standing between an overheating tank and a rupture. A blocked relief valve on an overheating water heater can lead to a catastrophic tank explosion capable of destroying walls and causing serious injury or death. If the valve is dripping, the answer is to find and fix the cause, never to seal it shut.
How to Test It Safely
You can verify the valve operates with a quick, careful test, but treat the discharged water as dangerously hot:
- Make sure the discharge pipe is in place and directed safely toward the floor.
- Stand clear and keep hands and face away from the discharge opening, because the water is scalding.
- Gently lift the test lever for just a second or two. You should hear and see water rush out through the discharge pipe.
- Release the lever. The flow should stop completely and the valve should reseat with no further dripping.
If water keeps trickling after you release the lever, the valve did not reseat and likely needs replacement. If nothing comes out at all, the valve may be stuck or mineral-blocked, which is equally a reason to replace it. When in doubt, call a plumber rather than forcing anything.
Why It Might Drip or Leak
A weeping or dripping valve is a signal worth investigating rather than ignoring. Common causes include:
- Thermal expansion: As water heats and expands in a closed plumbing system, pressure rises and can push the valve open slightly. This is one of the most common causes in homes with a check valve or pressure-reducing valve on the supply.
- High water pressure: If incoming municipal pressure is too high, it can lift the valve repeatedly.
- An expansion tank is needed: Installing a properly sized thermal expansion tank gives expanding water somewhere to go and often stops nuisance dripping for good.
- A failing valve: Age, corrosion, and mineral buildup can prevent the valve from sealing, so it leaks even under normal conditions.
A drip during a heating cycle that stops afterward often points to expansion pressure, while a constant drip usually means the valve itself is worn out.
What Dripping Means and When to Replace
An occasional, minor release during heating is the valve doing its job, but a valve that drips persistently or will not reseat after testing should be replaced. A relief valve that cannot close reliably is both a leak nuisance and a sign the safety mechanism is degrading. Because this part is tied directly to preventing tank rupture, replacement is not the place to gamble. Call a licensed plumber to diagnose whether the problem is the valve, excessive pressure, or a missing expansion tank, and to perform the swap correctly.
Replacement Cost
The valve itself is inexpensive, typically around $15 to $40 at a hardware store. Professional replacement, including draining the tank, removing the old valve, and installing and testing the new one, generally runs about $150 to $350 depending on your area and whether an expansion tank is added at the same time. Given what the part protects against, this is money well spent.
Maintenance and Signs of Failure
Plan to test the valve about once a year, and inspect the area around it for rust, moisture, or mineral crust at the same time. Warning signs that warrant attention include continuous dripping, a valve that will not reseat, no discharge when tested, corrosion around the fitting, or a discharge pipe that has been altered or blocked. Pair this annual check with a glance at your overall water pressure and the condition of any expansion tank. A few minutes of attention each year keeps this quiet guardian ready to do the one critical job it exists for.