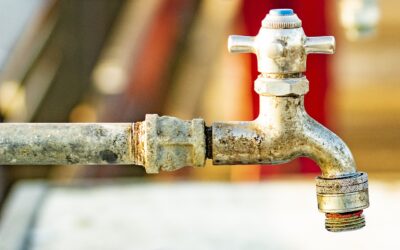
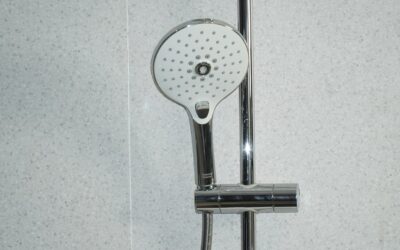
A dripping showerhead can waste 5,000+ gallons of water a year and put $50-100 on your annual utility bill, but the fix usually takes under an hour with a $25 part. Most shower valve repair jobs come down to replacing the internal cartridge, and the process is the same across most major brands. Here is how to diagnose what is wrong and either fix it yourself or call a plumber armed with the right information.
Part of our Bathroom Remodeling & Flooring guide — explore the full guide →
- Understanding Your Shower Valve Type
- Common Shower Valve Problems
- Tools and Parts You Need
- Step-by-Step Cartridge Replacement
- Fixing Temperature Inconsistency
- When You Have a Behind-the-Wall Leak
- Preventive Maintenance
- When to Call a Plumber
- Brand-Specific Cartridge Notes
- Avoiding Damage During the Repair
- Shower Valve Leaking? Where the Water Shows Up Tells You Why
Understanding Your Shower Valve Type
Three valve types dominate American homes:
- Pressure-balancing valves: the most common, single-handle, regulates hot/cold ratio
- Thermostatic valves: dual-handle, more precise temperature control, common in upscale homes
- Diverter valves: separate valve that switches between tub spout and showerhead
Look behind the trim plate for a brand stamp. Moen, Delta, Kohler, Pfister, and American Standard each use proprietary cartridges, and a Delta cartridge will not fit a Moen valve. The brand also determines whether you need a special tool to remove the cartridge.
Common Shower Valve Problems
Symptoms point you to the right repair:
- Constant drip: worn cartridge seals, easy DIY fix
- Water temperature fluctuates: failing pressure-balancing spool
- Hot water cuts out when toilet flushes: stuck pressure-balancing piston
- Handle hard to turn: mineral buildup on cartridge
- Leak behind the wall: failed valve body, often a major job
- No hot water at all: reversed cartridge installation or scale blockage
Most issues except the behind-the-wall leak are weekend projects for a homeowner with basic tools.
Tools and Parts You Need
Gather these before starting:
- Replacement cartridge for your specific valve model ($15-50)
- Allen wrench set
- Phillips and flathead screwdrivers
- Adjustable pliers or channel locks
- Cartridge puller tool (Moen requires one, $15-30)
- White vinegar for soaking mineral-clogged parts
- Plumber’s silicone grease
- Towels and a flashlight
Take a photo of the valve before disassembly. Reassembly mistakes are easy to make at 9 PM after you have spread parts across the bathroom floor.
Step-by-Step Cartridge Replacement
The procedure is similar across most brands. Plan on 30-60 minutes for first-timers.
- Shut off water at the main valve, then open the shower to drain residual pressure
- Remove the handle by loosening the set screw under the trim cap
- Unscrew the trim plate and any retaining nut covering the cartridge
- Pull the retaining clip with needle-nose pliers; do not lose it
- Pull the cartridge straight out, twisting slightly if stuck
- Soak the new cartridge O-rings in plumber’s grease before installing
- Insert the new cartridge in the same orientation as the old one
- Reinstall the retaining clip, trim, and handle
- Turn water back on slowly and test for leaks
If the cartridge will not budge, mineral buildup is the cause. Soak the area with white vinegar for 30 minutes, then try again with a Moen 104421 cartridge puller or equivalent.
Fixing Temperature Inconsistency
If hot water suddenly cuts out when someone else uses water elsewhere, the pressure-balancing spool has failed. The fix is the same as a cartridge replacement; modern valves combine the spool and cartridge into one unit. Replace the cartridge and the temperature stability returns.
For dual-handle thermostatic valves, calibrate the temperature limit stop after replacing the cartridge. Most have a small adjustment ring that sets the maximum hot temperature, ideally limited to 120°F to prevent scalding.
When You Have a Behind-the-Wall Leak
Water staining on the wall outside the shower or moisture in the ceiling below means the valve body itself is leaking, not the cartridge. This is rarely a DIY job. Replacing a valve body usually requires:
- Cutting open the wall behind the valve
- Sweat-soldering or press-fitting new copper or PEX connections
- Patching tile, drywall, and waterproofing
- Pressure-testing the new connections
Plumber rates run $200-600 for the valve work, plus tile and drywall repair. Total project costs typically land at $800-2,000.
Preventive Maintenance
Cartridges fail faster in homes with hard water. If your municipal water tests above 7 grains per gallon (120 ppm), consider a whole-house water softener. They run $800-2,500 installed but extend the life of every fixture in the house.
Also exercise your shower valve fully through its temperature range once a month. Stuck valves often fail during the first cold snap of winter, when sudden temperature changes catch corroded internal parts off guard.
When to Call a Plumber
Hire a pro for any of these scenarios:
- Water continues to leak after replacing the cartridge twice
- You see corrosion on the valve body itself
- The valve is older than 25 years and parts are no longer manufactured
- You have galvanized steel pipes that may need replacement
- You are uncomfortable shutting off the main water supply
For a straightforward repair like a cartridge swap, DIY is usually the right call.
Brand-Specific Cartridge Notes
Each major manufacturer has quirks worth knowing before you start. Moen’s Posi-Temp valves use the 1222 cartridge (single-handle) or 1225 (older models), and almost always require a Moen 104421 puller because thermal cycling fuses the brass shell to the valve body. The 1222 is widely stocked at Home Depot for $25-30 and carries a lifetime limited warranty; bring the old one to the store for a free replacement under warranty.
Delta’s Multichoice Universal valves use the RP19804 or RP46074 cartridge depending on series. The trim plate stays in place when you swap the cartridge, which makes the job 15 minutes shorter than other brands. Kohler GP500520 cartridges run $30-40 and are notorious for needing the Kohler 14076 wrench to remove. Pfister cartridges (974-291 or 974-292) use a unique square retainer that requires patience to disengage; the manual on the Pfister website includes exploded diagrams worth printing before you start.
Avoiding Damage During the Repair
Two mistakes ruin more shower valve jobs than any others. First, prying on a stuck cartridge with channel locks against the valve body cracks the brass casing and forces a full valve replacement, turning a $25 part into a $1,500 in-wall demolition. Always use the manufacturer-specific puller, even if it costs $15-30. The second mistake is overtightening the new cartridge or trim screws, which crushes O-rings or strips threads. Hand-tight plus a quarter turn with a wrench is correct for almost all components.
Test the repair with the water pressure on but the trim still off. Run hot and cold for 30 seconds each, watching for any drips at the cartridge-to-body seal. Catching a leak at this stage means a quick reseat with fresh plumber’s grease; finding it after the trim is back on means another teardown.
Shower Valve Leaking? Where the Water Shows Up Tells You Why
A shower valve leaking can mean three very different problems, and the spot where you see the water is the fastest way to tell them apart. Before you buy parts, watch the shower for a few minutes with the handle fully off, then again with it running, and note exactly where the water appears. That one observation usually points to the worn part and tells you whether the fix is a quick afternoon job or a call to a plumber.
Drip From the Spout or Showerhead With the Handle Off
Water that keeps dripping from the tub spout or showerhead after you shut the handle means water is slipping past the part that is supposed to seal it off. In a single handle valve, that part is the cartridge, and its rubber seals or ceramic disks wear or collect mineral scale over time. In older two or three handle valves, the culprit is usually a compression stem with a worn rubber washer pressing against a brass seat. If a new washer stops the drip for only a few weeks, the seat itself is probably pitted and needs to be replaced or dressed with a seat tool.
Water Around the Handle or Trim Plate
Water seeping out around the handle while the shower runs usually means a failed O ring on the cartridge or stem, or a loose bonnet nut that holds the stem in place. Mineral buildup can also keep a cartridge from seating fully. This kind of leak deserves attention even if it looks minor, because water running behind the trim plate can soak into the wall cavity. Check that the trim plate has a sound gasket or a thin bead of caulk along its top and sides, leaving the bottom open so any water that gets behind it can drain out instead of pooling.
Signs of a Leak Behind the Wall
Some leaks never show up in the shower at all. Look for a soft or stained wall on the far side of the shower, loose tiles or grout near the valve, a musty smell, peeling paint, or a water spot on the ceiling below the bathroom. These point to a leaking valve body, a cracked fitting or a failed connection to the supply pipes inside the wall. If there is an access panel behind the valve, open it with a flashlight and look for damp wood, corrosion or drips on the pipes while someone runs the shower.
Safe First Steps and When to Hire a Plumber
Before opening any valve, shut off the water at the main valve or at the shower’s own stops, then turn the shower on to relieve pressure and drain the lines. Cartridge, washer and O ring replacements are reasonable DIY repairs, and parts usually cost a modest amount. A leak inside the wall is different: it involves cutting into the wall, joining pipes and pressure testing, and plumbing code often requires a permit for that work. Call a licensed plumber for in wall leaks, and dry out any wet framing promptly so mold does not take hold.