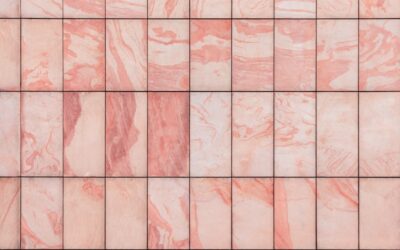
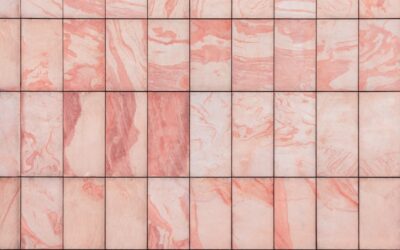
The twall pattern refers to a T-shaped arrangement used in wall framing, tile layouts, and decorative paneling where two walls or surfaces meet in a perpendicular intersection forming the letter T. Done well, a T-pattern adds architectural interest to an otherwise flat wall, creates visual rhythm in tile and paneling, and solves layout problems in tricky rooms. Done poorly, it highlights every framing inconsistency and leftover cut piece. The difference is in planning, not talent.
Where You Actually See T-Patterns
T-patterns show up in more places than most homeowners realize. Common applications:
- Subway tile layouts: T-pattern (also called traditional brick bond with T-intersections) offsets each row by half a tile
- Wall framing: T-intersections where interior partitions meet exterior or parallel walls
- Paneling and shiplap: T-moldings at vertical and horizontal joints
- Wainscoting and board-and-batten: T-patterns separating upper wall sections from lower panels
- Floor tile transitions: T-molding strips where tile meets hardwood or carpet
Each application has its own rules. A subway tile T-pattern is a design choice. A framing T-intersection is a structural requirement with code implications.
T-Pattern in Wall Framing
When an interior partition wall meets a continuous wall (exterior or another interior wall), framers create a T-intersection. Done right, this intersection provides nailing surfaces for drywall on all three sides and maintains structural integrity. Three main framing methods:
- Three-stud T: Traditional method with three studs at the intersection. Wastes lumber and reduces insulation area.
- Ladder blocking: Two studs with horizontal 2×6 blocks between them. Saves lumber, adds insulation space.
- Drywall clip method: Single stud at intersection with metal drywall clips for backing. Most lumber-efficient.
The 2024 International Residential Code permits all three methods. Choose based on insulation priorities (ladder or clip methods beat three-stud for R-value) and framer familiarity.
T-Pattern in Subway Tile Layouts
Standard subway tile (3 by 6 inch) is almost always laid in a T-pattern with 50 percent offset. Each row shifts half a tile from the row above, creating T-shaped grout intersections. This pattern:
- Hides minor tile size variations
- Creates visual rhythm without looking busy
- Reads as classic and period-appropriate from the 1920s onward
- Uses tiles efficiently with minimal waste
Variations on the 50 percent offset include 33 percent offset (tiles shift one-third instead of one-half) and straight stack (no offset, modern look). All three are technically T-patterns in the broader sense, but the classic half-offset is what most homeowners and tile setters picture.
Planning a T-Pattern Tile Job
Mistakes in tile T-patterns show up most at corners, ceilings, and edges. Plan with these steps:
- Measure the full wall width and divide by tile width plus grout line to find row count
- Calculate cut tiles needed at each end. Aim for cuts over 2 inches (tiny slivers look bad)
- Start the first row with a full tile or half tile based on cut sizes at ends
- Shift each subsequent row 50 percent (or chosen offset) from the row below
- Use tile spacers consistently; 1/16 to 1/8 inch is standard for subway
- Lay out the full pattern dry on the floor before cementing anything to the wall
A dry layout reveals spacing problems before they are permanent. Twenty minutes of laying out beats four hours of tearing out misaligned rows.
T-Pattern in Board-and-Batten and Paneling
Decorative wall paneling often uses T-patterns for visual interest. Classic examples:
- Board-and-batten with chair rail: Vertical battens meeting horizontal chair rail creates T-intersections at each batten
- Upper and lower wall treatments: Shiplap above, board-and-batten below, with a horizontal cap rail creating T-joints
- Window trim with stool and apron: Casing meets the stool (horizontal cap) in a T
T-intersections are where paneling jobs live or die. The tighter the joint, the more professional the work reads. Caulk fills gaps but cannot hide sloppy cuts.
Pro Techniques for Clean T-Joints
Whether you are tiling, paneling, or doing framing trim, clean T-joints come from good cuts. Technique:
- Use a miter saw with a fresh 80-tooth blade for trim
- Back-cut joints slightly (1 to 2 degrees) so the visible face meets tightly
- Glue joints with paintable caulk or Titebond before nailing
- Countersink finish nails and fill with wood filler
- Sand joints flush after filler dries
For tile T-joints, keep grout lines uniform by using spacers religiously and wiping excess thinset before it sets. Grout color matters too. A contrasting grout makes T-patterns pop dramatically; matching grout reads subtle and sophisticated.
Common T-Pattern Mistakes
Three errors come up constantly in DIY applications:
- Starting tile layout without dry-fitting, resulting in tiny slivers at corners
- Skipping blocking or clips in framed T-intersections, causing nail pops later
- Mitering trim T-joints instead of coping them, leaving visible gaps when wood moves
For trim T-intersections, always cope the butted piece rather than mitering both. A coped joint hides gaps from seasonal wood movement. Mitered T-joints open up visibly within the first year.
When to Choose a T-Pattern
T-patterns work best in:
- Narrow rooms where repeated horizontal rhythm extends apparent width
- Kitchens and baths where classic subway reads clean and ageless
- Entry halls and mudrooms where board-and-batten needs visual interest
- Areas where you want pattern without overwhelming the space
T-patterns read as more traditional than stacked straight patterns and less busy than chevron or herringbone. They are the safe-but-interesting middle ground.
Cost and Time Estimates
A basic subway tile twall pattern runs $10 to $25 per square foot materials and $8 to $15 per square foot labor installed. Board-and-batten T-pattern treatment (DIY) costs $3 to $8 per square foot in materials (MDF battens, primer, paint) and takes a weekend for an average room. Pro installation adds $4 to $12 per square foot in labor.
Final Thought
T-patterns look simple because they are not showing off. That restraint is exactly why they read timeless. Whether you are framing a wall, tiling a backsplash, or adding board-and-batten to a dining room, the T-pattern is the workhorse layout that disappears into the design rather than fighting for attention. Plan it out, cut it clean, and it will still look right 20 years from now.