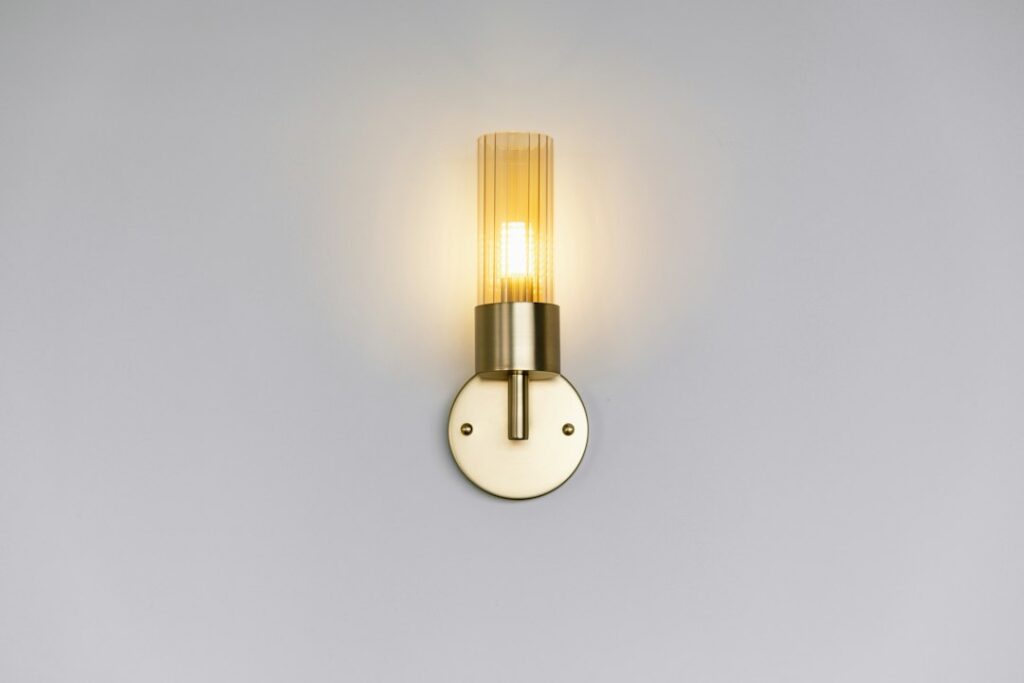
Most people buy an unlacquered brass sconce because it looks bright and golden in the photo, then panic three months later when it turns brown, spotty or even faintly green near the shade holder. That change is the whole point. Unlacquered brass has no clear protective coating, so the copper and zinc in the alloy react with oxygen, moisture and skin oils, building a living finish that darkens year after year.
The short answer to how it behaves: expect a visible shift within a few weeks, a soft honey-brown tone within six to twelve months, and a deep, uneven bronze after several years. You can let that patina develop, polish it back to bright metal whenever you like, or split the difference by polishing only the high points. None of those choices damages the fixture, as long as you use the right products and keep cleaners away from the wiring.
- How an Unlacquered Brass Sconce Ages Over Time
- Letting Patina Develop vs Polishing
- Safety Before You Clean or Polish
- Tools and Materials for Brass Care
- Step-by-Step: Polishing an Unlacquered Brass Sconce
- Placement: Bathrooms, Hallways and Beyond
- Troubleshooting Common Patina Problems
- Cost Ranges and Buying Tips
- When to Call a Licensed Electrician
- Frequently Asked Questions
Where you hang it matters as much as how you care for it. A sconce in a steamy bathroom ages faster and less evenly than one in a dry hallway, and a fixture next to a door that everyone touches will wear bright in the spots hands reach. Planning for that up front saves a lot of second-guessing later.
How an Unlacquered Brass Sconce Ages Over Time
Brass is mostly copper, usually around 60 to 70 percent, with zinc making up the balance. Fresh from the factory, an unlacquered brass sconce shows the bright yellow of clean metal. Once it is exposed to air, a thin oxide layer starts forming. In a dry room the change is gradual and fairly even: the yellow warms, then dulls to a satin amber, then moves toward a mellow brown.
Moisture and chemicals speed things up and make the result less uniform. Humidity, chlorine from tap water, sulfur compounds in the air and the salts and oils from fingertips all leave their mark. That is why you often see darker blotches around a switch or knob, lighter streaks where a cloth wiped once, and occasional green or blue-green spots (verdigris) where water sat on the surface.
Many owners find that the patina looks best once it settles. An evenly aged sconce reads as warm and old, the kind of finish you see in historic homes and older hotels. The transition period, when the metal is blotchy and halfway between bright and dark, is the stage that tests patience.
Typical aging timeline
- Weeks 1 to 4: slight dulling; fingerprints become visible as darker smudges.
- Months 2 to 6: warm amber tone; uneven spots in humid rooms.
- Months 6 to 12: honey-brown satin finish in dry rooms, deeper brown with mottling in baths.
- Years 2 and beyond: rich antique bronze color; occasional verdigris where water collects.
Letting Patina Develop vs Polishing
There is no wrong answer here, only a maintenance commitment. Deciding early helps, because a fixture you plan to keep bright needs regular attention, while one you plan to age needs almost none.
Let it patina
If you like the aged look, do very little. Dust the fixture with a dry microfiber cloth every few weeks and avoid household sprays. To encourage an even finish, some owners wipe the whole sconce with a damp cloth occasionally so that it tarnishes uniformly instead of just where hands touch. Others avoid touching it at all and accept whatever pattern forms. Both approaches are valid.
Keep it bright
To hold a polished, golden look, plan on polishing every one to three months in a dry room and more often in a bathroom. A non-abrasive metal cream made for brass works well. Apply a small amount with a soft cloth, rub with the grain if the brass has a brushed texture, and buff clean with a second dry cloth. Rinse residue from crevices with a barely damp cloth, then dry completely.
The middle route
A popular compromise is a “living highlight” finish: let the fixture darken overall, then lightly polish only raised details such as the backplate rim, the arm edge or the shade ring. The contrast between bright edges and dark recesses looks intentional and takes only a few minutes a year.
If you ever change your mind, you can reverse course. A dark unlacquered fixture can be polished back to bright metal, and a bright one will start aging again the day you stop polishing.
Safety Before You Clean or Polish
A wall sconce is a line-voltage fixture in most homes, carrying 120 volts from the house wiring. Plug-in versions with a cord are easier, but hardwired units deserve respect. Before any deep cleaning, polishing near the socket or removing a backplate, turn off the breaker and confirm power is off with a non-contact voltage tester. Never work on wiring that is still powered. Switching the wall switch off alone is not enough, because some switch loops leave a hot conductor in the box.
- Let bulbs and the socket cool fully before touching them.
- Remove the bulb and shade before polishing so liquid cannot reach the socket.
- Apply polish to the cloth, never directly onto the fixture, to keep product out of the canopy and wiring.
- Installing a new hardwired sconce where none existed, or adding a new circuit or box, is work for a licensed electrician.
Metal polishes and patina solutions are chemicals, too. Work with a window open or a fan running, wear nitrile gloves and safety glasses, and follow the respirator guidance on the label if the product calls for one. Never mix cleaners, especially anything containing ammonia with anything containing bleach, and keep solvent-based products away from pilot lights and open flames. Store rags soaked in oil-based products flat to dry outdoors before disposal.
Tools and Materials for Brass Care
You do not need much. Most of this fits in a small caddy under the sink.
- Two or three soft microfiber cloths (one for applying, one for buffing, one for dusting)
- Non-abrasive brass polish cream or paste
- Mild dish soap and warm water
- Soft toothbrush or detail brush for crevices
- Nitrile gloves and safety glasses
- Non-contact voltage tester for hardwired fixtures
- Optional: a homemade paste of lemon juice and baking soda, or white vinegar and salt, for heavier tarnish
- Optional: a paste wax suitable for metals if you want to slow aging without lacquer
Skip steel wool, scouring pads and abrasive powders. They leave scratches that catch tarnish and look cloudy once the metal ages again.
Step-by-Step: Polishing an Unlacquered Brass Sconce
- Power down. Switch off the fixture, then turn off the breaker for a hardwired unit and confirm it is dead with a non-contact voltage tester. Unplug a plug-in model.
- Cool and disassemble. Wait for the bulb to cool, then remove it along with any glass or fabric shade. Set the shade aside; fabric should never get polish on it.
- Wash off grime. Wipe the metal with a cloth dampened in warm, soapy water to lift dust and oils. Dry right away.
- Test a hidden spot. Try your polish on the back edge of the backplate or the underside of the arm. Some sconces have a factory-applied darkening that polish will remove; check before committing to the whole surface.
- Apply polish to the cloth. Rub in small circles on smooth surfaces, or follow the grain on brushed finishes. Work one section at a time.
- Detail the crevices. Use a soft brush with a dab of polish around knurled rings and joints, keeping it well away from the socket.
- Buff and remove residue. Buff with a clean dry cloth until the haze disappears. Leftover polish dries white in grooves, so check carefully.
- Optional wax. A thin coat of metal-safe paste wax slows tarnish for a few months without the plastic look of lacquer.
- Reassemble and restore power. Replace shade and bulb, then turn the breaker back on.
For a speedier patina instead, some owners wipe the clean metal with diluted white vinegar or a commercial brass darkening solution. Those products work fast and can produce blotches, so practice on a scrap or hidden area and wear gloves and eye protection.
Placement: Bathrooms, Hallways and Beyond
Bathrooms and humidity
Bathrooms age unlacquered brass fastest. Steam, splashes and cleaning sprays all speed oxidation, and water spots dry into dark rings or green verdigris. If you love the look, mount sconces at least 12 inches from the edge of a tub or shower spray zone and choose fixtures rated for damp locations. Run the exhaust fan during and for 20 to 30 minutes after showers. A flanking pair beside a vanity mirror, typically centered around 60 to 66 inches above the floor, gives even face lighting and stays out of the worst of the splash zone.
Pairing an unlacquered sconce with unlacquered faucets and hardware creates a consistent look, but the pieces will age at different rates. Faucets get wet and touched constantly, so they darken faster than a sconce on the wall. Many designers embrace that variation; if you prefer a perfect match, plan to polish everything on the same schedule.
Hallways, bedrooms and living rooms
Dry rooms produce the most even patina. A plug-in or hardwired fixture beside a bed, over a reading chair or along a hall ages slowly and gracefully. Mount hallway sconces around 66 to 72 inches high so they light the space without glaring into eyes, and space them roughly 8 to 10 feet apart for even coverage.
Kitchens
Over open shelving or a range wall, grease and cooking vapors build up on brass. Wipe regularly with warm soapy water so the finish ages under a clean surface rather than a sticky film.
Exterior porches
Outdoors, an unlacquered fixture weathers dramatically, especially near salt air. Choose a wet-rated model for exposed spots, and expect a dark brown to green finish within a year or two.
Troubleshooting Common Patina Problems
- Blotchy, uneven color: Usually from water spots or fingerprints. Polish the whole surface back to bright, then let it age evenly, or wipe the entire fixture with a damp cloth weekly for a month to even out tone.
- Green or blue spots: That is verdigris. Remove it with a lemon and baking soda paste, rinse, dry well, and address the moisture source.
- White residue in grooves: Dried polish. Brush it out with a soft toothbrush and a drop of warm water, then dry.
- Polish not working: The fixture may actually have a clear coat. Lacquered brass will not tarnish evenly and resists polish. Peeling or cloudy patches confirm a coating.
- Flickering after cleaning: Moisture or polish may have reached the socket. Turn off power at the breaker, let the fixture dry completely, and call an electrician if the flicker continues.
Cost Ranges and Buying Tips
Expect a broad spread. Simple single-arm plug-in models start in the low tens of dollars, mid-range hardwired sconces often fall in the low hundreds, and solid, handmade fixtures from small studios can run several hundred dollars or more per light. Solid brass costs more than brass-plated steel or zinc, but plating can wear through and reveal a different metal underneath once you start polishing.
When shopping for an unlacquered brass wall sconce, look for the words “solid brass” and “unlacquered” or “living finish” together. Check whether the fixture is listed by a recognized testing laboratory, whether it is rated for dry, damp or wet locations, and whether it suits your bulb type and dimmer. A hardwired installation by an electrician typically adds a modest labor charge when an existing box is in place, and substantially more when a new box and wire run are needed.
When to Call a Licensed Electrician
Swapping a plug-in sconce or cleaning an existing fixture is a homeowner task. Call a licensed electrician to add new hardwired sconces, run wire in finished walls, install a new box, add a dimmer to an older circuit, or troubleshoot buzzing, scorching smells or repeated breaker trips. In bathrooms, fixtures near water need correct damp or wet ratings and nearby outlets need GFCI protection, which a pro will confirm. Many jurisdictions require a permit for new circuits, so an electrician also keeps you on the right side of inspections.
Frequently Asked Questions
How long does it take an unlacquered brass sconce to darken?
You will see some change in a few weeks. A dry room usually produces a warm honey tone in six to twelve months, while a humid bathroom can darken a fixture noticeably within a few months.
Can I stop unlacquered brass from tarnishing without lacquer?
You can slow it. A thin coat of metal-safe paste wax after polishing buys a few months, and keeping the fixture dry and fingerprint-free helps. Nothing short of a clear coating stops the process entirely.
Is unlacquered brass a good choice for a bathroom sconce?
Yes, if you accept faster, less even aging. Choose a damp-rated fixture, keep it away from direct spray, and run the exhaust fan to limit water spotting.
Will polishing damage the patina permanently?
No. Polishing removes the oxide layer, and the metal begins aging again right away. You can switch between bright and aged looks as often as you like.
Do I need to turn off the power to dust a sconce?
Light dusting with a dry cloth is fine with the light switched off and cool. For anything wet, or any work near the socket or backplate on a hardwired unit, turn off the breaker and confirm power is off with a non-contact voltage tester first.