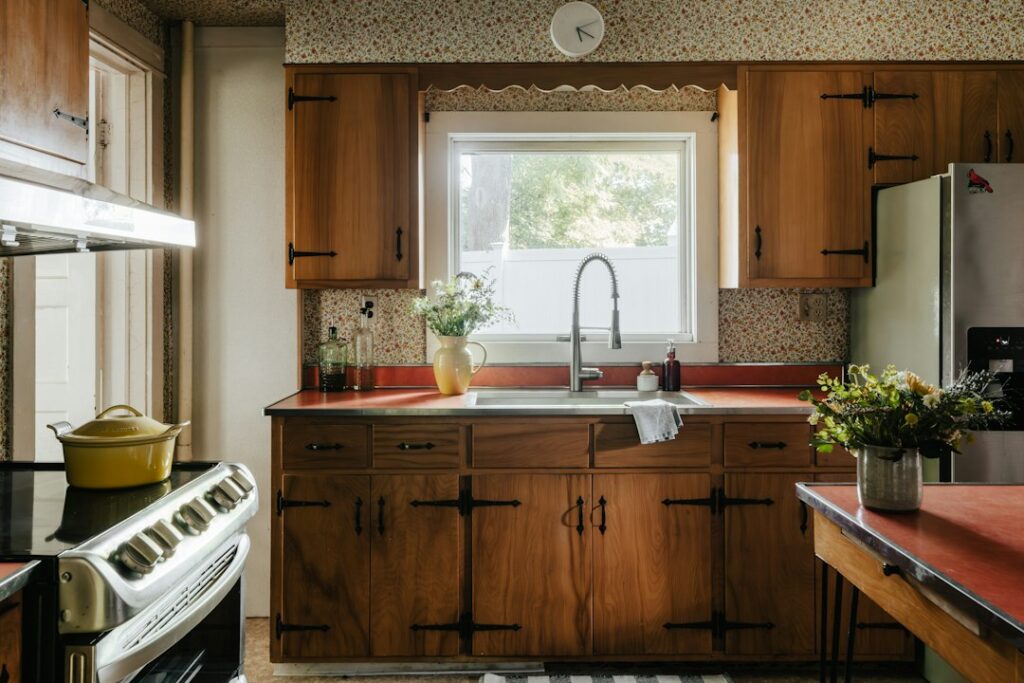
Replacing kitchen cabinets costs between $8,000 and $40,000 installed for an average kitchen. Yet many existing cabinets have solid boxes, hinges that work, and drawer slides that simply need adjustment. Before you tear anything out, the smart play is to update kitchen cabinets with paint, new doors, modern hardware, and interior organizers. The visual change is dramatic, the cost is a fraction of replacement, and the project takes a long weekend instead of three weeks of takeout dinners.
Part of our Kitchen Remodeling guide — explore the full guide →
- Assess Whether the Boxes Are Worth Saving
- Paint: The Highest Impact, Lowest Cost Option
- Refacing: New Doors on Old Boxes
- Hardware Swaps That Read as Brand New
- Add Interior Organizers Where They Matter
- Step-by-Step: A Weekend Paint Update
- What to Look for in Flooring Next to Refreshed Cabinets
- What to Spend and What to Skip
- More Ways to Update Old Kitchen Cabinets Without Replacing Them: Trim, Glass, Lighting and Open Shelves
Assess Whether the Boxes Are Worth Saving
Open every door and pull every drawer. Look for water swelling at the sink base, broken corner blocks, racked face frames, and particleboard delamination. Plywood boxes from any era usually have decades of life left. Particleboard boxes from the 1980s often look fine on the outside but crumble when you remove hinges. A simple test: drive a screw into an inside wall and yank it back out. Solid bite means the cabinet is worth refreshing. A puff of brown dust means replacement is closer to honest than rescue.
Drawers are a separate calculation. Wood dovetail boxes on full-extension undermount slides should stay. Plastic guides with metal staples and stapled-together fiberboard sides are not worth saving even if everything else is.
Paint: The Highest Impact, Lowest Cost Option
A quality cabinet paint job runs $300 to $600 in materials for an average 25-door kitchen. Use a water-based cabinet enamel with urethane or alkyd modifiers; these paints level out brush marks and cure to a hard finish in about 30 days. Two coats of paint over a properly prepped surface will last 10 to 15 years.
The prep matters more than the brand. Pull every door and drawer, label the hinge cup with painter’s tape and a number, and clean every surface with a degreasing cleaner or TSP substitute. Sand with 220-grit on a random orbit sander until the sheen is uniformly dull. Prime with a bonding primer or a shellac-based primer, both of which bond to factory clear coats without a chemical deglosser. Spray if you can borrow a handheld airless or HVLP sprayer. Otherwise brush with a quality synthetic angled sash brush and tip out with a high-density foam mini roller in 4-inch sleeves.
Refacing: New Doors on Old Boxes
Refacing keeps the cabinet boxes, replaces the doors and drawer fronts, and applies matching wood veneer or rigid thermofoil to the face frames. A pro reface costs $4,500 to $9,000 for a 25-door kitchen. A DIY reface using made-to-order doors from an online door supplier and peel-and-stick wood veneer runs $1,800 to $3,200 in materials.
Match the new doors to the existing reveals so the gaps look factory. Order overlay rather than inset unless your boxes were originally built for inset hinges. Clip-on 110-degree concealed hinges with built-in soft close make any old cabinet feel new the moment you pull the door open.
Hardware Swaps That Read as Brand New
Most builder-grade cabinets ship with 3-inch center brushed nickel knobs or a single round pull. Swapping to 5-inch matte black bar pulls on uppers and 8-inch pulls on drawer fronts adds visual length to the cabinets and modernizes the room for around $4 to $12 per pull. Solid zinc or brass pulls with commercial-grade finishes often outlast the cheapest bulk packs for similar money.
Use a cabinet hardware drilling jig to drill consistent holes. Mark a story stick from the bottom corner of each door and from the top edge of each drawer, then transfer through the jig. An inexpensive jig pays for itself in skipped layout headaches.
Add Interior Organizers Where They Matter
Pullouts inside existing cabinets deliver more functional change than any cosmetic update. Two-tier pullout wire baskets fit 15-inch and 18-inch cabinets and convert dead corner space into accessible storage. A Lazy Susan retrofit kit slides into a blind corner cabinet in about 90 minutes with no demolition. Adjustable drawer dividers double the usable surface in a 24-inch drawer.
Trash pullouts in the cabinet next to the sink are non-negotiable for daily quality of life. A double 35-quart pullout kit is a modest expense and installs with eight screws and an hour of work.
Step-by-Step: A Weekend Paint Update
- Friday evening: Remove all doors and drawers, label with tape, set up a paint station in the garage on sawhorses
- Saturday morning: Clean every surface with a degreaser, scuff sand with 220-grit, vacuum and tack cloth
- Saturday midday: Prime with a bonding primer using a handheld sprayer or a brush and roller, allow 4 hours dry time
- Saturday evening: First topcoat of cabinet enamel, light sand with 320 between coats
- Sunday morning: Second topcoat on doors, paint frames in place with a brush and foam roller
- Sunday afternoon: Drill for new hardware, reinstall doors and drawers, adjust hinges
Plan for the boxes to feel slightly tacky for several days. Avoid stacking dishes hard against fresh paint for the first two weeks while the urethane cures.
What to Look for in Flooring Next to Refreshed Cabinets
Refreshed cabinets often expose how tired the kitchen floor looks. If you are pairing a cabinet update with new flooring underneath, a waterproof rigid-core wood-look plank handles dishwasher leaks and sink splashes without swelling and usually sits at the lower end of flooring costs. Water-resistant engineered oak with a factory-sealed top layer costs more but gives you real wood rated for kitchen use. Warm or neutral oak looks pair well with painted Shaker cabinets in soft whites or grays. Skip the thinnest bargain vinyl planks and check the wear layer spec, since a thin wear layer is too weak to survive 10 years of chair scuffs and dropped pans next to refreshed cabinets that should last 15 years or more.
What to Spend and What to Skip
Money spent on paint, hardware, and pullouts returns the entire investment in lived-in quality and resale appeal. Money spent on new countertops with old cabinets reads as a half-finished kitchen. If the boxes are sound, the order of operations is paint, hardware, organizers, then sink and faucet, then counters last. A staged update like this lets you spread the cost over a year and live in a working kitchen the entire time. Document the original cabinet condition with photos before you start; the side-by-side comparison is what makes the project feel worth the effort six months in when daily use has dulled the memory of what the kitchen looked like before.
More Ways to Update Old Kitchen Cabinets Without Replacing Them: Trim, Glass, Lighting and Open Shelves
Paint, hardware and refacing get most of the attention, but a handful of carpentry upgrades can make dated boxes look custom. If you want to update old kitchen cabinets without replacing them and the boxes are solid, these projects change the shape and feel of the kitchen rather than just its color. Most take a weekend and basic tools.
Close the Gap at the Ceiling
Many older uppers stop a foot or more below the ceiling, leaving a dusty ledge that makes the room feel shorter. Build a simple frame on top of the cabinets and face it with a filler board painted to match, then add crown molding across the top. The cabinets read as taller built-ins. If a soffit already fills the space, a wide crown molding along the bottom edge ties it to the boxes visually.
Turn Flat Doors Into Shaker Style
Plain slab doors can be converted to a shaker look by gluing and pin-nailing thin flat trim strips around the perimeter of each door. Use a consistent width, often 2 to 3 inches, sand the joints smooth, caulk the inside edges and paint. For a different look, remove the center panels of a few upper doors with a router and install glass, or take a few doors off entirely and finish the inside of those boxes as open shelving for everyday dishes.
Add Under-Cabinet Lighting
Light under the uppers makes counters easier to use and shows off the new finish. Plug-in and battery-powered LED strips or puck lights are the easiest choice for a DIYer. Use low-voltage fixtures with a properly sized, listed power supply, keep strips uncoiled and away from heat, and plug the supply directly into an outlet. Hardwired fixtures connected to household wiring, or any new outlet or circuit, should be installed by a licensed electrician; before touching any existing fixture, the power must be off at the breaker and confirmed off with a non-contact voltage tester.
Furniture Details on the Base Cabinets
Adding decorative feet or a furniture-style toe kick to the end of an island or a run of base cabinets gives the room a built-in, unfitted look. Pair it with matching end panels to cover plain cabinet sides. For a final touch, line drawers and shelves with a wipeable liner so the refreshed interiors stay clean.
Older cabinets may carry lead paint. If the kitchen was built before 1978, test painted surfaces before sanding or cutting, and use lead-safe methods if the test is positive. Wear eye protection when cutting trim and use a sturdy step ladder for crown work. Taken together, these projects show how far you can update old kitchen cabinets without replacing them.