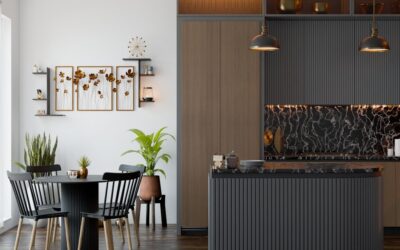
Nothing opens up a cramped galley kitchen faster than swapping a wall of solid maple for a few panes of glass. Upper kitchen cabinets with glass doors break the visual weight of a full cabinet run, bounce light around the room, and turn everyday dishes into a small design statement. They also demand a little discipline, because whatever sits behind that glass is now on permanent display. Get the balance right and a $180 upper cabinet reads like custom cabinetry.
Part of our Kitchen Remodeling guide — explore the full guide →
I have installed and refaced dozens of these over the years, and the homeowners who love the result almost always plan two things in advance: which panes get glass, and what goes behind them. Skip that step and you end up with a lit-up shelf of mismatched Tupperware.
- Why Glass-Front Uppers Are Worth Considering
- Choosing the Right Glass Type
- Styling What Goes Behind the Glass
- Lighting Makes or Breaks the Look
- Cost Breakdown and Where to Buy
- Installation and Hardware Tips
- Design Styles That Suit Glass Fronts
- Common Mistakes to Avoid
- Keeping the Glass Clean
- Are Glass-Front Cabinets Right for Your Kitchen?
Why Glass-Front Uppers Are Worth Considering
A standard 30-inch wall cabinet with two solid doors feels like a box bolted to the wall. Replace those doors with framed glass and the eye travels straight through to the back panel, which makes the whole wall feel deeper than its actual 12 inches. In a small kitchen, that illusion of depth is genuinely useful.
There is a practical upside too. When you can see your everyday glasses, mugs, and serving pieces, you stop digging through blind cabinets. Guests find the wine glasses without asking. For anyone who entertains, the top row of glass cabinets becomes a functional bar and display in one.
- Light distribution — glass lets natural and under-cabinet light pass through instead of stopping at a flat door.
- Perceived space — clear or lightly frosted panes make 10-foot ceilings and short walls feel taller.
- Selective display — you choose exactly which items earn a spot behind glass.
- Design flexibility — pair glass uppers with solid lowers for a two-tone look that feels intentional.
Choosing the Right Glass Type
The glass itself changes the entire personality of the cabinet, and this is where most people underthink the decision. Clear glass shows everything, so it belongs above tidy stemware or a curated set of white dishes. If your storage runs toward chaos, pick a glass that hides sins.
Clear vs. Textured vs. Frosted
- Clear tempered glass — the gallery option. Best for open shelving-style display and matched dishware sets. Full visibility, zero forgiveness.
- Seeded or reeded glass — vintage-inspired ripples and bubbles that blur the contents while still letting light through. Forgiving and popular in farmhouse and transitional kitchens.
- Frosted or satin-etched glass — you see soft shapes and shadows but no detail. Ideal if you want the glass look without curating every shelf.
- Leaded or mullion glass — divided-light grids that add traditional character. The grid pattern breaks up whatever is behind it.
Order tempered glass wherever you can. It costs a few dollars more per pane but resists cracks from door slams and, if it ever fails, crumbles into pebbles instead of daggers. Most manufacturers charge roughly $25 to $60 extra per door to upgrade a solid panel to glass.
Styling What Goes Behind the Glass
This is the part that separates a magazine kitchen from a cluttered one. Treat the interior like a small display shelf, not deep storage. Group items by color and material, keep some negative space, and stack from heavy on the bottom to delicate on top.
A reliable formula: dedicate the glass cabinet to a single palette. All-white dinnerware, clear stemware, or a run of amber glassware reads as deliberate. Add one or two non-dish objects — a small stack of cookbooks, a ceramic pitcher, a bit of greenery — to keep it from looking like a store shelf.
Paint or line the interior back panel a contrasting color for extra depth. A soft sage, navy, or warm clay behind white dishes gives the display a custom, built-in feel that costs almost nothing.
Lighting Makes or Breaks the Look
Glass-front cabinets without interior lighting go dark and cave-like the moment the sun drops. Puck lights or an LED strip mounted inside the top of the cabinet transform the display at night. I run warm white LEDs rated around 2700K to 3000K, which flatter dishware far better than the blue-white 5000K strips sold for garages.
Battery-powered stick-on pucks run about $20 to $40 for a set of three and need no wiring, which is perfect for a rental or a weekend upgrade. Hardwired LED tape with a dimmer looks cleaner and costs more, usually $60 to $150 in parts plus an electrician if you are not comfortable tapping into a switched circuit.
Cost Breakdown and Where to Buy
Glass-front uppers span a huge price range depending on whether you buy stock, semi-custom, or custom. Here is what to budget in 2026 dollars:
- Stock glass-front wall cabinet (30 in.) — $150 to $320 at big-box stores like Home Depot or Lowe’s.
- Semi-custom with your choice of glass and finish — $350 to $700 per cabinet.
- Glass-door upgrade on cabinets you already own — $90 to $250 per door through a cabinet-door supplier.
- Custom mullion or leaded glass doors — $300 and up per door.
If your existing cabinet boxes are solid, refacing is the smart money move. A cabinet-door company will build new glass doors to your exact hinge and size specs, and you swap them out in an afternoon. That keeps a full kitchen refresh under $2,000 instead of $8,000-plus for new cabinetry.
Installation and Hardware Tips
Hanging or swapping glass doors is well within reach for a confident DIYer, but a few details matter more than they do with solid doors. Glass adds weight and shifts the door’s balance toward the outer edge, so use quality European-style concealed hinges rated for the door size. Cheap hinges sag within months and let the door drift out of alignment.
- Confirm your hinge cup size — most cabinet doors use 35mm bore holes.
- Mount hinges to the door first, then clip onto the baseplates already set on the cabinet frame.
- Use the three adjustment screws on each hinge to dial in the reveal so gaps between doors stay even, ideally 1/8 inch.
- Add clear rubber bumpers to the inner corners to soften the glass-on-frame contact and stop rattling.
For the handle, keep it proportional. A slim 5-inch pull or a small knob suits the lighter visual weight of a glass door far better than a chunky 12-inch bar meant for a pantry.
Design Styles That Suit Glass Fronts
Glass-front uppers slot into almost any kitchen style, but the frame and glass pairing sets the tone. A shaker-style frame with clear glass reads clean and transitional. Add reeded glass to that same shaker door and it leans farmhouse. Swap in a mullion grid and you land squarely in traditional or English-country territory.
For a modern kitchen, go frameless with a slim aluminum-edge glass door and skip the muntins entirely — the goal there is a floating, gallery-like plane. In a coastal or cottage kitchen, paint the frames a soft blue-green and back the interior in white beadboard. The point is that the same basic glass cabinet can whisper or shout depending on how you dress the frame around it.
Two-Tone and Accent Placement
One trick that never fails: use glass fronts as accents rather than the whole run. Put glass on the two cabinets flanking a window or range hood and keep the rest solid. That symmetry frames the focal point of the kitchen and gives the eye a place to rest. Homeowners who glass every single upper often find the wall reads busy; restraint almost always looks more custom.
Common Mistakes to Avoid
A few missteps show up again and again, and all of them are easy to sidestep once you know to watch for them.
- Storing clutter behind clear glass — the fastest way to make an expensive cabinet look cheap. Use frosted or reeded glass if you cannot keep the interior tidy.
- Skipping interior lighting — an unlit glass cabinet turns into a dark void at night and loses all its appeal.
- Cheap hinges — glass adds weight, and bargain hinges sag and misalign within months.
- Mismatched glass across the kitchen — pick one glass type and repeat it so the room feels cohesive.
- Placing glass right beside the cooktop — grease films the panes and forces constant cleaning.
Keeping the Glass Clean
Glass shows fingerprints and dust more than solid doors, but upkeep is simple. Wipe the panes weekly with a microfiber cloth and a streak-free glass cleaner, or a 50/50 mix of white vinegar and water. Avoid spraying cleaner directly onto the glass near the frame joints, where liquid can seep into the wood and cause swelling over time — spray the cloth instead. Dust the interior shelves whenever you clean the glass, since dust behind a clear pane is just as visible as dust on it.
Are Glass-Front Cabinets Right for Your Kitchen?
They shine in kitchens where you want display and light, and where you either own attractive dishware or are willing to buy a coordinated set. They are less ideal directly next to a range, where grease and airborne oil film the glass and force weekly cleaning. Keep the glass cabinets a couple of feet from the cooktop and you sidestep most of that maintenance.
My usual advice: don’t convert every upper. Glass on one or two cabinets, flanked by solid doors that hide the cereal boxes and mismatched mugs, gives you the airy look without turning your whole kitchen into a display case you have to maintain. Start with the cabinet above the sink or beside the window, where light already flows, and build from there. That single change often delivers the biggest payoff for the least money and effort.