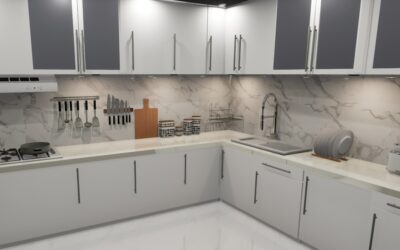
A vaulted ceiling does for a kitchen what a sunroof does for a sedan — adds drama, complicates the engineering, and rewards a careful designer. The mistake most homeowners make is treating the kitchen wall under a vault as if it were flat. Standard 30-inch uppers under a 14-foot peak leave a yawning triangle of bare wall that no amount of trim hides. Vaulted ceiling kitchen cabinets work when they either step up to meet the ceiling, terminate cleanly with intentional trim, or pair with a beam treatment that turns the slope into a focal point. Below are the layouts that actually look custom, with realistic cost and labor.
Part of our Kitchen Remodeling guide — explore the full guide →
- Understanding Your Vault Geometry
- Option 1: Stepped Stacked Uppers
- Option 2: Single Tall to Standard Height
- Option 3: Open Display Shelving Above Standard Uppers
- Option 4: Floor-to-Ceiling Pantry Tower
- Beam Treatments That Tie It Together
- Lighting Strategy Under a Vault
- HVAC and Ductwork Considerations
- Realistic Cost for a Vaulted Kitchen Cabinet Project
- The One Detail Designers Always Specify
Understanding Your Vault Geometry
Vaulted ceilings come in four common shapes that drive completely different cabinet decisions.
- Cathedral — Symmetrical pitch from both walls peaking in the center, often with exposed rafters
- Shed — Single slope from a low wall to a high wall
- Tray — Flat ceiling with stepped perimeter going higher in the center
- Barrel — Curved ceiling forming a rounded arch
Measure the wall height at the cabinet location specifically — not just the peak. A cathedral ceiling at 14 feet might give you only 10 feet of usable wall before the slope starts.
Option 1: Stepped Stacked Uppers
The most polished solution for shed ceilings. Start with standard 36 or 42-inch uppers along the lower wall, then step up sections of cabinetry as the ceiling rises. Each cabinet height matches the available wall above counter.
For a 9-foot to 12-foot shed ceiling, plan a primary cabinet section at 42 inches followed by 48-inch and then 54-inch sections as the wall climbs. The top of each cabinet aligns with a finished line about 12-18 inches below the ceiling.
Cost runs $300-$550 per linear foot for semi-custom shaker, $450-$900 per linear foot for full custom.
Option 2: Single Tall to Standard Height
Run all uppers at a single 48-inch height regardless of the ceiling, then finish the triangle of wall above with a deliberate treatment — shiplap, board-and-batten, or a contrasting paint color. This separates the cabinetry from the ceiling architecture and reads as a designed choice.
Works especially well in cathedral kitchens where the slope is dramatic and trying to follow it makes the cabinetry feel like it is fighting the room.
Option 3: Open Display Shelving Above Standard Uppers
Standard 30 or 36-inch uppers along the wall, then 2-3 rows of open shelving climbing the slope above. The shelves can step in tighter spacings to match the angle, with bracket hardware (Rejuvenation or Federal Brace, $25-$80 per bracket) sized to the shelf depth.
This treatment looks intentional in farmhouse, coastal, and modern-rustic kitchens. Avoid in formal traditional designs where the open shelving will read as casual.
Option 4: Floor-to-Ceiling Pantry Tower
If one wall under the vault is short (a gable end), build a single floor-to-peak pantry tower that follows the slope. This requires custom cabinetry — semi-custom does not typically offer angled tops — and runs $4,500-$8,500 for a single 36-inch wide tower.
The angled top is the eye-catching element. Use it for adjustable shelving or for tall pull-out broom storage that benefits from extreme height.
Beam Treatments That Tie It Together
Exposed or applied beams across a cathedral kitchen tie the ceiling to the cabinetry visually. Reclaimed Douglas fir, hand-hewn oak, or even box beams built from rough-sawn pine on a 2×4 frame all read as intentional architecture.
Plan $400-$900 per beam installed, including the wood, finish, and labor. Spacing matters: 24-36 inches on center for a tight modern-rustic feel, 48-60 inches for a more open look.
If beams are not in budget, paint the ceiling a slightly different tone than the walls — a warm white ceiling over off-white walls — to anchor the vault as its own element.
Lighting Strategy Under a Vault
Recessed cans in a vaulted ceiling can be a maintenance headache because the housing tilts with the slope. Use sloped-ceiling-rated trim (Halo H7T or Juno IC22LED) at $35-$60 each rather than standard cans, which will leave a gap or wrinkle the gasket.
Pendant lighting solves the vault problem elegantly. Hang pendants 30-36 inches above the island countertop with adjustable cord lengths, allowing the chain or cable to absorb any height variation across the room. Long industrial pendants with a 60-inch maximum drop work in 12+ foot vaults.
HVAC and Ductwork Considerations
Vaulted kitchens lose heat upward in winter. Ceiling fans (52-inch minimum diameter, reversible direction) push warm air back down and double summer cooling efficiency. Hunter Builder Elite or Kichler Tide fans at $150-$300 work in most vaults.
The range hood ducting needs careful planning. A vault rarely has flat ceiling space above the range for a ducted hood — most installs run ductwork through a soffit built down from the vault to a 36-inch wide flat plane above the cooktop, then transition to standard ductwork. Plan an extra $400-$900 for that soffit detail.
Realistic Cost for a Vaulted Kitchen Cabinet Project
A typical 14-foot run under a shed ceiling rising from 9 to 12 feet:
- Semi-custom shaker, stepped stacked uppers — $4,500-$7,200
- Full custom inset with stepped boxes — $9,500-$16,000
- Plus crown molding and finish trim — $400-$1,200
- Plus labor and install — $1,800-$3,500
For a full kitchen remodel under a vault (10 cabinet sections, island, pantry tower), $35,000-$80,000 is a realistic total range depending on materials.
The One Detail Designers Always Specify
When stepping cabinets up to follow a slope, make every step the same height — not a varied 4 inches here and 7 inches there. The eye reads consistent steps as designed; varied steps look like the installer was guessing. Confirm step heights on shop drawings, and verify them in person before any cabinet leaves the shop. Fixing a wrong-step cabinet after install requires a full replacement, not a field adjustment, because the box dimensions are fixed.