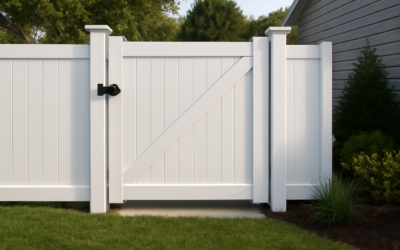
If you have a vinyl fence and need a clean way to add or replace a gate, a vinyl gate kit takes most of the guesswork out of the job. Instead of sourcing rails, pickets, hinges, and a latch separately and hoping they match your fence, a kit bundles the pieces that build one matching gate, sized to drop into a standard opening.
Kits range from bare-bones bracket sets to complete gates with everything but the posts. Knowing what you are buying, and what your fence opening actually needs, is the difference between a gate that swings true for years and one that sags within a season.
What a Vinyl Gate Kit Includes
The contents vary a lot by manufacturer and price point, so read the listing carefully. Most kits fall into one of two broad categories.
- Hardware-only kits: These give you the metal guts to convert vinyl fence panels into a gate. Expect hinges, a latch, an anti-sag reinforcement system, and the screws to assemble it. You supply or cut the vinyl rails and pickets from matching fence material.
- Complete gate kits: These include the pre-cut vinyl frame, pickets or panel infill, internal aluminum or steel reinforcement inside the frame, hinges, and a latch. You assemble the frame and hang it. This is the easiest route for matching a specific fence style.
Better kits include a steel or aluminum insert inside the bottom rail. That internal stiffener is the single most important component, because hollow vinyl alone is not rigid enough to resist the racking force that makes gates droop.
Measuring Your Gate Opening Correctly
Sizing is where most gate projects go wrong. The opening between your two gate posts is not the same as the gate width you order, because the hinges and latch need room to operate.
- Measure the clear distance between the two posts at the top and the bottom. Posts are rarely perfectly plumb, so use the smaller number.
- Subtract the manufacturer’s recommended gap, typically 1.5 to 3 inches total, to leave room for the hinge swing on one side and the latch on the other.
- Confirm the post height and rail spacing match your fence so the gate lines up visually with the adjacent panels.
Common kit widths cover single walk gates from 36 to 48 inches and wider drive gates up to 60 inches as a single leaf. For openings beyond about 6 feet, a double-gate kit with two leaves and a center drop rod is the right call, since one oversized leaf will always tend to sag.
Choosing the Right Kit for Your Fence
Match the kit to three things: your fence style, your opening width, and the traffic the gate will see. A privacy fence needs a privacy gate with full tongue-and-groove infill, while a picket fence needs a spaced-picket gate. Mixing styles looks like an afterthought.
Width drives the hardware grade. A 36-inch walk gate gets by with standard hinges, but a wide gate or a gate that swings dozens of times a day, like the entry to a pool or a dog run, deserves heavy-duty self-closing hinges and an internal frame on all four sides. If the gate guards a pool, local code almost always requires a self-closing, self-latching mechanism with the latch mounted high, so check your municipal requirements before you buy.
Hardware That Keeps a Gate From Sagging
A vinyl gate fails in predictable ways, and good hardware heads off every one of them. The hinge-side corner carries the load, so quality hinges and a reinforced frame matter most there.
- Hinges: Self-closing spring hinges are worth the upgrade for any gate you want to latch reliably. Look for stainless or powder-coated steel that resists rust.
- Anti-sag kit: A diagonal steel cable with a turnbuckle runs from the top hinge corner to the bottom latch corner. Tightening the turnbuckle pulls a drooping gate back square. Many kits include this; if yours does not, add one.
- Latch: Gravity latches and lockable latches are common. Choose one rated for your gate width and, for pools, one that locks.
- Internal reinforcement: Aluminum or galvanized steel inserts inside the vinyl rails keep the frame from flexing under its own weight.
Installing a Vinyl Gate Kit
Most homeowners with basic tools can install a complete kit in an afternoon. The sequence matters more than speed.
- Confirm both gate posts are set in concrete, fully cured, and plumb. A gate is only as solid as the posts it hangs on.
- Assemble the gate frame on a flat surface, installing the internal reinforcement and squaring the corners with a framing square before tightening fasteners.
- Dry-fit the gate in the opening on shims to verify your gaps and reveal lines.
- Mount the hinges to the post first, then attach the gate, checking that it swings freely and the top rail aligns with the fence.
- Install the latch at the correct height, then fit and tension the anti-sag cable until the gate hangs square.
- Test the swing and self-close, and adjust hinge tension as needed.
Cost and Value
Treat these figures as estimates, since prices move with material and hardware grade. A hardware-only conversion kit often runs $40 to $120. A complete single walk-gate kit commonly lands between $150 and $400, with privacy and wide gates at the higher end. A double-gate kit for a driveway can reach $500 or more. Compared with custom-fabricating a gate or hiring it out entirely, a kit usually saves both money and the headache of mismatched fence colors and profiles.
Maintenance and Longevity
Vinyl gates ask very little once they are hung right. Wash the vinyl with mild soap and water a couple of times a year to keep it bright. Check the hinge screws each season and snug any that have loosened from repeated swinging. If the gate starts to drag, tighten the anti-sag turnbuckle rather than ignoring it, because a small adjustment now prevents a permanently warped frame later. A well-chosen vinyl gate kit, hung on solid posts with reinforced hardware, will match your fence and swing smoothly for the life of the fence itself.
Prefer to explore on your own?
See how new flooring looks in your actual room in seconds — free, no signup.
Try the free Floor Studio →