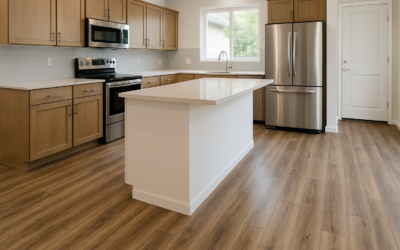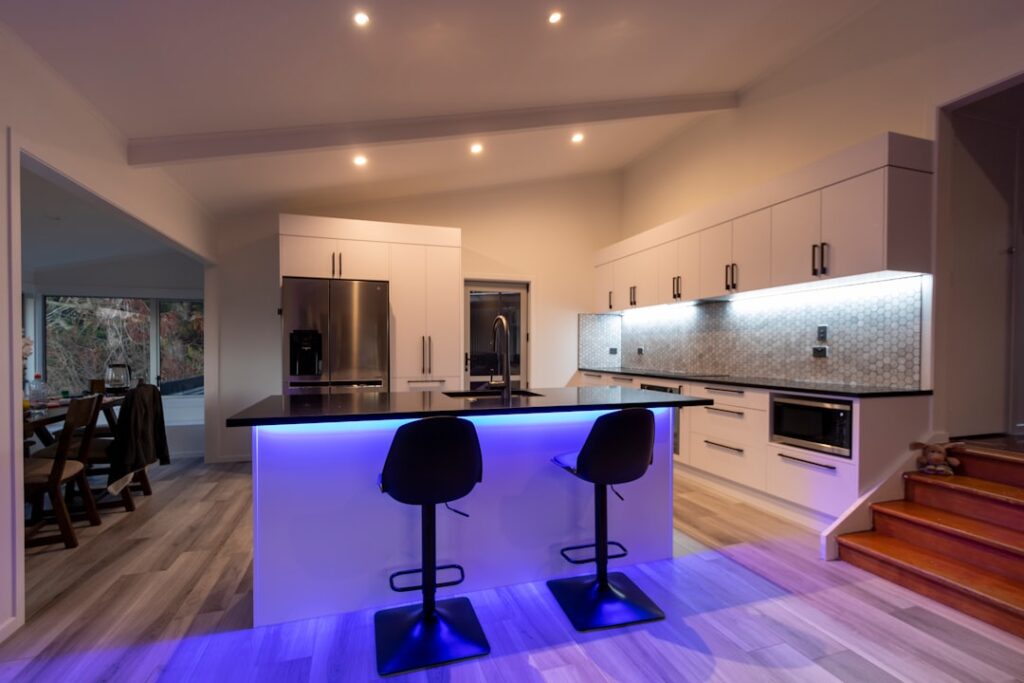
Vinyl plank flooring in kitchens has gone from a budget alternative to the single most popular kitchen flooring choice in North America. According to industry data, luxury vinyl plank (LVP) now accounts for more kitchen flooring installations than tile, hardwood, and laminate combined. The reasons are compelling: LVP is 100% waterproof, comfortably cushioned for standing, easy to clean after cooking messes, available in convincing wood-look designs, and costs a fraction of hardwood or tile.
Part of our Kitchen Remodeling guide — explore the full guide →
This guide covers why LVP excels in kitchens, the best brands for kitchen use, installation considerations (including the cabinets-first debate), maintenance requirements, and potential concerns every homeowner should understand before committing.
- Why LVP Is the #1 Kitchen Flooring Choice
- Waterproof Benefits for Kitchens
- Realistic Wood Looks Without the Risk
- Comfort for Standing and Cooking
- Easy Kitchen Cleanup
- Best Vinyl Plank Brands for Kitchens
- Kitchen Installation Tips
- Cabinets First or Flooring First?
- Undermount Dishwasher Concerns
- Kitchen LVP Maintenance
- Frequently Asked Questions
Why LVP Is the #1 Kitchen Flooring Choice
Kitchens demand more from their flooring than any other room. Your kitchen floor must handle water splashes from the sink, grease splatters from cooking, heavy foot traffic, dropped utensils and cookware, pet food and water bowls, and hours of standing while you cook. Vinyl plank flooring handles all of these challenges while looking beautiful and staying within budget.
Here is how LVP compares to other kitchen flooring options on the factors that matter most.
| Factor | Vinyl Plank | Hardwood | Tile | Laminate |
|---|---|---|---|---|
| Waterproof | Yes | No | Yes | Varies |
| Comfort (standing) | Excellent | Moderate | Poor | Moderate |
| Dropped dish impact | Dish may survive | May dent floor | Dish shatters | Dish may survive |
| Stain resistance | Excellent | Moderate | Excellent | Good |
| Cleanup ease | Very easy | Easy (careful with water) | Easy (grout needs care) | Easy |
| Installed cost/sq ft | $4 – $10 | $8 – $18 | $8 – $25 | $4 – $9 |
| DIY-friendly | Yes | No | Difficult | Yes |
| Lifespan | 15 – 25 years | 25 – 50+ years | 25 – 75+ years | 15 – 25 years |
LVP wins on waterproofing, comfort, impact forgiveness, cost, and DIY installation — the five factors that matter most in a kitchen environment. For a deeper comparison, visit our kitchen flooring guide.
Waterproof Benefits for Kitchens
Kitchens are the second wettest room in most homes (after bathrooms). Between sink splashes, dishwasher leaks, ice maker drips, spilled drinks, and mopping, your kitchen floor encounters water daily. Here is why LVP’s waterproof construction matters.
- Rigid SPC/WPC core — modern LVP uses a stone plastic composite (SPC) or wood plastic composite (WPC) core that will not swell, warp, or degrade when exposed to water. Even standing water from a dishwasher leak will not damage the planks.
- No grout to maintain — unlike tile, LVP has no grout lines that can absorb moisture, stain, or grow mold. One less maintenance task in a busy kitchen.
- Leak protection — if your refrigerator water line or dishwasher hose develops a slow leak, LVP planks will not be damaged. Hardwood would warp and stain; laminate would swell irreversibly.
- Easy spill cleanup — cooking spills (oil, wine, sauce) wipe up completely without staining. The vinyl surface is non-porous and does not absorb liquids.
Important caveat: While the planks themselves are waterproof, water can potentially seep between click-lock seams and reach the subfloor. For kitchens, choose LVP with sealed or tight-lock seams, and wipe up standing water promptly. Most premium brands (COREtec, Shaw Floorte Pro, Mohawk SolidTech) have engineering that minimizes seam penetration.
Realistic Wood Looks Without the Risk
One of the biggest reasons homeowners choose vinyl plank flooring for kitchens is the ability to get the warm, natural look of hardwood without the moisture vulnerability.
Modern LVP achieves remarkable realism through several technologies:
- Embossed-in-register (EIR) texturing — the surface texture aligns precisely with the printed wood grain image, so the planks look and feel like real wood when you touch them
- Wide and long plank formats — planks up to 9 inches wide and 72 inches long replicate the proportions of premium hardwood
- Multi-strip printing — each plank has a unique pattern, reducing the “repeated pattern” look that plagued older vinyl products
- Matte and wire-brushed finishes — low-sheen finishes that mimic the look of hand-scraped or wire-brushed hardwood
Popular wood looks for kitchens include warm white oak, light natural hickory, dark walnut, and gray-washed oak. These tones complement both traditional and modern kitchen designs.
Comfort for Standing and Cooking
If you spend significant time cooking, comfort underfoot matters. Standing on a hard surface for 30 minutes to an hour at a time causes leg fatigue, back pain, and foot discomfort — and kitchen meals often take longer than that.
LVP is noticeably more comfortable than tile or concrete. The vinyl construction has inherent flex and give, and most products include an attached cork or foam underlayment that provides cushioning. WPC (wood plastic composite) products tend to be warmer and softer than SPC (stone plastic composite) because the core material is lighter and more cushioned.
Comfort comparison:
- Vinyl plank: Warm, slightly cushioned, forgiving on feet and joints
- Tile/stone: Cold, very hard, causes fatigue quickly (anti-fatigue mats help but add clutter)
- Hardwood: Moderately comfortable, warmer than tile but firmer than LVP
- Laminate: Similar comfort to LVP when installed with quality underlayment
The comfort advantage extends to dropped items. A glass or plate dropped on LVP has a much better chance of surviving intact than one dropped on tile. If you have young children, this factor alone can prevent dozens of broken dishes over the years.
Easy Kitchen Cleanup
Kitchen floors get dirty fast — cooking grease, food crumbs, drink spills, pet food, and tracked-in dirt all accumulate daily. LVP simplifies kitchen floor maintenance to three simple steps:
- Sweep or vacuum daily to remove crumbs and grit (takes 2 minutes)
- Damp mop weekly with a microfiber mop and vinyl floor cleaner
- Wipe spills immediately — though even dried spills usually wipe up without staining
What makes LVP easier to clean than alternatives:
- No grout lines to scrub (tile’s biggest maintenance headache)
- Non-porous surface does not absorb stains, odors, or bacteria
- No sealing or waxing required — ever
- Handles wet mopping without concern (unlike hardwood, which requires careful damp mopping)
Best Vinyl Plank Brands for Kitchens
Not all LVP is created equal. For kitchen use, prioritize products with thick wear layers (20+ mil), rigid SPC cores, and sealed or tight-lock seams.
| Brand / Product | Core Type | Wear Layer | Cost/sq ft | Key Kitchen Feature |
|---|---|---|---|---|
| COREtec Plus Enhanced | WPC | 20 mil | $3.50 – $5.50 | Cork underlayment, warm underfoot |
| Shaw Floorte Pro Series 7 | SPC | 20 mil | $3.00 – $5.00 | I4F locking, commercial-grade durability |
| Mohawk SolidTech Plus | SPC | 20 mil | $4.00 – $6.00 | All Pet Protection warranty |
| LifeProof (Home Depot) | SPC | 22 mil | $2.50 – $3.50 | Best budget option, readily available |
| MSI Everlife Cyrus | SPC | 20 mil | $2.50 – $4.00 | Extra-long planks (48″), value pricing |
| Karndean Korlok | SPC | 20 mil | $4.50 – $7.00 | K-Core technology, premium realism |
Budget pick: LifeProof at Home Depot offers a 22-mil wear layer at $2.50 to $3.50 per square foot — the best value for kitchens. It is readily available, has a lifetime residential warranty, and the 22-mil wear layer outperforms some products at double the price.
Premium pick: COREtec Plus Enhanced offers the most comfortable kitchen floor experience thanks to its WPC core with attached cork underlayment. The cushioned feel makes long cooking sessions noticeably less fatiguing.
Compare these and other options in our luxury vinyl plank guide and best vinyl plank flooring picks.
Kitchen Installation Tips
Installing vinyl plank in a kitchen is a straightforward DIY project, but kitchens present unique challenges that bedrooms and living rooms do not.
- Acclimate the flooring. Store unopened boxes in the kitchen for 48 hours before installation. This allows the planks to adjust to the room’s temperature, reducing post-installation expansion or contraction.
- Maintain expansion gaps. Leave a 1/4-inch gap between the flooring and all fixed objects (walls, cabinets, islands, pipes). LVP expands and contracts with temperature changes, and without gaps, the floor will buckle. Baseboards and shoe molding will cover the gap.
- Install perpendicular to the longest wall for the most visually appealing layout. In galley kitchens, running planks lengthwise makes the space feel longer.
- Undercut door casings. Use an oscillating multi-tool to undercut door trim so planks slide underneath for a clean finish.
- Plan around the island. If your kitchen has an island, start installation there and work outward to ensure the planks are centered and symmetrical around this focal point.
Cabinets First or Flooring First?
This is one of the most debated questions in kitchen renovation, and the answer depends on your flooring type.
For vinyl plank flooring: install cabinets first, then flooring.
This is the recommended approach for LVP for several important reasons:
- LVP is a floating floor — it is not attached to the subfloor and needs to expand and contract freely. Cabinets sitting on top of a floating floor pin it in place and can cause buckling.
- Weight concerns — loaded kitchen cabinets (especially those filled with dishes and pantry items) can exert concentrated pressure on floating LVP, potentially compressing the locking mechanism and creating gaps.
- Future replacement — when the LVP eventually needs replacement (15 to 25 years), you can remove and replace it without disturbing the cabinets.
How it works in practice: Install cabinets and the kitchen island on the subfloor. Then install the vinyl plank flooring up to the cabinet toe kicks, leaving a 1/4-inch expansion gap. Cover the gap with shoe molding or quarter-round trim attached to the cabinets (not to the floor).
Undermount Dishwasher Concerns
One of the few genuine drawbacks of installing LVP in a kitchen is the dishwasher height issue. Here is the problem and how to solve it.
The issue: If you install cabinets first and then LVP, the flooring raises the finished floor level by 4 to 8mm (the thickness of the vinyl plank). This means the dishwasher, which sits on the subfloor level, now has less clearance to the countertop. In most cases, the dishwasher still fits by adjusting its leveling legs down. But in tight installations, the reduced clearance can make it impossible to slide the dishwasher in or out for service.
Solutions:
- Check clearance before installing flooring. Measure the gap between the dishwasher top and the countertop underside. If you have more than 1/2 inch of clearance, the LVP will not be a problem.
- Lower the dishwasher legs. Most dishwashers have adjustable front legs that can be lowered to compensate for the raised floor height.
- Install a plywood riser under the countertop. If the dishwasher is tight, a thin plywood strip under the countertop adjacent to the dishwasher opening raises the counter to create additional clearance.
- Run LVP under the dishwasher area. Install a section of LVP in the dishwasher bay before installing the dishwasher. This raises the dishwasher to the same level as the surrounding floor, maintaining proper clearance. Note: this section should be glued down rather than floating.
Kitchen LVP Maintenance
Kitchen vinyl plank floors require minimal maintenance but benefit from consistent daily care to prevent premature wear.
Daily:
- Sweep or vacuum to remove crumbs and grit that can scratch the wear layer
- Wipe up cooking grease splatters and spills promptly
Weekly:
- Damp mop with a flat microfiber mop and a pH-neutral vinyl floor cleaner
- Clean under the refrigerator kick plate and around the stove base where crumbs accumulate
Avoid:
- Steam mops — the heat can soften and warp vinyl, and the moisture can penetrate seams
- Abrasive cleaners — scrubbing powders and scouring pads scratch the wear layer
- Rubber-backed mats — rubber can discolor vinyl over time. Use mats with fabric or felt backing instead
- Dragging heavy appliances — use appliance sliders when moving the refrigerator or stove for cleaning
Under sinks and dishwashers: Place a drip tray under the sink base to catch slow leaks before they reach the floor. Check dishwasher hose connections annually. While LVP handles water on the surface, prolonged water under the planks can cause mold on the subfloor.
Frequently Asked Questions
Is vinyl plank flooring good for kitchens?
Yes — vinyl plank is the top-rated kitchen flooring choice for 2026. It is 100% waterproof, comfortable for standing, easy to clean, available in realistic wood looks, and costs 40 to 60% less than tile or hardwood. The only rooms where tile may be a better choice are commercial kitchens with heavy equipment loads or kitchens in luxury homes where tile adds more resale value.
How long does vinyl plank last in a kitchen?
Quality LVP with a 20-mil wear layer lasts 15 to 25 years in a typical residential kitchen. The wear layer protects against scratches and scuffs from daily use. Budget products with 6-12 mil wear layers may show wear in 8 to 12 years. Choosing a product with a 20+ mil wear layer is particularly important in kitchens due to the high traffic and grit exposure.
Can you put a refrigerator on vinyl plank flooring?
Yes, but use precautions. Place furniture pads or appliance coasters under the refrigerator’s front leveling feet to distribute weight and prevent dents. When moving the refrigerator for cleaning, slide it onto a piece of hardboard or use appliance sliders — never drag it directly on the vinyl surface.
Does vinyl plank flooring decrease home value?
No. Quality LVP is now a mainstream, expected flooring choice in homes under $500,000. It does not decrease home value, though it adds less perceived value than tile or hardwood. In the mid-range home market, buyers appreciate LVP for its modern look and low-maintenance appeal. In luxury homes ($500,000+), tile or hardwood may be expected by buyers.
Can you install vinyl plank over existing kitchen tile?
Yes. LVP can be installed directly over existing tile as long as the tile surface is flat, level, and well-bonded. Deep grout lines (over 1/4 inch) should be filled with floor leveler first to prevent them from telegraphing through the vinyl. This is an excellent way to update a kitchen without the cost and mess of tile removal.
What is the best thickness for kitchen vinyl plank?
Choose LVP that is at least 5.5mm thick for kitchens, with 6.5mm to 8mm being ideal. Thicker planks resist denting from heavy appliances, feel more substantial underfoot, and bridge minor subfloor imperfections better than thin products. Avoid anything under 4mm for kitchen use.
Prefer to explore on your own?
See how new flooring looks in your actual room in seconds — free, no signup.
Try the free Floor Studio →