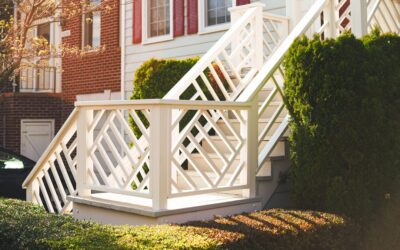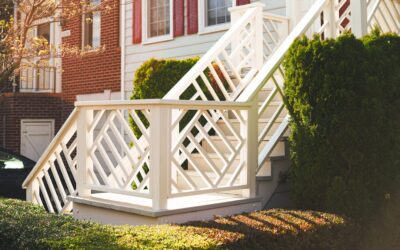
If you want a clean, low-maintenance railing for your deck, porch, or balcony, a vinyl railing kit is one of the simplest paths to get there. These pre-engineered packages bundle the rails, balusters, brackets, and hardware you need for a single section, so you spend less time cutting and measuring and more time assembling. For homeowners who would rather not deal with the constant sanding, staining, and rust that come with wood or metal, vinyl is an appealing middle ground.
This guide explains what comes in a typical kit, what you can expect to pay, how installation works, and how to choose a product that suits your space and local building requirements.
What Is a Vinyl Railing Kit
A vinyl railing kit is a complete, ready-to-assemble railing section made primarily from PVC, the same durable plastic used in vinyl siding and fencing. Instead of buying individual components and engineering the connections yourself, you buy a packaged set sized to a standard run, commonly six or eight feet long. The kit handles the geometry for you, which is why it appeals to first-time DIYers.
Most kits are designed to clip, screw, or snap together with minimal specialized tools. The vinyl is typically reinforced with internal aluminum or galvanized steel inserts in the top and bottom rails, which gives the railing the rigidity it needs to pass code and feel solid underfoot.
What’s Inside a Typical Kit
Contents vary by brand and style, but most kits include a similar core set of parts. Reading the parts list before you buy helps you confirm you are getting a complete section rather than a rail-only pack.
- A top rail and a bottom rail, often with reinforcing metal inserts.
- Balusters, also called spindles, usually square or round.
- Brackets to attach the rails to posts.
- Stainless or coated screws and any necessary connectors.
- A baluster spacer or foot block to hold even spacing.
Posts and post caps are frequently sold separately, so check whether your kit includes them. You will also need to confirm whether the kit is rated for level runs, stair runs, or both, because stair-rated kits include angled brackets.
Pros and Cons of Vinyl Railing
Vinyl railing earns its popularity through low maintenance. It never needs painting or staining, resists moisture and insects, and wipes clean with soap and water. The color runs through the material, so minor scratches are far less noticeable than chipped paint on wood.
The trade-offs are worth understanding. Vinyl can become brittle in extreme cold and may expand slightly in heat, so proper spacing during installation matters. Color choices are more limited than painted wood, and very cheap kits can look hollow or flex more than premium ones. White is the most common color, though tan, gray, and black options are widely available.
What a Vinyl Railing Kit Costs
Pricing depends on length, style, color, and brand quality, so treat any figure as an estimate and confirm current retail prices. As a general guide, a standard six- to eight-foot level kit often falls in the range of roughly 70 to 200 dollars per section, with posts, caps, and decorative balusters adding to the total.
When you budget, account for the full run rather than a single section. Measure your total railing length, divide by the kit length, and round up. Add posts at the required spacing, plus a small buffer for cuts and mistakes. Even with those extras, a DIY vinyl railing usually costs less than hiring out a comparable wood or aluminum install.
Step-by-Step Installation Overview
Always follow the manufacturer’s printed instructions, since connection methods differ between brands. The general workflow, however, looks similar across most kits.
- Set and secure your posts first, making sure they are plumb and spaced to match your kit length.
- Measure the gap between posts and cut the top and bottom rails to fit if your kit requires trimming.
- Attach the brackets to the posts at the correct rail heights for your local code.
- Insert balusters into the bottom rail using the included spacer to keep gaps uniform.
- Set the top rail over the balusters, then fasten both rails into the brackets.
- Check that the section is level and that no baluster gap exceeds the maximum your code allows.
Meeting Code and Safety Requirements
Railing is a safety feature, so building codes regulate it closely. Most residential codes require guardrails on decks and porches more than 30 inches above grade, with a typical guardrail height of 36 inches, though some jurisdictions require 42 inches. The classic rule for baluster spacing is that a four-inch sphere must not pass between balusters, which keeps small children safe.
Before you buy, check your local code and whether a permit is required. Confirm that the kit you choose meets your area’s height and load requirements, and verify that posts are anchored securely enough to resist the lateral force a railing must withstand. When a deck is high off the ground or you are unsure about structural anchoring, hiring a contractor is a reasonable choice.
Choosing the Right Vinyl Railing Kit
Start with the basics: measure your run, decide on a color, and note whether you need level sections, stair sections, or both. Then weigh quality. Look for kits with reinforced rails, a solid warranty, and balusters that feel substantial rather than flimsy.
Consider the look you want, too. Square balusters give a clean, modern feel, while round or turned styles read more traditional. Some kits accept glass or aluminum baluster inserts if you want a more open view. A well-chosen vinyl railing kit balances appearance, durability, and ease of installation, giving you a finished railing that holds up for years with almost no upkeep beyond an occasional rinse.
Caring for Vinyl Railing Over Time
One of vinyl’s biggest selling points is how little it asks of you after installation. There is no annual sanding, no staining, and no rust to chase. Cleaning is usually as simple as spraying the railing with a garden hose and wiping it down with a soft cloth and mild soapy water a couple of times a year.
For stubborn dirt, mildew, or scuffs, a non-abrasive household cleaner handles most problems without harming the finish. Avoid harsh solvents and abrasive pads, which can dull the surface. Inspect the railing each season for any loose brackets or fasteners, especially after harsh winters, and tighten anything that has worked free. With these minimal steps, a quality vinyl railing can look good and stay structurally sound for many years, making it one of the lowest-maintenance options available to homeowners.
Prefer to explore on your own?
See how new flooring looks in your actual room in seconds — free, no signup.
Try the free Floor Studio →