The hardest-working pair of valves in most homes sit hidden behind the laundry hookup, controlling thousands of gallons per year and quietly aging until one day they leak — usually overnight, usually onto a finished basement floor. The washer water valve is one of the highest-risk components in residential plumbing because it lives under constant pressure, gets cycled with every load, and rarely gets inspected. This guide walks through the valve types, signs of failure, how to replace one yourself, and the single upgrade that prevents most laundry-room floods.
- Where the Valves Are and How They Work
- Common Valve Types
- Signs Your Valve Is Failing
- How to Replace a Washer Water Valve
- Choosing the Right Replacement
- Hose Replacement Goes Hand in Hand
- Why You Should Shut Off Between Loads
- Common Valve Problems and Fixes
- Recessed Wall Box Considerations
- Quick Reference
Where the Valves Are and How They Work
Behind every washing machine sits a hot and cold water shutoff, typically housed in a recessed wall box (an outlet box) or mounted exposed on supply pipes. Each valve controls one supply line — hot on the left, cold on the right by convention — that connects to the washer through braided stainless or rubber hoses.
The valves stay open 99 percent of the time, with the washer’s internal solenoid valves managing actual fill cycles. That constant pressure on the rubber washers and seals inside the wall valves is what eventually causes them to leak.
Common Valve Types
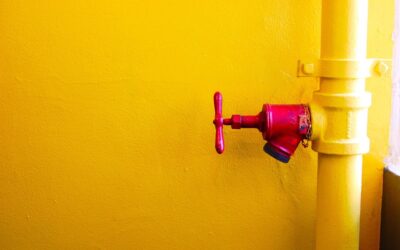
Older homes often use globe valves with rotating handles — the round red and blue knobs that turn 6 to 8 times to fully open or close. These are reliable but slow to operate, which discourages routine shutoff between loads.
Modern homes use quarter-turn ball valves. A 90-degree handle turn moves a ball-shaped internal mechanism that fully opens or shuts the line. Ball valves last longer, leak less, and make turning off the water between laundry sessions actually practical.
Single-lever combination valves (also called dual shutoff valves) handle both hot and cold from one handle. Pull the lever down or sideways to close both supplies simultaneously. These are the easiest to operate and the best upgrade for any home.
Signs Your Valve Is Failing
Look for these warning signs:
- Slow drip from the valve stem when the handle is in either position
- Mineral crust forming around the valve body
- Handle rotates loosely or won’t fully close
- Water pressure to the washer drops noticeably
- Visible corrosion or green patina on copper supply lines
Any of these is a signal to replace the valve before catastrophic failure. A failed open valve under 60 PSI of pressure can dump 200 gallons of water per hour into your laundry room.
How to Replace a Washer Water Valve
Replacement runs about an hour and requires basic plumbing skills. You will need a tubing cutter, a propane torch (for soldered copper) or a SharkBite-type push-fit fitting, a new valve, and possibly some PEX or copper pipe.
- Shut off the main water supply to the house
- Open a faucet on the lowest floor to drain pressure
- Disconnect the washer hoses from the old valves
- Cut the old valves off the supply pipe with a tubing cutter
- Clean the pipe ends, then attach the new valve using SharkBite push-fit (no torch needed) or solder
- Reconnect washer hoses with new rubber washers
- Turn the main water back on slowly and check for leaks
SharkBite quarter-turn valves cost around $15 to $25 each and install in under five minutes per side without any solder or specialized tools.
Choosing the Right Replacement
If your existing setup uses two separate valves, replace them with two quarter-turn ball valves rated for 200 PSI minimum. Brands like SharkBite, BrassCraft, and Watts all make reliable units in the $15 to $30 range.
If you want the highest-protection upgrade, install a single-lever dual shutoff valve like the Mopera or Watts laundry shutoff. These let you close both lines with one motion in seconds, making between-load shutoffs realistic. Cost runs $35 to $75 plus installation.
For maximum safety, look at automatic shutoff valves like the Watts FloodSafe or LeakSmart. These detect leaks at the washer and automatically close both supplies. Pricing runs $80 to $250 depending on features.
Hose Replacement Goes Hand in Hand
Rubber washing machine hoses fail just as often as valves. Industry guidance recommends replacing rubber hoses every 5 years and stainless braided hoses every 8 to 10 years. A burst hose under household pressure releases 5 to 7 gallons per minute — enough to flood a 1,000 square foot space in under an hour.
Always upgrade to braided stainless when replacing hoses. The cost difference is minimal (about $10 vs. $25 per hose) and the failure mode is far less catastrophic.
Why You Should Shut Off Between Loads
Most homeowners never close the laundry valves. The pressure on internal washer solenoids and rubber hoses 24/7 is the leading cause of laundry-room floods. Closing the valves when laundry is not running takes 5 seconds with a quarter-turn lever and prevents 90 percent of laundry water disasters.
If you travel for more than a few days, shut off the laundry valves. The combination of older hoses, building pressure, and no one home is a recipe for a soggy ceiling on your return.
Common Valve Problems and Fixes
Stuck handle: Mineral buildup is preventing rotation. Spray penetrating oil on the stem, wait 15 minutes, and gently work the handle. Replace the valve if it does not free up.
Drip from the stem: The packing nut needs tightening. Use a wrench to snug the nut clockwise a quarter turn at a time until the drip stops. If tightening does not help, the packing washer is shot — replace the valve.
Reduced flow: Mineral scale inside the valve body. Replacement is the only reliable fix — internal cleaning is impractical.
Recessed Wall Box Considerations
Wall boxes from Oatey, Sioux Chief, and Guy Gray house both valves and the drain stand pipe in a clean recessed assembly. If your laundry has exposed valves and you are remodeling, install a wall box during drywall — it tidies the space and adds a built-in drain pan capability.
Plastic wall boxes run $20 to $40 and work fine for most installations. Metal boxes cost $50 to $80 and last longer in unconditioned spaces.
Quick Reference
- Replace globe valves with quarter-turn ball valves whenever possible
- Install a single-lever dual shutoff for easy daily use
- Use SharkBite fittings to skip the torch and save time
- Replace rubber hoses with braided stainless every 8 to 10 years
- Close the valves between loads, especially before travel
Your washer water valve is the line of defense between normal laundry and a five-figure flood claim. A $30 quarter-turn upgrade and a habit of closing the valves between loads protects your home better than nearly any other plumbing maintenance you can do. Add a leak detector for extra peace of mind, and laundry day stops being a hidden insurance risk.