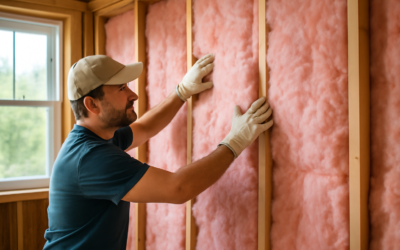
Grab the wrong insulation batt and you will either leave a cold gap at the top of the cavity or fight to compress a too-thick batt that loses its R-value in the process. Knowing what size insulation for 2×4 walls you need starts with one simple fact: a nominal 2×4 stud is actually 3.5 inches deep, not 4. That real dimension dictates the batt thickness and the maximum R-value you can pack into the wall. Get the size right and you get a comfortable, energy-efficient wall with no cold spots. Here is exactly what fits.
- The Real Depth of a 2×4 Wall
- The Right Batt Size: 3.5 Inches
- What R-Value Do You Need?
- Insulation Material Options for 2×4 Walls
- Why You Should Never Compress Insulation
- Faced vs Unfaced Batts
- Boosting R-Value Beyond the Cavity
- Air Sealing Makes Insulation Work
- How Much Insulation Will You Need?
- Installation Tips for a Tight Fit
- The Bottom Line
The Real Depth of a 2×4 Wall
Lumber is sold by nominal size, but the finished dimensions are smaller. A 2×4 stud measures 1.5 by 3.5 inches. That means the wall cavity between the studs is 3.5 inches deep. Any batt insulation you buy has to fit that 3.5-inch depth without being crammed in, because compressing insulation reduces its effectiveness.
The cavity width is typically 14.5 inches for studs spaced 16 inches on center, or 22.5 inches for 24-inch on-center framing. Insulation batts come pre-cut in 15-inch and 23-inch widths to fit these standard spacings snugly.
The Right Batt Size: 3.5 Inches
For a standard 2×4 wall, you want insulation that is 3.5 inches thick, sized to fill the cavity completely without bulging or compressing. This is the single most important spec. Manufacturers label these batts clearly for 2×4 walls.
Depending on the product, a 3.5-inch fiberglass batt delivers an R-value between R-13 and R-15. The higher R-15 batts are denser, “high-performance” versions that squeeze more insulating power into the same 3.5-inch space.
What R-Value Do You Need?
R-value measures resistance to heat flow, and higher is better. For 2×4 exterior walls, most building codes and energy guidelines call for R-13 to R-15, which is exactly what fits in a 3.5-inch cavity.
- R-13: Standard fiberglass batt, adequate for milder climates and code-minimum builds.
- R-15: High-density fiberglass or mineral wool batt, better for colder climates and lower energy bills.
- R-13 to R-21 with spray foam: Closed-cell spray foam packs the highest R-value per inch and can reach R-21 in a 3.5-inch cavity.
Your climate zone drives the target. In the northern U.S., aim for R-15 or the higher performance of spray foam. In the South, R-13 often meets code, though upgrading rarely hurts.
Insulation Material Options for 2×4 Walls
Several materials fit a 3.5-inch cavity, each with trade-offs.
Fiberglass batts
The most common and affordable choice. R-13 batts run about $0.50 to $0.75 per square foot, and R-15 high-density batts run $0.75 to $1.10. They are DIY-friendly, but wear gloves, long sleeves, and a respirator, since the fibers irritate skin and lungs.
Mineral wool (rock wool)
Denser than fiberglass, mineral wool batts sized for 2×4 walls deliver about R-15, resist fire, and dampen sound noticeably. They cost roughly $1.00 to $1.50 per square foot and hold their shape well, making them easier to fit cleanly.
Spray foam
Closed-cell spray foam offers the highest R-value per inch, around R-6 to R-7, so a full 3.5 inches can reach R-21 to R-24. It also air-seals the cavity. It is the priciest option at $1.50 to $4 per square foot installed and usually requires a professional.
Blown-in and injection insulation
For existing walls you do not want to open up, dense-packed cellulose or injection foam can be blown into the cavity through small holes. This is a retrofit-friendly route best left to a contractor.
Why You Should Never Compress Insulation
It is tempting to stuff a thicker R-19 batt, which is designed for 2×6 walls, into a 2×4 cavity to boost R-value. Do not. Compressing a 6.25-inch R-19 batt into 3.5 inches does not give you R-19; it typically drops to around R-13 or less because insulation works by trapping air, and squishing it removes the air pockets. Always use the batt sized for your cavity.
Faced vs Unfaced Batts
Batts come faced, with a paper or foil vapor barrier attached, or unfaced. Use faced batts on exterior walls where you need a vapor retarder, installing the facing toward the heated interior. Use unfaced batts for interior walls, for soundproofing, or when a separate vapor barrier is being installed. In many climates, a faced kraft batt is the simplest correct choice for exterior 2×4 walls.
Boosting R-Value Beyond the Cavity
If R-15 is not enough for your climate but you are stuck with 2×4 framing, you can add insulation outside the cavity rather than cramming more inside it. A layer of rigid foam board over the exterior sheathing adds continuous insulation and cuts thermal bridging, the heat loss that travels through the wood studs themselves. One inch of rigid polyiso adds roughly R-6, and it also breaks the thermal path that framing creates. Interior options include a thin foam board behind drywall on problem walls. This layered approach lets a 2×4 wall perform closer to a 2×6 wall without changing the studs, which is a common strategy in retrofits and colder-climate builds.
Air Sealing Makes Insulation Work
Insulation only reaches its rated R-value if air is not leaking around it. Fiberglass batts do nothing to stop air movement, so even a perfectly sized R-15 wall can feel drafty if the cavity leaks. Before or during insulating, seal the gaps: caulk where the bottom plate meets the subfloor, use low-expansion spray foam around window and door frames and where wires and pipes penetrate the framing, and seal electrical boxes on exterior walls. This combination of air sealing plus properly fitted batts is what actually delivers a comfortable, efficient wall. Skipping the air sealing is the most common reason a well-insulated wall still feels cold.
How Much Insulation Will You Need?
Measure the total square footage of wall area, then subtract about 15 percent for framing, doors, and windows. A batt bundle lists its coverage in square feet. For a 12-by-8-foot wall, roughly 96 square feet, you will need about one to two bundles depending on the product. Buy a little extra to account for cuts around outlets and pipes.
Installation Tips for a Tight Fit
- Cut batts slightly oversized so they fill the cavity edge to edge with no gaps.
- Split the batt around wiring and pipes rather than compressing it behind them.
- Fill small gaps around windows and doors with low-expansion spray foam, not stuffed batting.
- Do not leave voids at the top or bottom of the cavity; cold spots form there.
- Keep the facing continuous and staple it to the stud faces for exterior walls.
What thickness of insulation fits a 2×4 wall?
A 3.5-inch batt, because a 2×4 stud is actually 3.5 inches deep. That thickness fills the cavity without compressing, delivering R-13 to R-15 with fiberglass or mineral wool.
Can I use R-19 insulation in a 2×4 wall?
No. R-19 is made for 6.25-inch-deep 2×6 walls. Compressing it into 3.5 inches actually lowers its performance to around R-13. Use an R-13 or R-15 batt sized for 2×4 walls instead.
What is the highest R-value I can get in a 2×4 wall?
Closed-cell spray foam reaches the highest, roughly R-21 to R-24 in 3.5 inches. Among batts, high-density R-15 fiberglass or mineral wool is the top option.
Should I use faced or unfaced insulation?
Use faced batts on exterior walls, with the vapor barrier toward the heated interior. Use unfaced batts on interior walls, for soundproofing, or when a separate vapor barrier is installed.
The Bottom Line
For 2×4 walls, the answer is a 3.5-inch batt rated R-13 to R-15, matching the true 3.5-inch depth of the studs. Choose R-15 high-density fiberglass or mineral wool for colder climates and better efficiency, or spray foam if you want maximum R-value and air sealing. Never compress a thicker batt to cheat more R-value, and fit each piece snugly with no gaps. Match the size to the cavity and your wall will perform exactly as designed.