Two rooms can use the exact same oak plank and look a thousand dollars apart, because layout does as much design work as the wood itself. Wood flooring installation patterns range from the standard straight lay to herringbone, chevron, and full parquet — and each step up the ladder adds visual drama along with real, quantifiable costs in labor and waste. Installers charge 30 to 100 percent more for angled and geometric patterns, and material waste can double. This guide walks through every major pattern, what it honestly costs over a straight lay, and where each one belongs.
- Straight (Linear) Lay: The Default for a Reason
- Diagonal Lay: Drama for a Modest Premium
- Herringbone: The Premium Favorite
- Chevron: Herringbone's Sleeker Sibling
- Parquet, Basketweave, and Specialty Patterns
- Cost Summary: Honest Premiums Over Straight Lay
- DIY Reality Check by Pattern
- Choosing Well: Room, Style, and Resale
Straight (Linear) Lay: The Default for a Reason
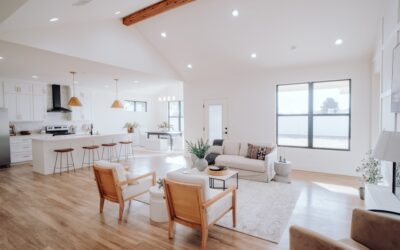
Planks run parallel to each other, usually along the room’s longest dimension or toward the main light source, with end joints staggered randomly (keep stagger at least 6 inches, and avoid repeating “stair-step” joints). This is the fastest, cheapest layout — the baseline against which everything else is priced — with material waste around 5 to 8 percent. Running boards perpendicular to floor joists is the structural default for nail-down floors; running them the length of a narrow room visually stretches it. Straight lay suits every style, every plank width, and every budget, which is why 90 percent of American wood floors use it. Its only real drawback is that it does nothing extra: in a large open plan, wall-to-wall straight planks can read a little flat.
Diagonal Lay: Drama for a Modest Premium
Same technique, rotated 45 degrees to the walls. The diagonal draws the eye across the room’s widest dimension, makes small and boxy rooms feel larger, and disguises walls that are out of parallel — a genuinely useful trick in older homes. Costs rise moderately: every row starts and ends with an angled cut, pushing waste to 10 to 15 percent, and most installers add 10 to 25 percent to labor. Diagonal works with any plank product, including click-lock floating floors, making it the easiest “upgrade” pattern for DIYers who can cut consistent 45s.
Herringbone: The Premium Favorite
Rectangular blocks lay in a staggered zigzag, each board’s end meeting the side of the next at 90 degrees. Herringbone is the pattern driving the current parquet revival, equally at home in a Parisian apartment or a modern farmhouse. The costs are real: expect 50 to 100 percent more labor than straight lay (many pros quote $6 to $12 per sq ft for herringbone installation versus $3 to $6 straight), because layout must be geometrically perfect from the centerline out and progress is slow. Waste runs 10 to 15 percent. Material matters too — you buy purpose-made herringbone blocks (typically 3 to 5 inches wide, 12 to 30 inches long, often sold in left/right pairs for click products) rather than cutting standard planks. Engineered herringbone in glue-down or click formats runs $6 to $15 per sq ft for material. Scale the block size to the room: small blocks in a large room turn busy; oversized blocks in a hallway lose the effect.
Chevron: Herringbone’s Sleeker Sibling
Chevron boards are cut with 45 or 60 degree ends so rows meet in continuous points, forming clean arrows down the room. The look is more tailored and contemporary than herringbone’s woven texture, and it visually elongates rooms powerfully. It is also the most expensive common pattern: boards must be end-cut with mirror-image precision (again sold as A/B pairs), pushing material to $8 to $16 per sq ft, with labor at the same 50 to 100 percent premium as herringbone and the least room for error at the point lines — a chevron that drifts even 1/8 inch per row announces itself down the entire seam. Waste: 15 percent, more in rooms with many offsets.
Parquet, Basketweave, and Specialty Patterns
- Block parquet (finger block): squares of short strips alternating direction, the classic mid-century look, enjoying a comeback. Pre-assembled 9 to 18 inch panels install fairly quickly (labor 25 to 50 percent over straight), and vintage-style solid parquet can be refinished for generations.
- Basketweave and brick bond: woven or offset rectangular motifs, often with contrasting border strips; pricing similar to herringbone when site-assembled.
- Versailles and Chantilly panels: large ornate prefabricated squares ($15 to $40+ per sq ft material) for formal spaces — panel format keeps labor sane, materials do the damage.
- Random-width lay: alternating 3, 5, and 7 inch planks in repeating or random sequences. Cost premium is small (10 to 20 percent labor, careful ordering by width), and the effect reads custom and historic — one of the best value upgrades in the whole list.
- Borders and medallions: a contrasting perimeter band or inlay adds $500 to several thousand dollars but lets a straight-lay field carry a custom look.
Cost Summary: Honest Premiums Over Straight Lay
- Straight: baseline labor ($3-$6/sq ft nail-down), 5-8% waste
- Diagonal: +10-25% labor, 10-15% waste
- Random-width: +10-20% labor, standard waste, modest material upcharge
- Herringbone: +50-100% labor, 10-15% waste, pattern-specific material
- Chevron: +50-100% labor, ~15% waste, priciest common material format
- Parquet panels: +25-50% labor, material varies wildly by panel
On a 300 sq ft living room in mid-grade engineered oak, that spread is roughly $3,500 installed for straight lay versus $6,500 to $9,000 for herringbone or chevron. Get pattern pricing in writing — this is the line item where verbal estimates drift most.
DIY Reality Check by Pattern
Ambition should scale with experience. Straight lay is genuinely DIY territory: a patient first-timer with a miter saw and a rented flooring nailer (about $40 to $60 a day) can produce professional results. Diagonal adds only the discipline of consistent 45-degree cuts and a proper starting line snapped across the room’s center. Random-width is DIY-friendly too, as long as you plan the width sequence on paper and order each width separately. Herringbone and chevron are a different sport — the entire floor references a centerline established in the first hour, glue-down is the usual method, and errors compound geometrically rather than staying local. Most flooring pros advise DIYers to attempt herringbone only in a small, low-stakes space first (an entry or a closet) before committing a living room to it. Prefabricated parquet panels split the difference: panel alignment is exacting, but each panel contains its own finished geometry, so mistakes stay contained.
Choosing Well: Room, Style, and Resale
Match ambition to the space. Entryways, dining rooms, and primary living spaces reward a statement pattern because the geometry stays visible; bedrooms and furniture-heavy family rooms bury it under rugs and sofas, wasting the premium. Small rooms suit diagonal or small-block herringbone; long halls love chevron’s directional pull. Keep the wood tone calmer as the pattern gets busier — a wild-grain hickory in herringbone fights itself, while mild white oak flatters any geometry. And think in decades: straight, herringbone, and parquet have all survived a century of fashion; they are safe resale bets in a way trendier finishes are not. One installer-vetting tip worth the whole article: ask any bidder how many herringbone or chevron floors they have personally laid, and ask for photos. Geometric wood flooring installation patterns are unforgiving of a first-timer, and the best material cannot rescue a layout that started 1/4 inch off center.
Prefer to explore on your own?
See how new flooring looks in your actual room in seconds — free, no signup.
Try the free Floor Studio →