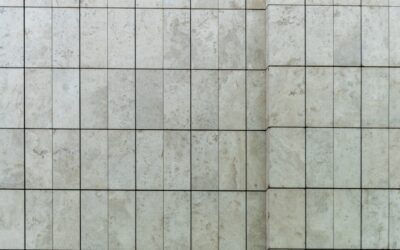
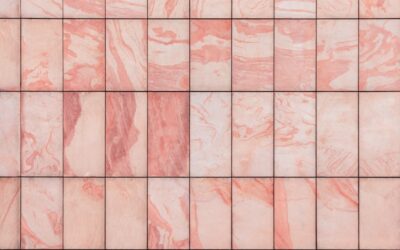
The 12×12 square tile is the workhorse of the tile world, and for good reason. It is large enough to cover ground quickly, small enough to handle without a helper, and available in nearly every material and finish you can name. If you have walked the tile aisle at a home center, you have seen stacks of them in ceramic, porcelain, and natural stone. This guide walks through what makes the 12-inch square so popular, what it costs, how much you actually need, and how to lay it out for a professional result.
Part of our Tile & Grout guide — explore the full guide →
Why the 12-Inch Square Endures
A foot-square tile hits a practical sweet spot. The math is friendly: one tile equals exactly one square foot, so estimating coverage takes no calculator gymnastics. The size is forgiving for DIY installers because each piece is manageable, and cuts around cabinets and doorways stay simple. Manufacturers produce 12×12 in such volume that you get the widest possible selection at the lowest per-tile prices.
While oversized planks and 24-inch tiles have gained ground in modern design, the 12×12 remains the default for budget-conscious projects, backsplashes, tub surrounds, and any space where a classic grid pattern looks right at home.
Common Materials and Finishes
The 12-inch square comes in a range of materials, each with its own strengths:
- Ceramic: Affordable and easy to cut, best for walls and light-traffic floors. Typically $0.50 to $3 per square foot.
- Porcelain: Denser and more water-resistant than ceramic, rated for heavy floor traffic. Usually $1.50 to $5 per square foot.
- Natural stone: Travertine, slate, marble, and granite squares deliver real stone character but need sealing. Expect $3 to $12 per square foot.
- Glass and mosaic-backed: Often sold on 12×12 mesh sheets for backsplashes, giving you many small tiles in one easy-to-set unit.
Finish matters as much as material. A matte or textured surface hides scuffs and adds slip resistance underfoot, while a polished face looks dressier but shows water spots and can be slick when wet.
How Many Tiles Do You Need?
This is where the 12×12 earns its keep. Since each tile covers one square foot, you start by measuring the room’s square footage. Multiply length by width in feet, then add a waste allowance for cuts and breakage.
- Simple square or rectangular rooms: add 10% waste.
- Diagonal layouts or rooms with many angles: add 15% to 20%.
- Natural stone with color variation: add an extra 5% so you can cull mismatched pieces.
For a 150-square-foot room with a standard grid, you would buy about 165 tiles. Always purchase from the same production lot and keep a few spares boxed away, because dye lots shift and matching a discontinued tile years later is nearly impossible.
Cost of a 12×12 Tile Project
Material is only part of the picture. A realistic installed budget includes thinset, grout, sealer where needed, and labor. For planning, professional installation runs $5 to $14 per square foot on top of the tile. That 150-square-foot room might total $1,000 to $2,500 installed with mid-grade porcelain. Doing it yourself can cut that in half, but factor in tool rental for a wet saw, which you will need for clean cuts in porcelain and stone.
Layout Patterns That Work
A 12×12 square is versatile enough to support several looks:
- Straight grid: Tiles line up in even rows. Clean, simple, and the most economical on cuts.
- Diagonal: The grid rotates 45 degrees, which makes small rooms feel larger and hides out-of-square walls. It uses more tile.
- Brick or offset: Each row shifts by half a tile. Because 12×12 tiles are truly flat, you can offset them without the lippage problems that plague long planks.
Keep grout lines consistent with spacers, typically 1/16 inch to 1/4 inch depending on the tile’s edge. Rectified tiles with crisp machine-cut edges allow the tightest lines, while tumbled stone looks best with a wider joint.
Installation Tips for a Clean Result
Start with a flat, clean, and rigid subfloor. Any flex or high spot telegraphs through as cracked grout or a rocking tile. Snap chalk lines to find your center point and dry-lay a row in both directions so you avoid a sliver-thin cut against the most visible wall.
Use the right trowel notch for the tile, usually a 1/4-inch square notch for 12×12, and back-butter stone or warped tiles for full coverage. Check every few tiles with a level, wipe grout haze before it fully cures, and wait 24 hours before walking on the floor. Rushing the cure is the fastest way to loosen tiles you just set.
Where 12×12 Tile Fits Best
This size is a natural for bathroom floors, laundry rooms, mudrooms, entryways, and kitchen backsplashes. It also works on tub and shower surrounds, where the grid pattern reads as timeless. In large open rooms, a 12-inch tile can start to feel busy with too many grout lines, so many designers step up to 18-inch or 24-inch formats there. But for most residential spaces, the humble foot-square tile delivers durability, selection, and value that few other formats can match.
Grout, Sealing, and Long-Term Care
The tile is only part of the finished surface; grout choice affects how it ages. For most 12×12 floors, a sanded grout suits the wider joints, while unsanded works for tight seams under 1/8 inch. Cement grout should be sealed after it cures and resealed periodically to resist staining, especially in kitchens and bathrooms. If you want a truly low-maintenance joint, epoxy grout never needs sealing and shrugs off spills, though it costs more and sets fast.
Day-to-day care depends on the material. Glazed ceramic and porcelain wipe clean with a pH-neutral cleaner and need no sealing. Natural stone squares require a penetrating sealer and gentle, non-acidic cleaning to protect the surface. Whatever you choose, sweep or vacuum regularly so grit does not scratch the finish, and address spills before they can work into unsealed grout lines.
Pros and Cons at a Glance
Before you buy, weigh the trade-offs of the foot-square format so your expectations match reality:
- Pros: Effortless coverage math, the widest material and color selection, low per-tile pricing, manageable handling for DIYers, and flatness that supports offset and diagonal patterns.
- Cons: More grout lines than large-format tile, which some find busy in big open rooms, and more individual pieces to set, which adds labor time compared with 24-inch tiles.
For bathrooms, laundry rooms, entryways, and backsplashes, those trade-offs land firmly in the plus column. In sprawling open-concept spaces, you may prefer a larger format, but even there the 12×12 remains a budget-friendly, forgiving option.
It also helps to think about how the 12×12 will read against the scale of your room and furnishings. In a compact bathroom or laundry, the foot-square grid feels proportional and tidy. In a hallway or entry, running the tiles in line with the direction of travel keeps the space looking longer. And because the format is so common, replacement tiles and matching trim pieces like bullnose and cove base are easy to source, which matters if a tile ever chips and needs swapping years down the road.
The Bottom Line
The 12×12 square tile stays popular because it solves real problems: easy estimating, wide availability, manageable handling, and a price point that fits nearly any budget. Match the material to the room, buy 10% to 20% extra, keep your subfloor flat, and you will end up with a floor or wall that looks sharp and lasts for decades. It may not be the trendiest format, but it remains one of the smartest choices a homeowner can make.
Prefer to explore on your own?
See how new flooring looks in your actual room in seconds — free, no signup.
Try the free Floor Studio →