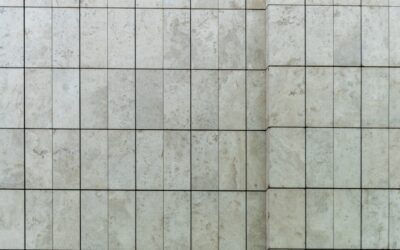
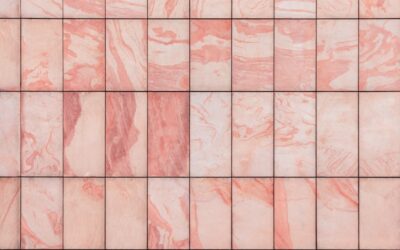
The humble 12×12 porcelain tile has been the default American floor tile for decades, and while trends now push toward big-format planks and slabs, this classic square still earns its place. It is easy to handle, easy to lay out, forgiving for DIYers, and widely available at friendly prices. Porcelain’s density makes it tougher and less absorbent than ceramic, so a 12 by 12 porcelain tile gives you durability in a size almost anyone can work with. Here is where it shines and where a bigger tile makes more sense.
Part of our Tile & Grout guide — explore the full guide →
Why the 12×12 Format Endures
A one-foot square is intuitive. It maps cleanly to room dimensions, making estimating simple, one tile roughly equals one square foot before grout. It is light enough to handle and set without a helper, small enough to cut on a modest wet saw, and forgiving over subfloors that are not perfectly flat, since small tiles bridge minor dips far better than large ones. For a DIYer tiling a first bathroom or laundry room, that manageability is a real advantage over wrestling heavy 24-inch tiles.
Best Uses for 12×12 Porcelain
The size suits plenty of jobs around the house.
- Bathroom and laundry floors: Easy to cut around toilets, vanities, and drains.
- Mudrooms and entries: Durable, water-resistant, and simple to replace one tile if damaged.
- Small kitchens: Scaled right so the floor does not look oversized.
- Shower and tub surrounds: Straightforward wall coverage with predictable layout.
- Utility and basement floors: Tough, budget-friendly, and forgiving over imperfect slabs.
Layout Patterns to Consider
Even a simple square opens up several looks. A straight grid is the cleanest and easiest, keeping cuts and layout predictable. A diagonal set at 45 degrees makes a small room feel larger and hides slightly out-of-square walls. A brick or offset pattern adds subtle movement, though with rectified square tiles you want to keep the offset modest to avoid lippage. For visual interest without changing tile, mix a contrasting grout or add a small border. Always dry-lay a row first and plan cuts so full tiles land at the room’s focal point and slivers hide under cabinets or along the least visible wall.
Grout Tips
Grout does more than fill gaps, it sets the tone and the maintenance load. A grout color close to the tile minimizes the grid and makes the floor read as one calm surface, while a contrasting grout emphasizes the pattern. On floors, seal cement-based grout after it cures and reseal periodically, or choose a stain-resistant epoxy grout in high-traffic and wet areas. Keep joint width consistent, a 1/8 to 3/16 inch joint is typical, and a darker grout will hide traffic dirt that white grout shows within weeks.
What It Costs
Value is a big part of the appeal. Basic 12×12 porcelain often runs $1 to $4 per square foot for material, with higher-end stone-look and wood-look designs reaching $5 or $6. Installation typically adds $5 to $10 per square foot depending on your region, subfloor prep, and pattern complexity, with diagonal and intricate layouts costing more in labor. Because the tiles are easy to handle, this is also one of the more approachable formats for a confident DIYer to install and save on labor.
Porcelain vs Ceramic in the 12×12 Size
You will see both porcelain and ceramic offered in the 12×12 format, and the difference is worth understanding. Porcelain is fired denser and hotter, absorbing less than 0.5 percent water, which makes it tougher, more frost-resistant, and better for high-traffic and wet areas. Ceramic is softer, easier to cut, and usually cheaper, which suits low-traffic walls and light-duty floors. For a mudroom, entry, or busy kitchen, spend the little extra on porcelain. For a guest bath wall or a budget project, ceramic can be the smart call. Either way, check the tile’s floor rating and, for wet areas, its DCOF slip number.
Subfloor Prep and Installation
Even a forgiving 12×12 tile needs a sound base. Over a wood subfloor, install cement backer board or an uncoupling membrane so the floor stays rigid, because deflection is what cracks tile and grout. Concrete slabs should be clean, flat, and free of active cracks. Trowel thinset to full coverage and set each tile with a slight twist to collapse the ridges, since hollow spots under a tile lead to cracks and loose pieces later. Use tile spacers for consistent joints and check your layout with a chalk line so the pattern stays square to the room. Because 12×12 tiles are easy to handle, this is one of the better formats for a confident DIYer to tackle.
Design Ideas Beyond the Plain Grid
A one-foot square does not have to look basic. Setting the tiles on a 45-degree diagonal instantly dresses up a plain floor and disguises walls that are not perfectly square. Adding a contrasting border or a small accent tile at the corners, sometimes called a pinwheel or cabochon detail, brings a custom, old-world feel. Mixing two coordinating colors in a checkerboard reads retro and playful in a laundry or entry. And choosing a stone-look or wood-look 12×12 gives you natural style in an easy-to-install size. A little planning turns the humble square into something that looks deliberate rather than default.
Estimating How Much You Need
One reason DIYers love the 12×12 size is how simple the math is: one tile is one square foot before grout, so a room’s square footage roughly equals your tile count. Still, always buy extra. Add 10 percent for straight layouts and 15 percent for diagonal patterns to cover cuts, breakage, and the occasional mis-set tile. Keep a small stash of leftover tiles after the job, because dye lots change and matching a discontinued tile years later for a repair is a headache. Order all your tile from the same production lot and check the shade and caliber numbers on each box, since even the same product can vary slightly between batches. Also account for waste from broken tiles during handling and any pieces ruined by bad cuts, which is more common when you are new to using a wet saw.
When a Larger Format Beats It
Be honest about the trade-offs. Large-format tiles, 12×24 and up, and big plank tiles have fewer grout lines, which means a more seamless, modern, contemporary look and less grout to clean and maintain. In big open rooms, a grid of small 12×12 squares can look dated and busy, and all those joints add cleaning work. So reach for large format in spacious, style-forward spaces, and keep 12×12 porcelain tile for smaller rooms, DIY installs, tight budgets, and floors where its easy handling and low cost matter more than the latest look.
Prefer to explore on your own?
See how new flooring looks in your actual room in seconds — free, no signup.
Try the free Floor Studio →