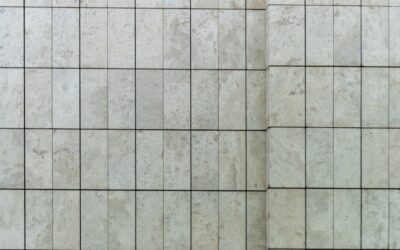
If there is one format that defines modern tile design, it is the 12×24 ceramic tile. This rectangular large-format tile has become the go-to choice for kitchens, bathrooms, entryways, and shower walls because it delivers a clean, expansive look with fewer grout lines than traditional squares. It bridges the gap between the busy grid of small tile and the seamless feel of a stone slab. In this guide we will walk through the layout patterns that make it sing, the real costs you can expect, and the buying and installation details that separate a professional result from an amateur one.
Why the 12×24 Format Is So Popular
The appeal starts with proportion. A two-to-one rectangle mimics the shape of natural wood planks and stone tiles, giving the eye a sense of direction and flow. Larger surface area means fewer seams, so a floor or wall reads as calm and uncluttered rather than gridded. That visual simplicity makes small rooms feel bigger and large rooms feel intentional. Ceramic construction keeps the price accessible compared with porcelain or natural stone, while still offering durability, easy cleaning, and a huge range of finishes, from matte concrete looks to polished marble imitations and realistic wood grains. For homeowners who want a high-end appearance on a mid-range budget, the 12×24 ceramic tile is hard to beat.
The Best Layout Patterns
Layout has a bigger impact on the final look than almost any other choice. Here are the most effective patterns for this format:
- One-third offset (running bond): Stagger each row by one-third of the tile length rather than the traditional half. This is the industry-recommended layout because large-format tiles are rarely perfectly flat, and a half-offset places the highest point of one tile against the corner of its neighbor, causing lippage. A one-third offset minimizes it.
- Straight stack (grid): Aligning tiles edge to edge in a clean grid creates a crisp, contemporary, almost seamless look, popular on feature walls.
- Herringbone: Angling the rectangles into a classic zigzag adds movement and a designer touch, though it increases cuts and waste.
- Vertical stack on walls: Running tiles vertically draws the eye upward and makes ceilings feel taller, a favorite trick in showers.
- Diagonal: Set at 45 degrees for a dynamic floor, though this generates the most cutting and waste.
Real Cost Ranges
Material prices for 12×24 ceramic tile typically fall between two and six dollars per square foot, with budget lines occasionally dipping to a dollar fifty and premium wood-look or marble-look designs reaching eight dollars. Installation adds significantly to the total. Because these are large-format tiles, professional labor usually runs five to twelve dollars per square foot, higher than for standard 12×12 tile, because the subfloor must be flattened and each tile often back-buttered. Factor in setting materials, grout, and possibly a self-leveling underlayment, which can add another one to three dollars per square foot. For a 200-square-foot kitchen floor, an all-in professional job commonly lands between 1,600 and 3,600 dollars. Doing the installation yourself can cut that roughly in half, but the flatness demands make this a challenging DIY project.
Subfloor Preparation Is Non-Negotiable
The single most common failure with large-format tile is lippage, where the edge of one tile sits higher than the next, creating an uneven, catch-your-toe surface. The culprit is almost always an uneven substrate. Industry standards call for a subfloor flat to within one-eighth inch over ten feet and one-sixteenth inch over two feet for tiles this size. Before setting a single tile, check the floor with a long straightedge, fill low spots with patching compound, and grind down high spots. On floors, a layer of self-leveling underlayment is often the fastest path to the required flatness. Skipping this step guarantees problems no amount of skill at the trowel can fix.
Installation Tips for a Flawless Finish
Beyond a flat substrate, technique matters. Keep these pointers in mind:
- Use a large-notch trowel, typically half-inch by half-inch, to bed enough mortar under the big tile.
- Back-butter each tile, spreading a thin coat of mortar on its back, to achieve full contact and eliminate hollow spots.
- Use tile leveling clips and wedges to hold adjacent tiles flush while the mortar cures.
- Limit the offset to one-third to control lippage, as noted above.
- Choose a grout joint of at least one-sixteenth inch; rectified tiles allow the tightest joints, while pressed-edge tiles need a slightly wider line to absorb size variation.
- Mix mortar to a firm, not soupy, consistency so heavy tiles do not sink unevenly.
Choosing the Right 12×24 Ceramic Tile for Your Space
Finish and rating should guide your purchase. For floors, look for a slip-resistance rating and a matte or textured surface, especially in bathrooms and entryways where water is present. Polished finishes look stunning on walls but can be slick underfoot. Consider the color and pattern in context: light tiles expand a space and hide less dust, while dark tiles hide stains but show every crumb and water spot. Wood-look planks in the 12×24 size bring warmth to a kitchen, while concrete and marble looks lean contemporary. Always confirm the tile’s PEI rating matches your intended use, and buy from a single dye lot with 10 to 15 percent overage for cuts and future repairs.
Where 12×24 Works Best
This format is remarkably versatile. On floors it shines in kitchens, bathrooms, laundry rooms, mudrooms, and open living areas. On walls it excels in showers and tub surrounds, where vertical or horizontal placement can reshape the room’s proportions. It also makes a striking fireplace surround or accent wall. About the only place it struggles is on curved or steeply sloped surfaces like shower pans, where its rigidity prevents it from following the pitch; there, small mosaics remain the right call. For nearly every flat surface in the home, though, the 12×24 delivers.
Grout Color and Finishing Touches
Once the tile is set, the grout you choose has an outsized effect on the final look, and it deserves as much thought as the tile itself. A grout that closely matches the tile color minimizes the appearance of the joints and lets a 12×24 floor or wall read as a smooth, almost continuous surface, reinforcing that modern, seamless quality the format is prized for. A contrasting grout, on the other hand, frames each tile and turns the layout into a graphic feature, which can look striking on a feature wall but busy on a large floor. For most homeowners chasing the clean contemporary look, a tone-on-tone grout is the safer choice. Consider these finishing details as well:
- Grout type: Epoxy grout resists stains and needs no sealing, ideal for kitchens and wet areas, while cement grout is cheaper but should be sealed.
- Joint width: Rectified tiles allow the tightest joints for a seamless effect; pressed-edge tiles need a slightly wider line.
- Transitions: Plan clean transition strips where the tile meets carpet, wood, or a different tile so thresholds look intentional.
- Movement joints: On large floors, include soft caulk joints at the perimeter and at changes of plane to absorb expansion.
- Sealing: Seal cement grout after it cures and reapply periodically to keep it looking fresh.
These small choices are easy to overlook in the excitement of picking tile, but they determine whether the finished installation feels polished and durable or unfinished and high-maintenance.
Final Thoughts
The 12×24 ceramic tile has earned its popularity honestly, combining a modern, seamless look with real affordability and broad availability. The keys to success are matching the layout to your goals, budgeting realistically for both material and the labor-intensive installation, and above all preparing a dead-flat substrate to prevent lippage. Choose a finish rated for your space, order extra, and follow proper large-format setting technique. Do those things and you will end up with a floor or wall that looks like it belongs in a design magazine, at a price that respects your budget and a durability that will serve your home for many years to come.
Prefer to explore on your own?
See how new flooring looks in your actual room in seconds — free, no signup.
Try the free Floor Studio →