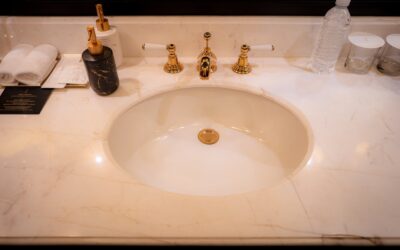
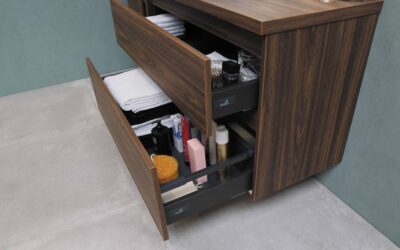
Twenty-four inches is the sweet spot where a bathroom cabinet stops being a token and starts being genuinely useful. A 24 inch bathroom vanity with sink gives you a full-size basin, a door or a bank of drawers, and enough counter to set down a toothbrush cup without playing Jenga, all in a footprint that still fits a modest full bath or a generous powder room. This is the size I recommend most often for guest baths, kids’ baths, and older homes with tight floor plans. It hits the balance between storage and space better than almost anything else on the aisle.
Part of our Bathroom Remodeling & Flooring guide — explore the full guide →
Below is how to choose one that fits your rough-in, your plumbing, and the way you actually use the room.
The Footprint and What Fits Around It
A 24-inch vanity measures 24 inches wide. Depth usually runs the standard 21 inches front to back, though narrow-depth versions exist at 18 inches for hallway baths. Standard height is 32 to 34 inches, while comfort-height models reach 34 to 36, which most adults find easier on the back.
Plan the surrounding clearances before you fall in love with a model. The sink centerline needs at least 15 inches to any side wall, and you want a minimum of 21 inches of clear floor in front, though 30 inches feels far better if you can spare it. If a door swings toward the vanity, confirm the leading edge clears the countertop by the full door width, usually 30 inches for a standard bathroom door. In a 5-by-8 bath, a 24-inch vanity typically leaves a comfortable path to the tub and toilet.
Sink Styles That Work at 24 Inches
Unlike an 18-inch cabinet, a 24-inch top can carry a real, full-size sink. Your main options:
- Integrated single-piece top: Cultured marble, resin, or ceramic molded as one unit with the bowl. Cheapest, seam-free, and easy to wipe down.
- Undermount basin under stone or quartz: The upscale look. A rectangular or oval undermount bowl mounted below a slab top gives a clean edge and lets you sweep water straight into the sink.
- Drop-in sink: A self-rimming basin that sits in a cutout. Easy to replace and forgiving of imperfect countertops.
- Vessel sink: A bowl on top of a flat counter for a spa look, though it eats into usable counter and raises the faucet height.
For faucets, a single-hole or a 4-inch centerset both fit a 24-inch top comfortably. I steer people away from 8-inch widespread sets at this width because the handles crowd the edges.
Door vs Drawers: The Storage Decision
At 24 inches you get to choose your storage layout, and it matters more than the finish color. The three common configurations:
- Single or double door with a shelf: Maximum bulk storage. Great for cleaning supplies, a hair dryer, and tall bottles, but you reach past the P-trap to find things.
- One drawer over a door: A shallow top drawer for small items plus a cabinet below. The most versatile layout for a shared bath.
- Full drawer stack: Three drawers, each notched around the plumbing. Best for makeup, grooming tools, and anything you want to see at a glance.
My rule of thumb: if the vanity serves a kid or a guest, doors handle the random bulky stuff better. If it serves an adult who does hair and makeup here every morning, drawers pay for themselves.
Matching the Vanity to Your Plumbing Rough-In
The most common install headache is the drain and supply lines landing in the wrong spot for a drawer vanity. On a door cabinet the plumbing just lives in the open box, so location barely matters. On a drawer vanity the back of each drawer must be notched or the drawers built U-shaped to clear the P-trap, and the supply valves need to sit low and to the sides.
Before ordering a drawer model, measure the height of your drain stub-out and the horizontal position of your supply valves. If the drain sits high, budget for lowering it or accept that the top drawer loses depth. This one check saves a return and a wasted Saturday.
Materials and Build Quality
Bathrooms are humid, so the box material determines how long the vanity lasts. Plywood boxes resist swelling and hold screws well; solid-wood face frames add rigidity. Particleboard and low-grade MDF are common on budget units and will survive if you keep water off them, but a leaking supply line or a splashy sink can turn the toe kick to mush within a year.
Check the drawer glides and hinges too. Soft-close, full-extension glides and concealed European hinges signal a cabinet built to last. Exposed roller glides and surface hinges are the tell of a bargain build.
Price Ranges to Expect
A complete 24-inch vanity with sink spans a wide price band depending on the top and the box:
- Budget combo (MDF box, cultured top): $180 to $350, often including the top and a basic faucet hole.
- Mid-range (plywood box, quartz or stone top, undermount): $400 to $750.
- Premium (solid wood, thick quartz, soft-close everything): $750 to $1,300.
Add $50 to $150 for a faucet, $30 for a drain assembly, and roughly $200 to $400 in plumber labor if you are not doing the swap yourself.
Freestanding vs Floating at 24 Inches
A 24-inch vanity comes in both floor-standing and wall-mounted floating versions, and the choice shapes both the look and the install. Freestanding units sit on the floor with a toe kick, hide their plumbing, forgive uneven walls and floors, and install in an afternoon with nothing more than shims and a couple of screws into a stud. For a family bath, a rental, or a quick refresh, freestanding is the low-drama default.
A floating 24-inch vanity mounts to the wall and leaves the floor visible underneath, which makes a small bath feel noticeably larger and turns mopping into a five-second job. The catch is structure: the cabinet needs solid blocking or at least two studs behind the mounting rail, and the install has to be dead level since there is no floor to reference. If you want the modern look and have a square wall to work with, floating is worth the extra effort. If your walls are old and out of plumb, freestanding hides those flaws far better.
Installation Steps and Tips
Swapping in a 24-inch vanity is one of the more approachable bathroom projects if you take it in order. Shut off the supply valves, disconnect the P-trap and supply lines, and free the old cabinet from the wall and the caulk holding it. Set the new cabinet in place and check it for level in both directions, shimming the base as needed so the counter and sink will not sit crooked.
Scribe the back or side to the wall if there is a gap, anchor the back rail into a stud, then set the top, mount the sink and faucet, and reconnect the plumbing. Run a bead of caulk along the counter-to-wall joint to keep splash water out of the wall. Take your time on the level check; a cabinet that is off by even a quarter inch shows badly once the water sits in the bowl. Budget two to four hours for a confident DIYer, longer if you are also relocating a drain to suit a drawer layout.
How to Pick the Right One
Start with the room, not the showroom. Confirm the 24-inch width leaves your 15-inch centerline and 21-inch front clearance, then decide door versus drawers based on who uses the bath. Choose a plywood box if the budget allows, match your faucet to the top’s pre-drilled holes, and verify your rough-in works with the storage layout you want.
Done right, a 24 inch bathroom vanity with sink is the highest-value cabinet in the bathroom aisle. It carries a real sink, hides a surprising amount of clutter, and fits rooms where a 30-inch or 36-inch unit simply will not go, which is exactly why it stays the most popular size year after year.