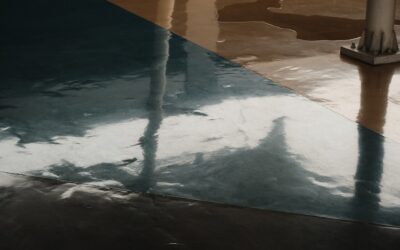
Pinterest is awash in 3D flooring images of dolphins leaping out of bathroom floors and koi swimming under glass-clear kitchens. The reality on a finished install is more nuanced. 3D floors are a multi-layer epoxy system that combines a printed image, a clear self-leveling coat, and a topcoat. They look stunning when the substrate, lighting, and curing conditions all cooperate. They look amateur when any of those three go wrong.
How 3D Floors Are Actually Built
A real 3D epoxy floor is a four-layer system. The base is a primer coat over a flat, moisture-tested concrete slab. Next comes a pigmented color base that establishes the background. The third layer is the printed image, either a large-format vinyl banner or a digitally printed high-resolution decal. The top is a clear, self-leveling epoxy that creates the depth illusion, finished with a polyurethane or polyaspartic wear coat.
Total thickness ranges from 80 to 120 mils. That clear top epoxy is what makes a flat picture appear three-dimensional, because the eye reads the depth between the print and the surface as physical distance.
What Photographs Well and What Does Not
3D floors photograph best with high-contrast images and significant depth in the original picture. Ocean scenes with reefs, beaches with shells, and abstract geometric patterns hold up well. Closeup photos of single objects (a flower, a tiger face) often look distorted because the eye cannot resolve scale at floor level. Marble veining and stone patterns work but mostly read as a really nice solid epoxy floor with a stone pattern, not a 3D illusion.
Catalog images are shot from a 35-degree angle in soft, raking light. Once you live with the floor under overhead LEDs, the depth illusion flattens. Always ask installers for in-the-field photos taken from standing eye height in normal lighting before you commit.
Real-World Pricing for 2026
- Solid color epoxy with flakes: $5-$9 per sq ft installed
- Metallic epoxy (single color, no print): $9-$14 per sq ft installed
- 3D printed image floor (stock design): $15-$22 per sq ft installed
- 3D custom image floor: $20-$35 per sq ft installed
- Premium 3D with multiple layers: $35-$55+ per sq ft installed
A 200-square-foot bathroom with a stock 3D ocean design typically prices between $3,500 and $4,500 turnkey. Custom artwork (your dog, a family photo, a logo) doubles the price because of the licensing, printing, and color-matching labor.
Substrate Requirements
3D epoxy floors live or die by the substrate. The concrete slab must test below 4 pounds of moisture vapor emission per 1000 square feet per 24 hours via ASTM F1869, or below 75 percent RH via ASTM F2170 in-situ probes. Diamond grinding to CSP 2-3 (per the International Concrete Repair Institute scale) is standard prep. Cracks wider than 1/16 inch need to be filled with a polyurea or epoxy crack filler. Skip prep and the entire system will delaminate within 2-5 years.
Plywood substrates can work but require an additional self-leveling underlayment like Ardex K-15 to handle deflection. Suspended subfloors are generally not recommended because flex telegraphs through the rigid epoxy.
Where 3D Floors Make Sense
Restaurants, retail showrooms, dental offices, and bowling alleys see strong ROI from 3D floors because the wow factor drives social media shares and foot traffic. In residential use, the strongest case is for a half-bath, a wine cellar, a home theater, or a kids’ playroom where the design statement matters and traffic patterns are manageable.
Kitchens, master bathrooms, and laundry rooms are tougher. The chemicals, hot water, and grit grind down the topcoat faster than expected. Most installers spec a polyaspartic topcoat (rather than polyurethane) for wet rooms because polyaspartic resists UV yellowing and chemical attack better.
Maintenance Reality
3D floors look easy to clean because they are seamless and glossy, and mostly they are. Daily sweeping plus a damp microfiber mop with a pH-neutral cleaner handles 95 percent of the work. The gotchas are surface scratches and topcoat hazing. High-heel traffic, dog claws, and dragged furniture all leave micro-scratches that build up under sidelighting and ruin the depth illusion.
Most systems need a recoat of the polyaspartic topcoat every 5-8 years in residential settings, every 2-4 years in commercial. Recoats cost $3-$6 per square foot if the base layers are sound, much less than a full replacement.
Choosing an Installer
Verify the installer has at least 10 documented 3D installs with current photos and references. Ask about the specific epoxy system they use; reputable brands include Sherwin-Williams General Polymers, Stonhard, and Elite Crete Systems. Confirm moisture testing is included, not an add-on. Get a written warranty of at least 5 years on the topcoat and 10 years on the base system. Cheap installers skip steps, and the failure shows up at year three when you need to tear the whole thing out.
Done right, a 3D epoxy floor is a 15-20 year installation that turns an otherwise plain room into a conversation piece. Done wrong, it is the most expensive coat of paint you will ever buy.
Image Sourcing and Licensing Pitfalls
Many shoppers find their dream 3D floor image on Pinterest or Google Images and assume the installer can print whatever picture they want. Copyright matters. Stock photo sites like Shutterstock, Adobe Stock, and Getty Images license images for specific commercial uses, and large-format printing for a permanent installation usually requires an Enhanced license at $50-$500 per image. Using an unlicensed image exposes you to a takedown notice and potential damages from the photographer.
The safer route is to commission an original image from a photographer or graphic designer, or to choose from your installer’s pre-licensed catalog. Companies like 3D Floor Designs and ArtKraft Direct maintain libraries of pre-licensed images specifically for epoxy printing, which removes the legal risk entirely.
Curing Time and Move-In Reality
3D floors are not installed in a weekend. The base epoxy primer needs 12-24 hours to cure. The pigmented base coat needs another 12-18 hours. The image installation, clear self-leveling coat, and topcoat each need 12-24 hours of cure time before the next step. Total install runs 4-7 days from prep to walkable surface, and full chemical cure (when you can place heavy furniture and the topcoat reaches maximum hardness) typically lands at 5-7 days after the final coat. Plan your renovation timeline around this, and do not rush the curing schedule even when the surface looks dry to the touch.
Prefer to explore on your own?
See how new flooring looks in your actual room in seconds — free, no signup.
Try the free Floor Studio →