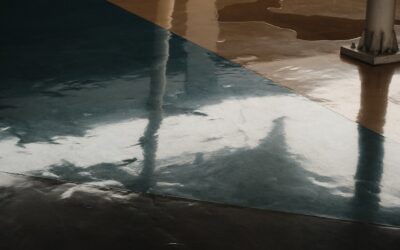
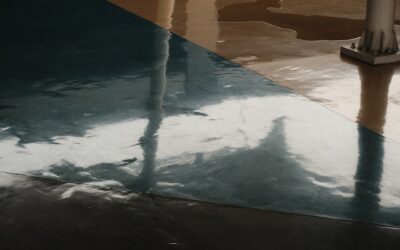
Search any home improvement forum and you will find threads of homeowners obsessing over epoxy flooring images — metallic swirls in garages, decorative flake systems in basements, and high-gloss showroom floors that look like pour art. The photos are seductive. What the photos do not show is the prep work, the chemistry, and the realistic cost of getting a finished floor that actually matches the marketing shots. Here is the unfiltered reality behind the photogenic surfaces.
Part of our Epoxy, Concrete & Garage Floors guide — explore the full guide →
- The Main Epoxy Flooring Looks
- What Real-World Epoxy Looks Like
- Pros of Epoxy Flooring
- Cons of Epoxy Flooring
- Pricing by Visual Style
- Color Flake Systems Explained
- Metallic Epoxy: The Showpiece Look
- Substrate Prep: The Hidden Cost
- DIY vs Professional Installation
- Lighting Matters in Photos and Reality
- Maintenance for the Long Term
- Bottom Line
The Main Epoxy Flooring Looks
Most epoxy installations fall into one of five visual categories:
- Solid color: single-color epoxy in gray, beige, or white, the most common garage finish
- Color flake (chip) systems: multi-color vinyl chips broadcast into wet epoxy
- Metallic epoxy: reflective pigments swirled to create marble-like patterns
- Quartz aggregate: colored quartz sand broadcast for a textured, slip-resistant finish
- Polyaspartic over epoxy: ultra-glossy finish with UV resistance for outdoor and sunny rooms
What Real-World Epoxy Looks Like
The marketing photos almost always show metallic and high-end designer installs. Real-world results depend on:
- Substrate condition before coating
- Skill of the installer
- Quality and chemistry of the epoxy product
- Lighting in the finished space
- Topcoat application and cure conditions
A poor install with bargain product looks dramatically different from a pro install with premium materials, even if the color choice is identical. Always look at the installer’s portfolio of completed jobs before committing.
Pros of Epoxy Flooring
- Extremely durable — withstands hot tire pickup, oil drips, and heavy impact
- Seamless finish with no grout lines or joints to clean
- Easy to clean — most spills wipe up with a damp mop
- Wide range of colors and decorative effects
- Adds significant resale value to garages and basements
- Lifespan of 15-25 years on quality systems with proper care
Cons of Epoxy Flooring
- Substrate prep is critical — failed prep means failed coating
- Slippery when wet without anti-slip aggregate
- Requires 24-72 hour cure time before walking, 7+ days for vehicle traffic
- UV exposure yellows standard epoxy — polyaspartic topcoat required outdoors
- Hard underfoot — uncomfortable for long standing
- Hot tire pickup possible on inadequate systems
Pricing by Visual Style
Pricing for residential epoxy installations:
- Solid color (DIY kit): $0.50-$2.50 per sq ft material, no labor warranty
- Solid color (professional): $3-$7 per sq ft installed
- Color flake (professional): $5-$10 per sq ft installed
- Metallic epoxy (professional): $7-$15 per sq ft installed
- Quartz aggregate system: $8-$16 per sq ft installed
- Designer custom installs: $15-$30 per sq ft installed
For a typical 500-square-foot two-car garage, expect $1,500-$5,000 for a quality professional install in solid color or flake. Metallic systems run $3,500-$7,500 for the same area.
Color Flake Systems Explained
Flake systems are popular for residential garages because they hide imperfections, add visual interest, and provide some slip resistance. The flakes are vinyl chips ranging from 1/16 inch (mini-flake) to 1 inch (large flake). Application:
- Apply colored basecoat epoxy
- Broadcast flakes immediately onto wet epoxy until rejection (no more sticks)
- Allow 12-24 hour cure
- Sweep up loose flakes
- Apply 1-2 clear topcoats to lock everything in
Standard flake colors come in coordinated blends — Gray Granite, Tuscan, Coastal Beach, etc. Custom blends are available at most installers for a 10-20 percent upcharge.
Metallic Epoxy: The Showpiece Look
Metallic epoxy creates the swirled, three-dimensional patterns that dominate Pinterest boards. The effect comes from metallic powder pigments suspended in the epoxy, which the installer manipulates with a leaf blower, foam brushes, or solvent drops while the resin is wet.
No two metallic floors look identical — the patterns are partially controlled, partially random. This is part of the appeal but also a risk. Get a sample mockup before committing on a large installation. Some installers will pour a 2×2 or 3×3 sample area for $200-$500.
Substrate Prep: The Hidden Cost
Concrete prep is the most overlooked part of any epoxy install. Required steps:
- Test concrete for moisture vapor emission (under 3 lb/1000 sq ft per 24 hours)
- Check for sealers or curing compounds — must be removed
- Mechanically profile the surface with a diamond grinder or shot blaster
- Repair cracks with a polyurethane or polyurea filler
- Vacuum thoroughly before priming
Skip any of these and the coating will eventually fail — peeling, bubbling, or delaminating in 6-24 months. Prep adds $1-$3 per square foot to the project cost. It is not optional.
DIY vs Professional Installation
DIY epoxy kits from brands like Rust-Oleum and Quikrete cost $200-$500 for a typical two-car garage. They work for solid color basic floors if you have realistic expectations — the finish will not match a pro install in either appearance or longevity.
For metallic, flake, and quartz systems, professional installation is essential. The chemistry, timing, and technique require experience that no YouTube video fully conveys. A failed metallic install is virtually impossible to repair without grinding everything off and starting over.
Lighting Matters in Photos and Reality
Epoxy floors look dramatically different under different lighting. Showroom photos are typically lit with soft natural light at low angles to maximize the metallic shine. The same floor under garage fluorescents or basement LEDs will read flatter and less dimensional.
Before approving a sample, view it in the actual space at the time of day you will use the room most. South-facing garages with morning sun show metallic effects beautifully. North-facing basements may need lighting upgrades to make the floor pop.
Maintenance for the Long Term
Epoxy floors require minimal but consistent maintenance:
- Sweep or dust mop weekly
- Damp-mop monthly with a mild detergent
- Address oil and chemical spills within 24 hours
- Apply a fresh polyurethane topcoat every 5-8 years to refresh appearance and durability
- Use floor mats under car tires in garages to prevent hot-tire pickup
Bottom Line
Epoxy flooring images on Instagram show what is possible, not what is typical. Achieving showroom results requires premium product, expert installation, and realistic budget. For most homeowners, a professional flake system at $6-$9 per square foot delivers an attractive, durable floor that comes close to the marketing photos. Save the metallic systems for showcase spaces where the upcharge makes sense.