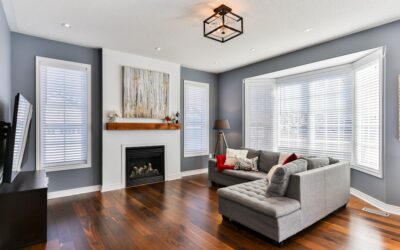
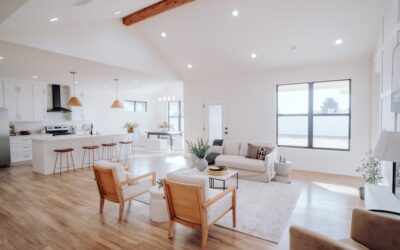
Scrolling through hardwood flooring images on Pinterest or Houzz is how most projects start, and it is also where most homeowners get burned. The boards in that beautifully lit photo could be 5-inch white oak with a Bona Craft Oil finish at $11 per sq ft installed, or 3-inch domestic red oak with a Duraseal stain at $6—both can look nearly identical in a square thumbnail. This guide explains how to translate the photo you saved into a real species, finish, width, and pattern you can actually buy.
- Reading the Wood Species From a Photo
- Plank Width Changes the Entire Look
- Stain Colors That Photograph Differently in Real Life
- Site-Finished vs Prefinished in Photos
- Patterns: Herringbone, Chevron, and Straight-Lay
- Finish Sheen Caught in the Light
- What Real Hardwood Costs Compared to the Photo
- Solid vs Engineered for the Look You Want
- From Image to Order: The Three-Step Verification
- How Photo Editing Changes What You See
- Common Hardwood Image Trends Worth Knowing
Reading the Wood Species From a Photo
Grain pattern and pore structure are the first tell. Red oak (Janka 1290) shows wide, open grain with pink undertones. White oak (Janka 1360) shows tighter grain with a cooler, gray-friendly base—this is what almost every modern designer photo is using. Hickory (Janka 1820) has dramatic light-to-dark variation in the same plank. Maple (Janka 1450) reads almost grain-less in photos, like a creamy sheet. Walnut shows chocolate browns with curving figure. If the image looks “rustic with knots,” that is usually character-grade white oak or hickory from Bruce Classics, Shaw Pebble Hill, or Hurst Hardwoods.
Plank Width Changes the Entire Look
Narrow 2 1/4-inch strip flooring photographs busy and traditional—think 1990s builder homes. Wider 5-inch to 7-inch planks dominate modern photos because they show off grain figure and feel calmer in open floor plans. The 8-inch and wider European-style planks (Mirage Sweet Memories, Carlisle Wide Plank, Stuga) command $14-$22 per sq ft and need an engineered construction to stay flat. If the image you love shows fewer than four planks crossing a doorway, you are looking at 7-inch or wider.
Stain Colors That Photograph Differently in Real Life
Warm walnut tones, espresso browns, and weathered grays are the three most-saved stain palettes. Duraseal Jacobean, Bona Antique Brown, and Minwax Classic Gray are the actual cans behind 80% of the photos you see. Be aware that lighting changes everything—a 3000K LED makes Provincial look like Special Walnut, while north-facing daylight pulls red oak pink no matter what stain you use. Always order 12×12-inch sample boards from the manufacturer and lay them in the actual room before committing.
Site-Finished vs Prefinished in Photos
Tight seams with no micro-bevel mean site-finished. You can see the floor flow like one continuous surface—this is the high-end look in most magazine photos. Prefinished boards (Bruce Lifestyle, Shaw Repel, Mohawk TecWood) have a small painted V-groove between planks that catches shadow lines. Prefinished saves $2-$3 per sq ft in labor and offers stronger aluminum-oxide wear layers, but it never quite matches the seamless look of site-finished.
Patterns: Herringbone, Chevron, and Straight-Lay
Straight-lay (parallel planks) is 90% of installs. Herringbone uses rectangular planks set at 90° in a zig-zag, with a defined “step” where each plank end meets another plank’s side. Chevron cuts the plank ends at 45° so the points meet in a clean V. Herringbone costs about 30% more in labor; chevron costs 40-50% more because of the angle cuts and waste. Carlisle, Lauzon Designer, and Mirage all sell pre-cut herringbone blocks to lower install time.
Finish Sheen Caught in the Light
Look at how the floor reflects window light in the photo. Matte (3-10 sheen) shows almost no glare and hides scratches—standard for Bona Pro Series Traffic HD and most European oils. Satin (25-35 sheen) gives a soft glow and is the most common prefinished factory finish. Semi-gloss (55 sheen) and gloss are 1990s-era and rarely seen in modern photos. Matte and satin both hide dog claws and footprints better than gloss.
What Real Hardwood Costs Compared to the Photo
- Domestic red oak, 3 1/4″ prefinished: $4-$6 per sq ft material
- White oak, 5″ engineered prefinished: $6-$9 per sq ft material
- White oak, 7″ wire-brushed European: $10-$14 per sq ft material
- Walnut, 5″ prefinished: $9-$12 per sq ft material
- Hickory, character grade 5″: $7-$10 per sq ft material
Install adds $4-$8 per sq ft depending on subfloor prep, removal of existing flooring, and pattern. Site-finishing adds $3-$5 per sq ft for sanding, staining, and three coats of finish.
Solid vs Engineered for the Look You Want
For wide planks above 5 inches, engineered hardwood with a 4mm or thicker wear layer (Mirage Engineered, Mohawk TecWood Plus, Lauzon Pure Genius) is the only stable choice. Solid hardwood above 5 inches will cup and gap with seasonal humidity. NWFA recommends keeping interior RH between 30% and 50% year-round. Engineered also installs over concrete slabs and radiant heat—solid does not.
From Image to Order: The Three-Step Verification
Find the source photo’s caption or pin description—designers often credit the brand. Cross-check the species and width on the manufacturer site. Order three samples in adjacent stain colors and one width up and down. That $40 in samples will save you from a $9,000 mistake on the wrong floor.
How Photo Editing Changes What You See
Almost every magazine and Instagram hardwood image goes through Lightroom or Photoshop adjustments before publication. White balance shifts pull cool oak warmer or cool. Saturation tweaks intensify walnut browns. Even an “untouched” iPhone shot applies automatic HDR that brightens shadows and dulls highlights. The result: the floor in the photo often looks 10-20% lighter, warmer, or more colorful than reality. Always verify product visuals against the manufacturer’s professional studio photography on their own website—those shots use color-calibrated lighting and are the most accurate reference.
The most reliable workflow is to email or call the manufacturer’s customer service line and ask which SKU appears in a specific image. Mirage, Lauzon, Carlisle, and Bona all maintain image libraries cross-referenced to their SKU codes. Big-box brands like LifeProof and SmartCore are less forthcoming, but their in-store samples and 12×12 take-home tiles give you a real-world reference under your own lighting.
Common Hardwood Image Trends Worth Knowing
Three visuals dominate current designer hardwood imagery: white-oak wire-brushed in pale natural tone (Bona NordicSeal), white-oak fumed with a smoky grey-brown (Lauzon Pure Genius Smoke), and walnut wide-plank with hand-scraped texture (Carlisle Wide Plank Black Walnut). All three appear in roughly 60% of high-end remodel photos shared in 2024-2025. If your image fits one of those three categories, you can shortlist confidently within those three SKU families and save weeks of sample hunting. For everything else, the species-width-stain-finish framework above will get you to the right product family inside an afternoon.
Prefer to explore on your own?
See how new flooring looks in your actual room in seconds — free, no signup.
Try the free Floor Studio →