Basement crawl space waterproofing is about keeping ground water and humidity out of the lowest level of your home so you don’t end up with mold, rot, and ruined belongings. Whether you have a full basement or a low crawl space, basement crawl space waterproofing uses a mix of drainage, sealing, moisture barriers, and dehumidification — and knowing which methods your situation calls for saves you from paying for the wrong fix.
Part of our Roofing guide — explore the full guide →
- Where the Water Comes From
- Interior vs. Exterior Methods
- The Sump Pump and Drainage Tie-In
- Sealing Cracks and Walls
- Crawl Space Encapsulation
- Dehumidifiers and Sizing
- Grading, Gutters, and Cheap Wins
- When to Call a Professional
- Signs You Have a Moisture Problem
- Basement vs. Crawl Space: Different Priorities
- Health and Structural Stakes
- Putting It Together
Where the Water Comes From
Before choosing a method, understand the source. Water reaches a basement or crawl space through hydrostatic pressure pushing groundwater against the foundation, cracks in walls or floor slabs, poor exterior grading that channels rain toward the house, clogged or missing gutters, and simple humidity condensing on cool surfaces. Different sources call for different fixes — a surface-water problem from bad grading is cheap to solve, while a high water table pressing on the walls needs a real drainage system. Diagnosing correctly is half the job.
Interior vs. Exterior Methods
Waterproofing splits into two broad approaches. Interior methods manage water after it reaches the foundation — interior drain tile, a sump pump, sealants, and vapor barriers — and are less disruptive and less expensive. Exterior methods stop water before it enters — excavating around the foundation, applying waterproof membranes, and installing exterior footing drains — and are the most thorough but the most expensive and invasive. Many homes use a combination: exterior grading and gutter fixes outside, plus an interior drain and sump inside as a backstop.
- Interior: lower cost, less disruption, manages water that gets in.
- Exterior: higher cost, heavy excavation, keeps water out entirely.
- Combined: exterior surface fixes plus interior drainage for belt-and-suspenders protection.
The Sump Pump and Drainage Tie-In
At the heart of most interior systems is a sump pump. A perimeter drain — interior drain tile installed along the footing inside the basement — collects water and channels it to a sump pit, where the pump lifts it up and discharges it away from the house. A reliable system needs the drain graded to the pit, a properly sized pump, a check valve to stop backflow, and a discharge line that carries water far enough from the foundation that it doesn’t just cycle back. Add a battery backup pump for storms and power outages, when you need it most. This drain-to-sump tie-in is the workhorse of basement waterproofing.
Sealing Cracks and Walls
Sealing addresses direct leaks. Hairline and non-structural cracks in poured concrete walls can be filled with epoxy or polyurethane injection, and interior masonry can get a waterproof coating to slow seepage and humidity. Sealants are effective against minor moisture but are not a cure for water under real hydrostatic pressure — if water is actively pushing through, you need drainage, not just paint. And any crack that’s widening, stepping, or accompanied by bowing walls is a structural warning sign, not a simple waterproofing job (more on that below).
Crawl Space Encapsulation
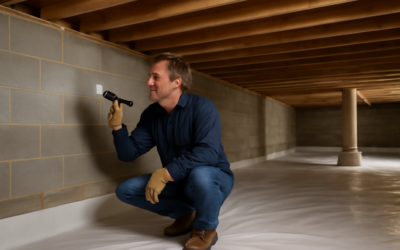
Crawl spaces have their own best-practice fix: encapsulation. A heavy polyethylene vapor barrier (commonly 12 to 20 mil) is laid across the dirt floor and up the walls and sealed at the seams, cutting off ground moisture that would otherwise evaporate into the space and rise into the house. Vents are often sealed and the crawl space is conditioned instead. Encapsulation transforms a damp, musty crawl space into a dry, sealed one and is the single most effective step for crawl-space moisture. Pair it with drainage if water actually pools, and a dehumidifier to control what’s left.
Dehumidifiers and Sizing
Even after drainage and sealing, humid air needs managing, especially in summer. A dedicated crawl space or basement dehumidifier holds humidity in the 45–55% range that discourages mold. Size it by pints of water removed per day and by the dampness of the space — a small basement might need a 50–70 pint/day unit, while a large or very wet space wants 90 pints/day or more. Route the dehumidifier’s condensate to a drain or sump so you never empty a bucket, and plug it into a GFCI-protected outlet since it runs in a damp location. An encapsulated crawl space plus a right-sized dehumidifier is a proven combination.
Grading, Gutters, and Cheap Wins
Before spending on drainage systems, fix the outside for pennies on the dollar. Slope the soil away from the foundation so the first 6 feet drops at least a few inches. Clean gutters, and extend downspouts 4 to 6 feet from the house so roof water doesn’t dump against the wall. Repair cracked exterior drainage and remove garden beds that trap water at the foundation. These surface fixes solve a surprising share of “wet basement” complaints and should always come first.
When to Call a Professional
DIY handles grading, gutter extensions, minor crack sealing, and crawl space vapor barriers. Call a professional for full interior drain-tile and sump systems, any exterior excavation and membrane work, and above all for structural symptoms — bowing or cracked foundation walls, horizontal cracks, or floors and walls that are shifting. Those signal a structural problem that a waterproofing contractor and often a structural engineer must evaluate; sealing over them is dangerous. Get a written diagnosis of the water source before authorizing expensive work, and be wary of any contractor who prescribes the priciest exterior dig without ruling out cheap surface fixes first.
Signs You Have a Moisture Problem
Catching moisture early is cheaper than repairing the damage it causes. Watch for a musty, earthy smell that signals mold or mildew even before you see it; white, chalky efflorescence on concrete walls where water has evaporated and left mineral salts; peeling paint, bubbling floor finishes, or warped wood; visible mold on walls, joists, or stored belongings; rust on metal appliances and fasteners; and condensation or “sweating” walls in summer. In a crawl space, sagging insulation, damp soil, and a high humidity reading on a cheap hygrometer are red flags. Any standing water after a rain points to an active intrusion that needs drainage, not just a dehumidifier.
Basement vs. Crawl Space: Different Priorities
Though both are below-grade, the two spaces call for slightly different game plans. A finished or usable basement usually warrants a full interior perimeter drain and sump pump plus wall sealing, because you’re protecting living space and belongings and want reliable water removal. A crawl space, by contrast, is driven mostly by ground-moisture control, so encapsulation with a heavy vapor barrier is the headline fix, supported by a dehumidifier and drainage only if water actually pools. In both, controlling the source outside — grading and gutters — comes first. Knowing which space you’re dealing with keeps you from over-building a crawl space or under-protecting a basement.
Health and Structural Stakes
Waterproofing isn’t only about comfort. Chronic dampness breeds mold that can aggravate allergies and asthma, and it invites wood-destroying pests like termites and carpenter ants that thrive in moist framing. Over time, unmanaged water rots sill plates, floor joists, and subfloor, and freeze-thaw cycles can worsen foundation cracks. Because the damage compounds quietly behind walls and under insulation, a modest investment in drainage, sealing, and humidity control protects both the health of the people inside and the structure holding the house up. That’s the real argument for addressing moisture sooner rather than waiting for visible damage.
Putting It Together
Effective basement crawl space waterproofing usually layers several measures: fix grading and gutters outside, encapsulate a crawl space, run an interior perimeter drain to a sump with a backup pump, seal minor cracks, and control the remaining humidity with a properly sized dehumidifier. Match the intensity to the problem — a lightly damp space may need only surface fixes and a dehumidifier, while a chronically flooding basement warrants full drainage and possibly exterior work. Diagnose first, start with the cheap wins, and escalate only as the water demands.