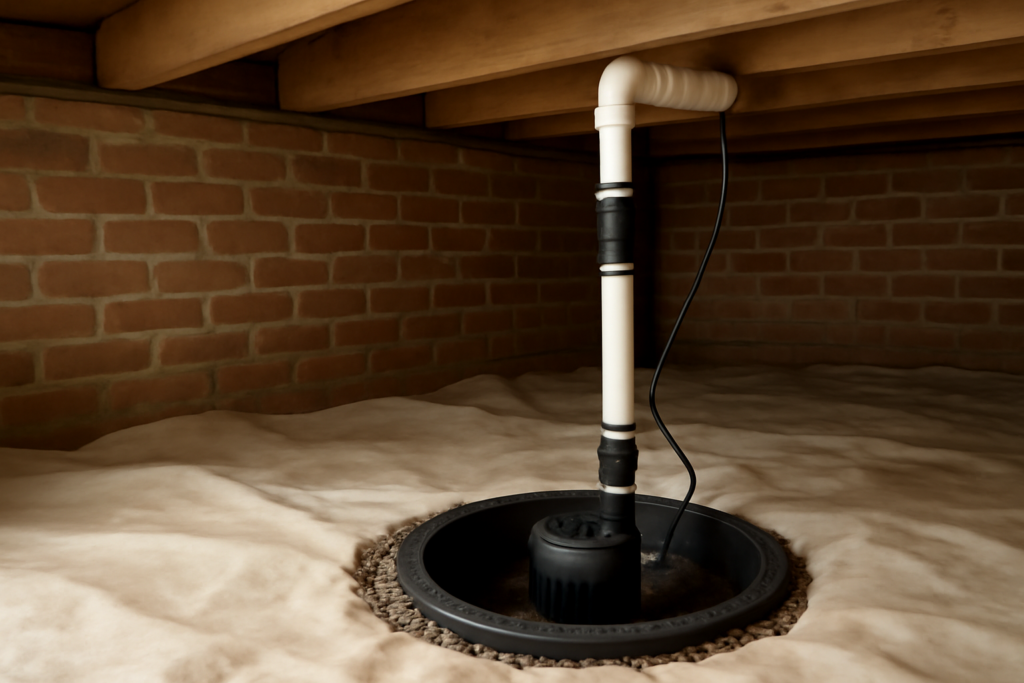
A crawl space sump pump is the difference between a dry, healthy foundation and a damp, musty crawl space quietly rotting your home from below. Unlike a basement, a crawl space is out of sight, so water problems there fester for years before anyone notices — until you smell mold upstairs or a contractor finds rotted joists. If your crawl space takes on water after heavy rain or the ground is chronically damp, a properly installed sump pump is the fix. Here’s everything you need to get it right.
Why Crawl Spaces Need Pumps
Crawl spaces sit partly or fully below grade, which makes them natural collection points for groundwater. During heavy rain or snowmelt, the water table rises and hydrostatic pressure pushes moisture up through the soil floor and foundation walls. Even without standing water, chronic dampness invites a cascade of problems: mold and mildew, wood rot in joists and sills, rusting ductwork, pest infestation, and the “stack effect” that pulls damp, musty air up into your living space. Roughly half the air you breathe on the first floor comes up from the crawl space, so its moisture is your indoor air quality.
A sump pump collects intruding water in a pit and pumps it away from the foundation before it can pool and cause damage. Paired with proper drainage and a vapor barrier, it keeps the space dry year-round.
How the System Works Together
A crawl space sump system is more than just the pump. It’s a coordinated setup:
- A sump pit (basin): a perforated liner sunk into the lowest point of the crawl space, where water collects.
- Perimeter drainage: ideally a French drain or drain tile around the interior perimeter that channels water toward the pit.
- The pump itself: submersible or pedestal, sitting in the pit, activated by a float switch when water rises.
- A discharge line: pipe carrying water up and out, well away from the foundation.
- A vapor barrier: heavy poly sheeting over the soil floor to block ground moisture from evaporating up (part of encapsulation).
The pump handles liquid water; the vapor barrier handles humidity. You want both for a genuinely dry crawl space.
Choosing the Right Pump
Submersible vs. Pedestal
For crawl spaces, a submersible pump is almost always the right call. It sits down in the pit, runs quietly, stays cooler, and fits the tight vertical clearance of a crawl space where a tall pedestal pump won’t. Pedestal pumps keep the motor above the water and are easier to service, but they’re taller and louder — better suited to basements.
Sizing: Horsepower and GPH
Most crawl spaces are well served by a 1/3 horsepower pump, which moves roughly 30-45 gallons per minute (around 2,000-2,700 GPH) at typical lift heights. For higher water tables, longer discharge runs, or greater lift, step up to 1/2 horsepower (2,700-3,500 GPH). Bigger isn’t automatically better — an oversized pump short-cycles, turning on and off rapidly, which wears it out faster. Match the pump to your actual water volume and lift height (the vertical distance the water must travel plus friction from the horizontal run).
Look for a cast-iron body over all-plastic; cast iron dissipates heat and lasts longer. Reputable names include Zoeller (the M53 is a crawl space workhorse), Wayne, and Liberty.
Installation Overview
Installing a crawl space sump pump is doable for a determined DIYer, but the confined, low space makes it genuinely uncomfortable work. Here’s the sequence:
- Locate the low point. Find where water naturally collects and dig your pit there.
- Dig and set the basin. Excavate a hole for a perforated sump liner — typically 18-24 inches deep and wide enough for the basin. Surround it with gravel to aid drainage.
- Set the pump on a solid base (a brick or block) inside the basin so debris and silt on the pit floor don’t clog the intake.
- Run the discharge line up and out through the rim joist or a vent, sloping it to daylight or a drainage area at least 10 feet from the foundation. Include a check valve on the discharge to stop water flowing back into the pit.
- Provide power from a dedicated GFCI-protected outlet (NEC 210.8 requires GFCI protection in crawl spaces). Never run a pump on an extension cord.
The electrical connection is where I’d urge caution: a wet crawl space and an improvised power source is a dangerous combination. If you don’t have a proper GFCI outlet within reach, hire a licensed electrician to add one, and check whether your area requires a permit for the circuit.
Battery Backup and Alarms
Storms that flood crawl spaces are exactly the events that knock out power — precisely when you need the pump most. A battery backup pump or a backup system that kicks in when the primary fails or power drops is strongly worth the $150-400. For a crawl space you rarely enter, add a water alarm too: a sensor that alerts you (locally or to your phone) when water rises past a set point or the pump fails. Because crawl space problems are invisible, an alarm is what turns a silent disaster into a manageable heads-up.
Maintenance for a Space You Never See
Out of sight can’t mean out of mind. Test the pump quarterly by pouring a bucket of water into the pit and confirming it kicks on and pumps out. Once or twice a year, clear the pit of silt and debris, check that the float switch moves freely and isn’t snagged, inspect the check valve, and confirm the discharge line is clear and directing water away. Verify battery backups hold a charge annually. In freezing climates, make sure the discharge line can’t freeze shut in winter.
A neglected pump fails silently, and you find out when the joists are already soft. Twenty minutes twice a year prevents thousands in repairs.
Encapsulation: Pairing the Pump With a Vapor Barrier
A sump pump handles liquid water, but it does nothing about the humidity rising off a bare soil floor — and in a crawl space, that ground moisture is half the battle. This is why the best results come from pairing the pump with encapsulation: sealing the crawl space with a heavy vapor barrier so it becomes a genuinely dry, conditioned zone.
Encapsulation means laying a thick (usually 12- to 20-mil) reinforced polyethylene liner across the entire soil floor and up the foundation walls, sealing the seams, and often adding a dehumidifier. The sump pit is left accessible so the pump can still collect and evacuate any water that does intrude. With the barrier blocking evaporation from below and the pump removing standing water, the space stays dry year-round. Many homeowners add a crawl space dehumidifier to hold relative humidity below 60%, the threshold above which mold thrives. It’s a bigger project than the pump alone, but for a chronically damp crawl space it’s the difference between managing water and actually solving the moisture problem.
Common Installation Mistakes
I get called to fix the same errors repeatedly, and they’re all avoidable. The most common is a discharge line that dumps water right at the foundation — the water simply flows back in and the pump cycles endlessly. Run the discharge at least 10 feet out, sloped to drain, ideally to a spot that carries water away from the house.
- Skipping the check valve, so the water in the vertical pipe drains back into the pit each time the pump stops, causing short-cycling and premature wear.
- Setting the pump directly on the silty pit floor, which lets debris clog the intake. Always set it on a brick or block.
- Undersizing the pit, so the float can’t move freely or the pump short-cycles.
- Using an extension cord instead of a proper GFCI-protected outlet — a real hazard in a wet space.
- Forgetting freeze protection on the discharge line, which can freeze solid in winter and back water up into the crawl space.
Is It Worth It?
A complete crawl space sump pump installation runs roughly $1,000-3,000 professionally, less if you DIY the labor. Set against the cost of remediating mold, replacing rotted structural wood, or dealing with poor indoor air quality, it’s inexpensive insurance. If your crawl space shows any sign of standing water, efflorescence on the walls, musty odors, or persistent dampness, a crawl space sump pump — paired with drainage and a vapor barrier — is one of the smartest protective investments you can make in your home.