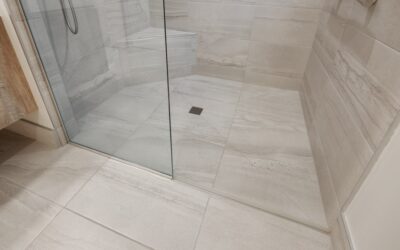
Of every surface in a home, the bathroom shower floor works the hardest. It gets soaked dozens of times a week, has to shed that water fast, must never let a drop reach the framing below, and can’t turn into a skating rink when someone steps on it wet. Get it right and it disappears into the background for 20 years. Get it wrong and you are ripping out drywall to chase a hidden leak.
Part of our Bathroom Remodeling & Flooring guide — explore the full guide →
Drawing on years of building wet rooms and custom showers, here is everything a homeowner needs to choose, waterproof, and install a bathroom shower floor that stays safe, dry, and good-looking.
- What a Shower Floor Has to Do
- Best Materials for a Shower Floor
- The Critical Detail: Slope and the Drain
- Waterproofing Is Non-Negotiable
- Grout, Sealing, and Slip Safety
- What It Costs to Do a Shower Floor
- Maintenance That Keeps It Sealed
- Prefab Pan vs. Custom Tile Floor
- Timeline for a Shower Floor Install
- Final Advice From the Field
What a Shower Floor Has to Do
Before picking a pretty tile, understand the four jobs this surface performs. It must drain completely with no standing puddles, provide reliable slip resistance underfoot, seal water out of the structure entirely, and hold up to daily soap, minerals, and cleaning chemicals. A material can be gorgeous and still fail if it skips any one of those four. Function comes first here; looks come second.
Best Materials for a Shower Floor
Not every flooring belongs in a shower pan. Here are the options I actually recommend and where each fits.
- Porcelain mosaic tile: My go-to. Small 1-inch or 2-inch tiles mean more grout lines, which equals more grip, and porcelain absorbs less than 0.5 percent water. Runs $2 to $15 per sq ft.
- Natural stone (pebble, slate, marble): Beautiful and textured, but porous. It demands sealing every 6 to 12 months. Expect $7 to $25 per sq ft.
- Solid surface or cast pans: One-piece acrylic or cultured marble bases with zero grout lines. Nearly leak-proof and fast to install, $200 to $800 per pan.
- Textured large-format porcelain: Modern, minimal grout, but insist on a slip-rated (R10 or higher) surface.
Avoid glossy large tiles, hardwood, and standard vinyl plank in the wet zone. Slick finishes and water do not mix, and most wood-look products aren’t rated for constant submersion.
The Critical Detail: Slope and the Drain
Water only leaves if gravity pulls it out. Code and good practice call for a slope of 1/4 inch of fall per foot from the shower walls down to the drain. On a standard 4-foot pan that is a full inch of drop across the floor, enough to move water without feeling like you are standing on a hill.
Traditional center drains slope from all four sides. Linear drains along one wall let you use large-format tile with a single-plane slope, which looks cleaner and improves accessibility for curbless designs. Whichever you choose, dry-fit and check the fall with a level before a drop of thinset goes down.
Waterproofing Is Non-Negotiable
This is where I see the most catastrophic failures. Tile and grout are not waterproof; water passes right through grout. The waterproof layer lives underneath the tile, and if it is missing or sloppy, you will have rot and mold in a year or two.
Modern Waterproofing Systems
- Foam pan and membrane systems: Pre-sloped foam trays with bonded sheet membrane. Fast, foolproof, and my preference for DIYers.
- Liquid-applied membrane: A rubberized paint-on coating rolled over the mortar bed, ideal for custom shapes. Apply two coats and let it fully cure.
- Traditional PVC or CPE liner: The old-school mortar bed over a sheet liner and clamping drain. Bulletproof when done right, but labor-intensive.
Whichever system you use, flood-test it. Plug the drain, fill the pan with an inch of water, mark the line, and wait 24 hours. If the level drops, you have a leak to fix before tiling, not after.
Grout, Sealing, and Slip Safety
For shower floors I specify epoxy grout over standard cement grout. Epoxy is essentially waterproof, resists mildew, and never needs sealing, which is worth the extra $8 to $12 per pound on a surface that lives in water. If you do use cement grout, seal it every 6 to 12 months.
Slip resistance comes from texture and grout lines. Smaller tiles, a honed rather than polished finish, and a slip rating of R10 or better keep footing safe. For extra security in a family bath, a matte pebble mosaic gives excellent grip and hides soap film between cleanings.
What It Costs to Do a Shower Floor
Let me give you real budget ranges so you can plan.
- Materials only (DIY): $300 to $900 including pan or mortar, membrane, tile, and epoxy grout.
- Professional shower floor install: $600 to $1,800 depending on drain type and tile.
- Full custom curbless wet room: $2,500 and up.
The membrane and drain are not the place to save money. Spending an extra $150 on a proven waterproofing system is far cheaper than the $5,000 you pay to repair water damage after a hidden leak rots the subfloor.
Maintenance That Keeps It Sealed
A well-built shower floor is easy to live with. Squeegee or wipe the floor after showers to cut mineral buildup, and run the exhaust fan for 20 minutes afterward to drop humidity. Clean weekly with a pH-neutral cleaner rather than harsh acids that etch stone and dull grout.
Inspect the grout lines and the drain seal twice a year. Catch a hairline crack early and a $10 tube of caulk fixes it; ignore it and water finds the framing. Reseal natural stone on schedule, and your bathroom shower floor will stay watertight and safe for two decades.
Prefab Pan vs. Custom Tile Floor
One of the first decisions is whether to set a manufactured base or build a custom tiled pan. Both are valid; they just suit different homeowners.
Prefab Shower Base
A one-piece acrylic or cultured-marble pan drops in with a pre-formed slope and no grout lines to seal. Installation takes an afternoon, leaks are rare, and cleaning is a breeze. The downside is limited sizes and a less custom look. For a straightforward 32-by-60-inch alcove, a prefab base is the safest, fastest choice.
Custom Tiled Pan
Building your own pan lets you hit any size, shape, or curbless design and match the floor to the wall tile. It costs more in labor and demands flawless waterproofing, but nothing beats it for a spa-like custom bath. If you go this route, use a foam tray system to take the guesswork out of the slope.
Timeline for a Shower Floor Install
Homeowners always want to know how long the shower is out of service. Here is a realistic schedule for a tiled pan:
- Day one: Set the pan or mortar bed and install the drain.
- Day two: Apply waterproofing membrane and let it cure, then run the 24-hour flood test.
- Day three: Set the floor tile in thinset and let it cure overnight.
- Day four: Grout with epoxy grout, then wait 48 to 72 hours before the first shower.
Rushing any of these steps, especially the flood test and the grout cure, is exactly how leaks and cracks start. Build in the drying time and you only do the job once.
Final Advice From the Field
The best bathroom shower floor is the one you never think about because it just works. Pick a slip-resistant, low-absorption material, nail the 1/4-inch-per-foot slope, waterproof underneath the tile with a proven system, and flood-test before you tile. Those fundamentals matter far more than which trendy tile you pin to a mood board. Build it right once and you will never have to build it again.
Prefer to explore on your own?
See how new flooring looks in your actual room in seconds — free, no signup.
Try the free Floor Studio →