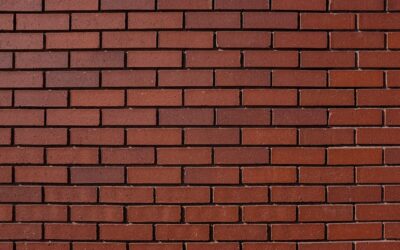
A brick flooring kitchen reads as authentically classic in a way that few materials can match — the warmth, the irregular surface, the way the floor visually grounds tall cabinetry and exposed beams. The aesthetic has cycled in and out of fashion since the 1970s, and the latest wave (driven by farmhouse and English-cottage kitchen trends) has brought brick back into showrooms with better installation systems than the painful 1.5 inch full pavers of decades past. The honest evaluation of brick flooring in a real working kitchen comes down to three categories: material format, surface treatment, and comfort during long cooking sessions.
Part of our Kitchen Remodeling guide — explore the full guide →
Full Pavers vs. Thin Brick
Two formats dominate residential brick flooring. Full pavers run 1.5 to 2.25 inches thick and install as a mortar-set masonry floor, the way brick has been laid for centuries. The construction is bulletproof — full brick floors in historic homes routinely survive 200 years — but the install height demands subfloor planning, often requiring step-down construction or careful coordination with thresholds.
Thin brick is the modern alternative. Real fired clay tiles cut to 1/2 to 5/8 inch thickness, installed like ceramic tile over a backer board or membrane system. The visual is indistinguishable from full brick at floor level, the install height matches standard tile work, and the cost per square foot is meaningfully lower because less raw clay and faster installation. For most kitchen retrofits, thin brick is the right answer.
Pricing Snapshot
- Thin brick tile: $7 to $14 per square foot material, $9 to $16 per square foot install
- Full brick pavers: $5 to $11 per square foot material, $13 to $22 per square foot install
- Brick-look porcelain (Italian and Spanish manufacturers): $4 to $9 per square foot material, $7 to $12 per square foot install
- Reclaimed antique brick tile: $12 to $25 per square foot material, install premium of $3 to $6 per square foot above standard thin brick
The Comfort Conversation
Brick floors are hard. A cook standing at the prep counter for 90 minutes feels it in feet, knees, and lower back by minute 60. Anti-fatigue mats at sinks, prep zones, and the range become non-negotiable accessories. For households where one person cooks frequently and at length, this is the single biggest reason to pause before committing to brick over softer alternatives like cork-backed LVP or engineered hardwood.
The other comfort issue is cold. Brick has a relatively low thermal mass compared to thick stone but still reads as cool underfoot in winter unless tied into a radiant heating system. Electric radiant mats under thin brick add $6 to $11 per square foot installed and transform the kitchen experience in heating climates.
Sealing — Where Most DIY Installs Fail
Brick is porous. Without proper sealing, the floor stains within weeks of normal kitchen use. Spilled red wine, olive oil, balsamic vinegar, and tomato sauce all penetrate unsealed brick and leave permanent darkening. The standard sealing protocol involves:
- Apply a penetrating sealer (Aqua Mix Sealer’s Choice Gold or Miracle Sealants 511) after grout cures fully — typically 14 to 21 days post-install
- Apply two coats of penetrating sealer with full dry time between coats per manufacturer spec
- Add a topical sealer (Aqua Mix Enrich N Seal or Glaze N Seal Penetrating Sealer) for additional protection and color enhancement
- Reapply topical sealer every 12 to 24 months in residential kitchens
Skipping the sealer cycle is the most common reason brick kitchen floors look beautiful at year one and rough by year three.
Pros That Justify the Effort
- Authentic character that visually anchors traditional and farmhouse kitchen designs
- Effectively indestructible — handles dropped cast iron, dragged appliances, and decades of traffic
- Naturally non-slip surface texture provides excellent traction even when wet
- Thermal mass holds heat well when combined with radiant heating, evening out kitchen temperature swings
- Increases resale value in markets where traditional and historic-style homes command a premium
- Patinas attractively over time — the floor genuinely looks better at year 20 than at year 1
Cons That Need Honest Acknowledgment
- Hard underfoot for extended standing — anti-fatigue mats essential
- Cold without radiant heating, particularly in northern climates
- Maintenance discipline required for sealer reapplication
- Glassware and ceramic dishes shatter aggressively on impact
- Mortar grout joints can darken and require periodic cleaning or recoloring
- Heavy material adds significant load to floor framing — verify subfloor structure for full pavers
- Difficult to repair invisibly if a single brick cracks or stains
The Brick-Look Porcelain Alternative
Italian manufacturers like Sant’Agostino, Fioranese, and Marazzi produce porcelain tiles that mimic brick at a level that fools most observers. Through-body porcelain construction, individual unit sizes around 2 by 8 inches or 3 by 12 inches, surface textures that replicate worn clay brick. Installed at $7 to $12 per square foot, these products deliver 95 percent of the visual at 60 percent of the cost — and they bring zero sealing requirements and lower water absorption. For working kitchens, brick-look porcelain is often the smarter spec.
Install Considerations
For thin brick over wood subfloor, use a Schluter Ditra or NobleSeal CIS membrane for crack isolation. Set in a modified thinset mortar rated for brick or quarry tile. Joint widths typically run 3/8 to 1/2 inch and use a sanded grout. Allow 21 to 28 days of cure time before applying penetrating sealer. For full pavers, work with a mason experienced in residential brick floors — the install is genuinely different from tile work and crews skilled in one are not automatically skilled in the other.
The Realistic Recommendation
If the kitchen aesthetic absolutely demands authentic brick character and the household accepts the comfort and maintenance trade-offs, thin brick tile installed over a Ditra membrane with proper sealing delivers a genuinely beautiful floor that will outlast multiple kitchen renovations. If the look is the priority but maintenance and comfort matter, choose brick-look porcelain from a quality Italian or Spanish manufacturer. Either way, plan for radiant heating, plan for anti-fatigue mats, and plan for the long view — brick rewards patience and discipline more than most flooring categories.
Prefer to explore on your own?
See how new flooring looks in your actual room in seconds — free, no signup.
Try the free Floor Studio →