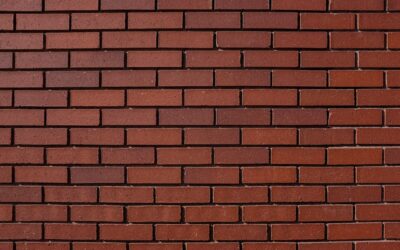
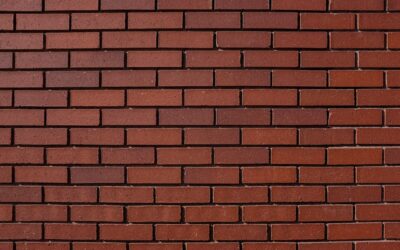
Real exposed brick looks incredible until you try to clean it, seal it, or hang a cabinet on it. Brick look tile solves that problem by giving you the texture, warmth, and character of weathered brick in a thin porcelain or ceramic format that wipes clean and never needs repointing. It has become one of the most requested kitchen and accent finishes of the past few years, and for good reason. You get the farmhouse-meets-industrial look without the weight, the dust, or the maintenance headaches of the real thing.
Part of our Tile & Grout guide — explore the full guide →
- Why Homeowners Choose It Over Real Brick
- Where Brick Look Tile Works Best
- Finishes and Color Options
- Sizes and Layout Patterns
- Grout Choices That Make or Break the Look
- What It Costs
- Installation Tips Worth Knowing
- Cleaning and Long-Term Maintenance
- Common Mistakes to Avoid
- Is It Right for Your Space?
Why Homeowners Choose It Over Real Brick
Genuine brick is porous, heavy, and structurally demanding. A true brick veneer wall needs proper support and sealing, and it traps grease and grime in every pore. Tile that imitates brick sidesteps all of that. Because it is fired porcelain or ceramic, it resists stains, moisture, and heat, which makes it practical behind a stove or in a bathroom where real brick would struggle.
It is also far thinner. Most brick look tiles run between 1/4 and 1/2 inch thick, compared to the 2 to 3 inches of thin brick veneer. That means you can apply it over standard backer board without reframing or reinforcing the wall.
Where Brick Look Tile Works Best
This finish is versatile, but it shines in a few specific places.
- Kitchen backsplashes: The textured face adds depth behind cabinets and reads as warm rather than sterile.
- Accent walls: A fireplace surround or a single feature wall gets instant character.
- Mudrooms and entryways: Durable enough for high-traffic zones and easy to wipe down.
- Floors: Many lines come rated for floor use, giving you a brick-paver look that is far easier to mop than actual pavers.
For floors, always confirm the tile carries a suitable slip and wear rating. A wall tile pressed into floor service will wear unevenly and can get slippery.
Finishes and Color Options
Manufacturers have gotten remarkably good at mimicking the irregularities of fired clay. You will find tiles with subtle color variation across the same box, faux mortar smears, chipped edges, and even glaze imperfections baked in on purpose. Common palettes include classic red-clay, whitewashed white, charcoal, and warm taupe.
Matte finishes read most like authentic brick, while lightly glossed versions catch more light and feel slightly more polished. If you want the genuinely aged look, choose a line that advertises high “shade variation,” often labeled V3 or V4, which means tiles vary noticeably from piece to piece, just like a real brick wall.
Sizes and Layout Patterns
Standard brick look tiles mimic real brick proportions, commonly around 2.5 by 8 inches or 3 by 12 inches, though larger plank-style versions exist. The layout you choose changes the whole feel of the room.
- Running bond: The classic brick offset, with each row shifted by half a tile. Timeless and forgiving.
- Stacked: Tiles aligned in a grid for a cleaner, more modern read.
- Herringbone: Tiles angled at 45 or 90 degrees for a dramatic, high-end look that uses more material.
- Vertical: Standing the brick on end to add height to a space.
Grout Choices That Make or Break the Look
Grout color does more work than any other detail here. A contrasting grout, like dark gray against red tile, emphasizes each brick and reads rustic. A matched grout color blends the joints and creates a softer, more monolithic surface. For the authentic mortar look, many installers use a slightly wider joint, around 3/8 inch, and a sanded grout in a warm gray or off-white to mimic real mortar.
Some homeowners go a step further and intentionally smear grout slightly onto the tile face, a German smear technique, for a weathered, old-world finish. Test that on a sample board first, because it is hard to undo once it cures.
What It Costs
Brick look tile sits in the mid-range of tile pricing. Material commonly runs from a few dollars to around eight dollars per square foot depending on whether it is ceramic or porcelain and how detailed the finish is. Specialty herringbone or handmade-look lines push higher. Installation adds labor on top, and patterns like herringbone cost more to set because of the cutting and waste involved. Budget extra tile, typically 10 to 15 percent, for cuts and breakage.
Installation Tips Worth Knowing
Treat brick look tile like any other porcelain installation, with a few extra considerations. Because the faces are textured and irregular, dry-lay a section first to balance the color variation across the wall so you do not end up with all the dark pieces clustered in one corner. Use a quality thinset rated for the tile and substrate, and back-butter larger pieces to ensure full coverage behind the raised texture.
Spacers help keep your mortar joints consistent, which matters more on a brick pattern where the eye expects regular lines. After grouting, seal the grout in wet areas to keep it clean, and if the tile itself is unglazed or has a porous finish, ask the manufacturer whether a sealer is recommended.
Cleaning and Long-Term Maintenance
One of the quiet advantages of this finish shows up after installation, during years of ordinary use. Because the tile face is fired porcelain or glazed ceramic, day-to-day cleaning is as simple as a damp cloth or a mild tile cleaner. Grease behind a stove wipes off instead of soaking in, which is the opposite of how real brick behaves. The only real upkeep point is the grout. In a kitchen or bathroom, sealing the grout lines keeps them from absorbing stains and discoloring over time, and a quick reseal every year or two in heavy-use areas keeps the whole installation looking fresh.
Avoid harsh abrasive pads on textured or matte-finish tiles, since aggressive scrubbing can dull the surface unevenly. For most messes a soft sponge and a pH-neutral cleaner are all you need, and the textured face actually hides minor smudges and water spots better than a high-gloss surface would.
Common Mistakes to Avoid
A few predictable errors keep brick look installations from reaching their potential. The biggest is failing to mix tiles from multiple boxes during installation, which leaves all the lighter or darker pieces clustered together and breaks the natural-brick illusion. Another is choosing a grout color without testing it, then discovering the contrast is either too stark or too muddy once it cures. Some homeowners also pick a delicate wall tile for a floor, then watch it wear and chip under foot traffic. And skipping the extra material for cuts almost always means a frustrating mid-project run to buy more tile from a different dye lot. Plan for color blending, sample your grout, match the tile rating to its use, and order a generous overage, and the finish comes out looking like the real thing.
Is It Right for Your Space?
If you love the look of brick but want something practical, this finish delivers nearly all the charm with a fraction of the upkeep. It survives splashes, scrubbing, and daily wear that would slowly degrade real brick, and you can install it in spaces where genuine masonry would never be allowed. For a backsplash, a feature wall, or a hardworking entry floor, brick look tile is one of the easiest ways to add warmth and texture to a home without committing to the maintenance of the real material.
Prefer to explore on your own?
See how new flooring looks in your actual room in seconds — free, no signup.
Try the free Floor Studio →