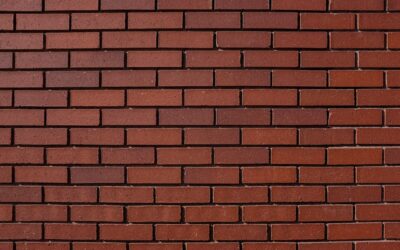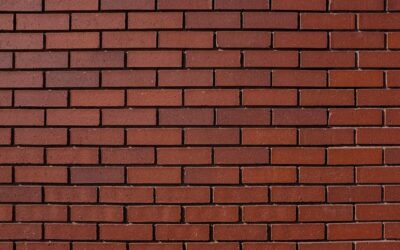
Real exposed brick looks fantastic until you try to seal it, clean it, or mop the crumbling mortar off your floor. That is exactly why brick look porcelain tile has taken over kitchens, entryways, and accent walls across the country. You get the warmth and texture of aged brick with the waterproof, stain-proof, low-maintenance body of porcelain. This guide covers sizes, costs, layout patterns, grout choices, and where this tile shines and where it does not.
Part of our Tile & Grout guide — explore the full guide →
What Brick Look Porcelain Tile Actually Is
These are thin porcelain planks manufactured to mimic the dimensions, color variation, and surface texture of clay brick. High-definition inkjet printing gives each tile a slightly different face, so a finished wall or floor avoids the repeating pattern that gives cheaper tile away. Because the material is porcelain fired at roughly 2,200°F, it absorbs less than 0.5 percent water, making it far more durable and stain-resistant than the fired clay brick it imitates.
The key advantage is versatility. Genuine brick veneer adds weight and needs sealing to resist grease and moisture. A porcelain version installs like any tile, wipes clean with a damp mop, and works in wet areas where real brick would be a maintenance headache. You get the aesthetic without the porous, dust-shedding downsides.
Durability is another reason it has spread beyond design magazines into real kitchens. Porcelain scores high on the PEI wear scale, and floor-rated brick-look tiles typically carry a PEI 4 or 5 rating, meaning they handle heavy foot traffic without the surface wearing through. Real brick, by contrast, sheds fine grit as it ages and the mortar joints slowly crumble. With porcelain you get the rugged, textured character of brick locked into a body that will not degrade, spall, or shed dust into your home.
Common Sizes and Formats
Most brick look porcelain tile ships in plank formats that echo standard brick proportions. The most common size is roughly 2.5 by 10 inches, close to a true brick face. You will also find 3 by 12 inch and 4 by 12 inch planks for a slightly larger scale. Some manufacturers offer pre-arranged mosaic sheets where mini bricks are mounted on mesh backing, which speeds up wall installs considerably.
- 2.5 x 10 in: closest to real brick, best for authentic walls
- 3 x 12 in: versatile for floors and backsplashes
- 4 x 12 in: larger scale, fewer grout lines, faster install
- Mosaic sheets: mesh-backed mini bricks for quick accent walls
Where It Works Best
Kitchen backsplashes are the number one use. A herringbone or running-bond brick backsplash gives a farmhouse or industrial kitchen instant character, and the porcelain wipes clean of grease and tomato sauce that would stain real brick. Entryway and mudroom floors are another strong fit, since the texture hides dirt and the porcelain shrugs off wet boots and road salt.
Fireplace surrounds, accent walls, and even shower walls all take this tile well because porcelain is fully waterproof. Outdoors, choose a tile specifically rated for exterior and freeze-thaw conditions with a textured, slip-resistant surface. Do not assume every brick-look tile is frost-proof; check the manufacturer rating for exterior use before putting it on a patio or porch.
Commercial and high-traffic residential spaces have embraced it too. Coffee shops, restaurants, and open-plan lofts use brick-look porcelain on both floors and walls to get an industrial warehouse feel without the cost of restoring genuine masonry. In a home, the same look reads beautifully in a basement bar, a home gym, or a laundry room where you want durability and character in equal measure. Because the tile carries no odor and never needs sealing on the tile body, it suits pantries and food-prep zones where a porous surface would be a liability.
Cost and Budgeting
Expect to pay $3 to $9 per square foot for the tile itself, with premium designer lines reaching $12. That is competitive with mid-grade ceramic and far cheaper than the labor to install and seal genuine thin brick. Installation by a pro typically runs $8 to $15 per square foot depending on the pattern; intricate herringbone layouts cost more because of the added cutting and layout time.
For a typical 30-square-foot kitchen backsplash, budget roughly $90 to $270 in tile plus mortar, grout, and trim. A DIY install cuts labor entirely but plan a full weekend for a first-timer, since the many small pieces take patience to set evenly.
Layout Patterns That Sell the Look
Pattern choice does more for authenticity than the tile itself. Running bond, where each course offsets the one below by half a brick, is the classic and most convincing layout. Herringbone turns the planks at 45 or 90 degrees for a dressier, more contemporary feel that works beautifully on accent walls and floors alike.
Stack bond, where bricks align in straight vertical columns, gives a cleaner modern look but reads less like traditional brick. Whatever you choose, dry-lay a few rows first to check your color distribution. Because the tiles are printed with intentional variation, pulling planks from several boxes as you go prevents clusters of identical faces from standing out.
Grout: The Detail That Makes or Breaks It
Grout color is the single biggest factor in whether your finished project reads as authentic brick or obvious tile. For a traditional worn-brick look, choose a gray or off-white mortar-colored grout that mimics real masonry joints. A matching or slightly lighter grout softens the grid; a strongly contrasting grout emphasizes every plank and can look busy.
Use a sanded grout for the typical 3/8-inch brick-style joints, since unsanded grout shrinks and cracks in wide gaps. Seal the grout after it cures to keep kitchen grease and mudroom grime from discoloring the lines. Some installers even use a raked, slightly recessed grout joint to imitate the tuck-pointed look of aged brick walls.
For the ultimate in low maintenance, consider an epoxy grout instead of standard cement grout. Epoxy grout is essentially stain-proof and never needs sealing, which is a real advantage in a greasy kitchen backsplash or a wet shower. It costs more and is harder to work with, since it sets fast and must be cleaned off the textured tile face quickly before it hardens, so many DIYers stick with cement grout and a good sealer. On a high-use surface, though, the extra effort of epoxy grout pays back in years of joints that stay their original color.
Installation Tips From the Field
Start with a flat, clean substrate. On walls, cement backer board is ideal in wet areas; painted drywall is acceptable for a dry backsplash. Use a quality thinset mortar rated for porcelain, and back-butter the larger planks to ensure full coverage and prevent hollow spots that crack under impact.
Spacers keep your joints consistent, but many brick-look lines are designed for a specific joint width to look right, so follow the manufacturer spacing. A wet saw with a porcelain blade is essential for clean cuts, since porcelain chips under a snap cutter. Let mortar cure 24 to 48 hours before grouting, and do not walk on a floor install until it has fully set.
Order about 10 to 15 percent extra tile beyond your measured square footage. The many small planks mean more cuts and therefore more waste than a large-format tile, and having overage from the same dye lot lets you match color if you ever need a repair. Because the tiles are intentionally varied, dry-lay from several boxes and shuffle the planks before you set them, spreading the lighter and darker faces across the whole surface so no cluster of matching bricks stands out once the mortar is down.
Care and Long-Term Maintenance
This is where porcelain earns its keep. Routine cleaning is a damp microfiber mop or a soft cloth with a pH-neutral cleaner. Avoid abrasive pads that dull the printed surface over time. Unlike real brick, there is no annual resealing of the tile body, though sealing the grout every year or two keeps the joints looking fresh.
Because the color and texture run through the printed glaze rather than sitting on the surface, minor scuffs rarely show. A well-installed brick look porcelain tile floor or wall can look great for 20 years or more with almost no upkeep. For the character of exposed brick without the crumbling mortar, sealing chores, and staining, this material is one of the smartest swaps in home design today.
One practical tip for textured surfaces: the same rough face that makes the tile look authentic can trap grease and grime in a backsplash behind a cooktop. In heavy-splatter zones, a periodic scrub with a soft brush and a degreasing cleaner keeps the texture from dulling. On floors, sweep or vacuum regularly so grit does not sit in the recessed grout joints. None of this is demanding, but a textured brick-look surface asks for slightly more attention than a smooth glazed tile, which is a fair trade for the realism it delivers.
Prefer to explore on your own?
See how new flooring looks in your actual room in seconds — free, no signup.
Try the free Floor Studio →