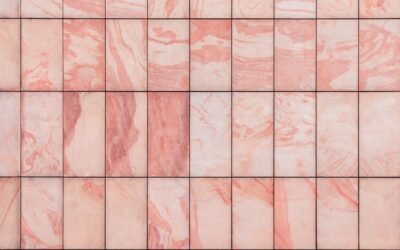
The wall behind your stove and sink takes more abuse than almost any surface in the kitchen, and that is exactly why a ceramic backsplash remains the default choice for so many homeowners. Ceramic tile shrugs off grease splatters, water, and heat, wipes clean with a sponge, and comes in nearly endless colors and shapes. It is also one of the more affordable ways to make a kitchen look finished and intentional.
Part of our Kitchen Remodeling guide — explore the full guide →
This guide covers the styles worth considering, what a ceramic backsplash costs, how installation works, and how to keep it looking sharp for years.
Why Choose Ceramic
Ceramic tile is made from clay fired at high temperature and finished with a glaze that seals the surface. That glaze is the secret to its low maintenance: it resists stains, moisture, and most household cleaners. Unlike natural stone, glazed ceramic does not need sealing, so once it is installed your only ongoing chore is wiping the surface and occasionally cleaning the grout.
Ceramic is also budget friendly compared with glass, metal, or natural stone, and it stands up to the daily splatter zone behind a range better than painted drywall ever could.
Popular Ceramic Backsplash Styles
Shape and layout drive the look as much as color. A few enduring options:
- Subway tile: classic 3-by-6-inch rectangles, usually in a brick-offset pattern. Timeless and forgiving of mistakes.
- Square tile: simple grids that read clean and modern, from small mosaics to large-format squares.
- Herringbone and chevron: rectangular tiles set at angles for a tailored, upscale feel.
- Hexagon and picket: geometric shapes that add personality without loud color.
- Handmade-look tile: slightly irregular glazes that bring warmth and a crafted appearance.
Neutral whites, grays, and soft greens stay current the longest, while a bold glaze can make a great accent if you are willing to update it down the road.
What a Ceramic Backsplash Costs
Ceramic is among the most affordable tile materials. Tile itself typically runs $2 to $15 per square foot, with basic subway tile at the low end and specialty shapes or handmade looks at the high end. Installation by a pro generally adds $10 to $25 per square foot depending on your area, the pattern complexity, and prep work.
A standard kitchen backsplash covers 30 to 40 square feet, so a typical professional job lands in the few-hundred to low-thousands range. Choosing a simple layout and a stock tile keeps both material and labor costs down, since intricate patterns and mosaics take longer to set.
Installation Basics
Installing a ceramic backsplash is one of the more achievable tile projects for a confident DIYer, though it rewards patience. The general sequence:
- Clean and lightly sand the wall, then mark a level baseline; never trust the countertop to be perfectly level.
- Spread thin-set mortar or use a quality mastic adhesive for small wall tile, working in sections you can tile before it skins over.
- Set tiles with consistent spacers, checking for level as you go and cutting edge and outlet tiles with a tile cutter or wet saw.
- Let the adhesive cure, usually 24 hours, then mix and apply grout, working it into the joints with a rubber float.
- Wipe excess grout with a damp sponge, let it haze, buff clean, and finish with a thin bead of caulk where the tile meets the counter.
The most common mistakes are rushing the layout and skimping on cuts around outlets. Dry-lay a row first to confirm spacing, and turn off power before removing outlet covers.
Grout and Maintenance
Glazed ceramic itself needs no sealing, but the grout does. Apply a penetrating grout sealer a few days after grouting and reapply yearly in busy kitchens. For cleaning, a damp microfiber cloth handles daily splatters, and a paste of baking soda and water lifts grease from grout lines. Avoid abrasive pads that can dull the glaze over time.
Choosing a grout color a shade or two darker than pure white hides cooking stains far better than bright white grout, a small decision that saves a lot of scrubbing.
Ceramic Versus Other Backsplash Materials
Knowing how ceramic stacks up against the alternatives clarifies why it stays so popular. Glass tile is striking and reflects light beautifully but costs more and shows water spots and fingerprints. Natural stone like marble brings unmatched character but demands sealing and is vulnerable to etching from acidic foods and cleaners. Metal and stainless tiles look modern but dent and scratch. Porcelain, ceramic’s close cousin, is denser and slightly more durable but generally costs a bit more for similar looks.
Against all of these, ceramic wins on the combination of price, durability, and zero sealing for the glazed surface. The trade-off is that glazed ceramic can chip if struck hard, exposing the clay body beneath, and very glossy glazes show smudges. For the vast majority of kitchens, though, ceramic offers the best balance of cost and carefree performance.
Design Tips for a Lasting Look
A few design choices keep a ceramic backsplash looking intentional for years. Carry the tile all the way up to the underside of upper cabinets rather than stopping partway, which reads unfinished. Behind the range, consider running the tile to the hood or ceiling for a focal feature. Keep bold colors and busy patterns to accents, and let neutral field tile do the heavy lifting, since cabinets and counters are expensive to change while a backsplash should complement them for the long haul.
Edge treatment matters too. Finish exposed tile edges with a matching bullnose, a metal or tile trim piece, or a clean schluter-style edge so the ends look deliberate rather than raw. These small details separate a backsplash that looks professionally designed from one that looks like an afterthought.
Final Thoughts
A ceramic backsplash delivers durability, easy cleaning, and broad style options at a price most kitchens can absorb. Stick with a classic shape and neutral glaze for lasting appeal, budget for quality grout and a careful layout, and seal the grout to keep it clean. Whether you hire a pro or tackle it yourself, ceramic remains the practical, good-looking workhorse of the kitchen wall.
Prefer to explore on your own?
See how new flooring looks in your actual room in seconds — free, no signup.
Try the free Floor Studio →